YaST2 is a Configuration tool in SUSE Linux which is used to configure the system’s Hardware like printers, Sound cards, keyboards , network cards.It also help us to configure Network clients & services like NIS, NFS.
Most common use of yast2 is to install, upgrade and remove software. Yast2 can be used as Command line tool and GUI tool.
Use below Command to list the modules that can be configured and managed by Yast2.
linux-xa3t:~ # yast2 -l
Available modules:

add-on
apparmor
backup
bootloader
checkmedia
disk
dsl
firewall
.....
view_anymsg
xen
linux-xa3t:~ #
Basic syntax of Yast2 command

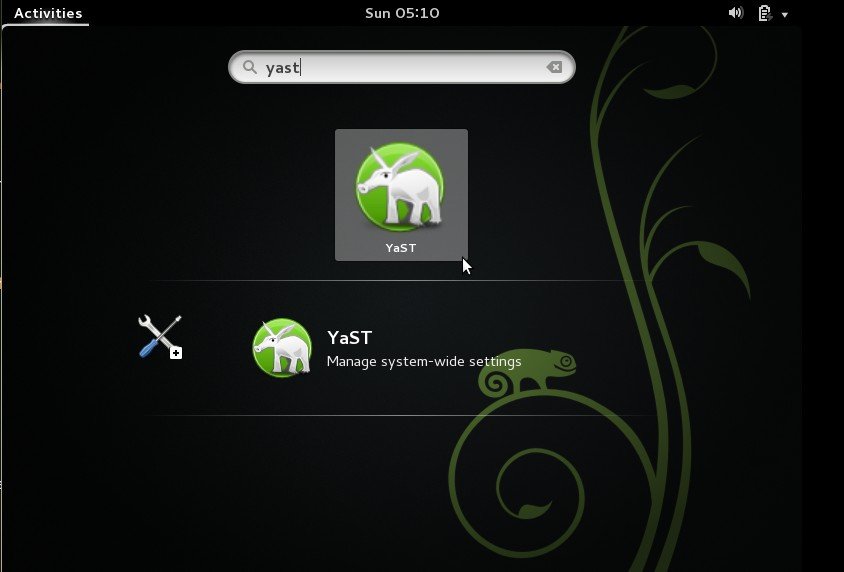
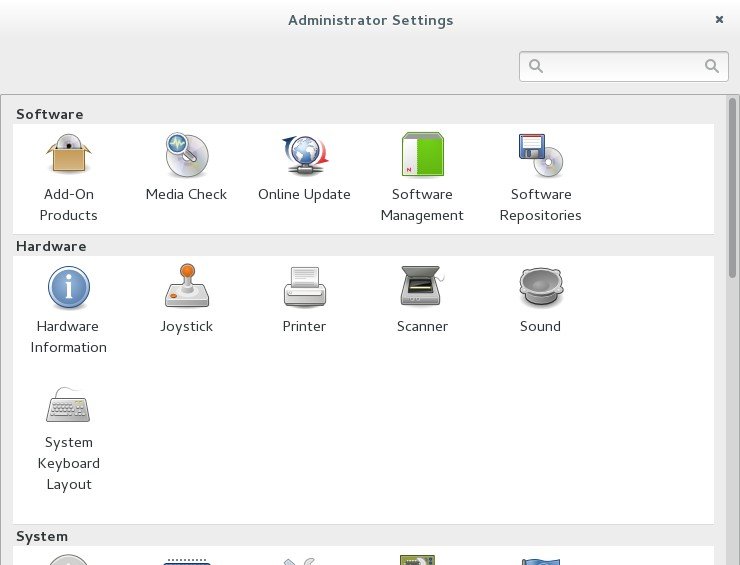
Example:1 Access the YaST2 tool.
Alternate way to start yast2
Open the terminal type yast2 command as shown below.
linux-xa3t:~ # yast2
Example:2 Install and Remove Software using yast2
Start the yast2 , Got to Software Management Module. Type the Software on search box that you want to install or remove it.
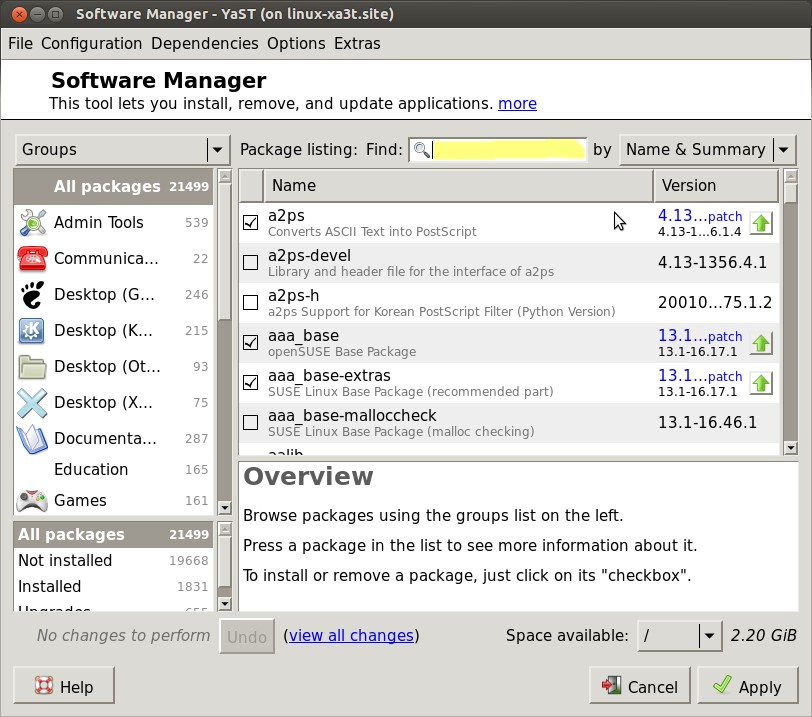
Alternate way to install and remove package.
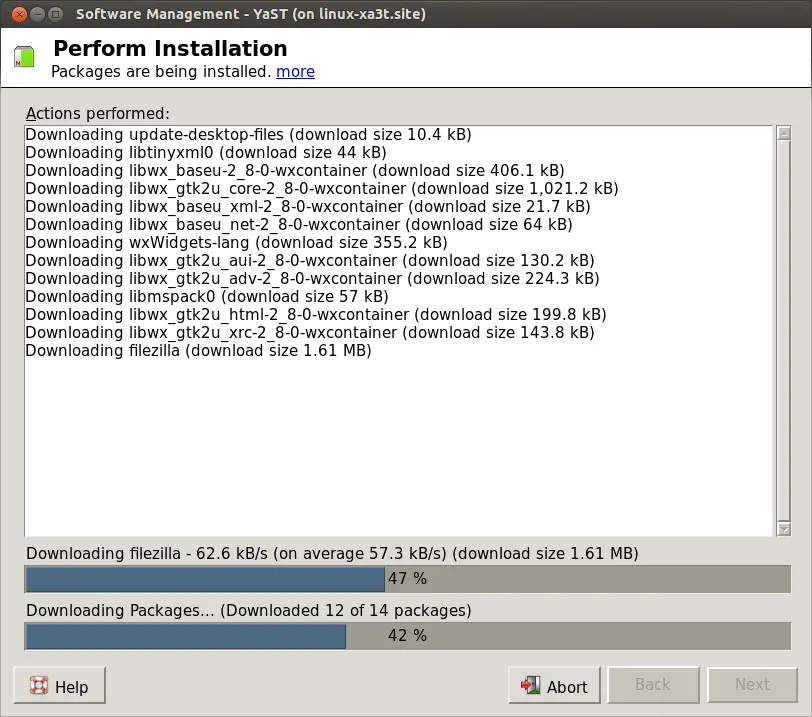
Suppose i want to install filezilla on my system, then use below command
linux-xa3t:~ # yast2 --install filezilla
Removing a Software
linux-xa3t:~ # yast2 --remove filezilla
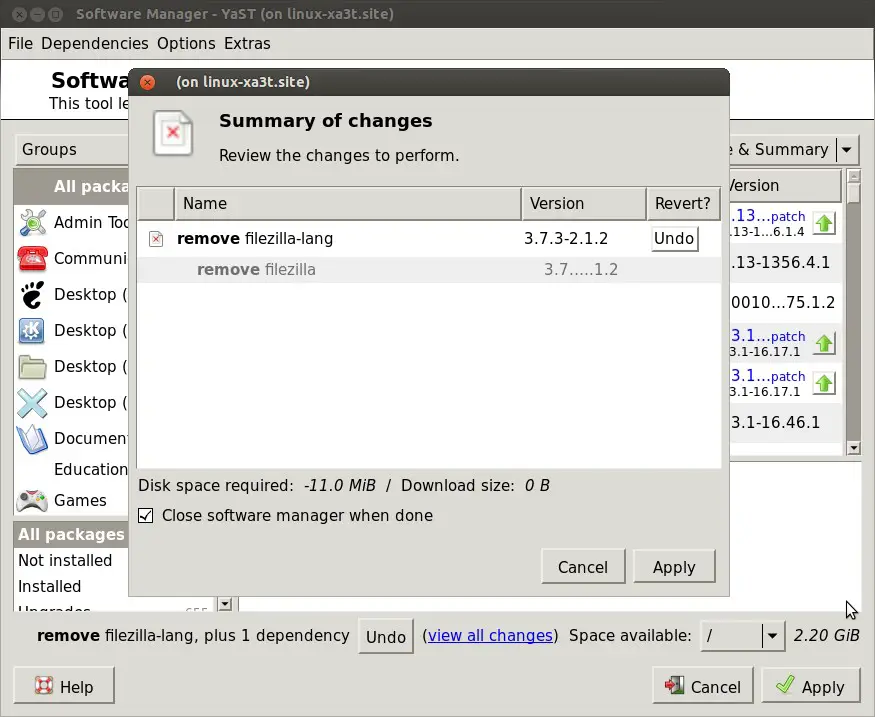
Click on Apply.
Example:3 Update the Software Repository
Start the yast2 and Go to Software Repository Section or you can type below command .
linux-xa3t:~ # yast2 repositories
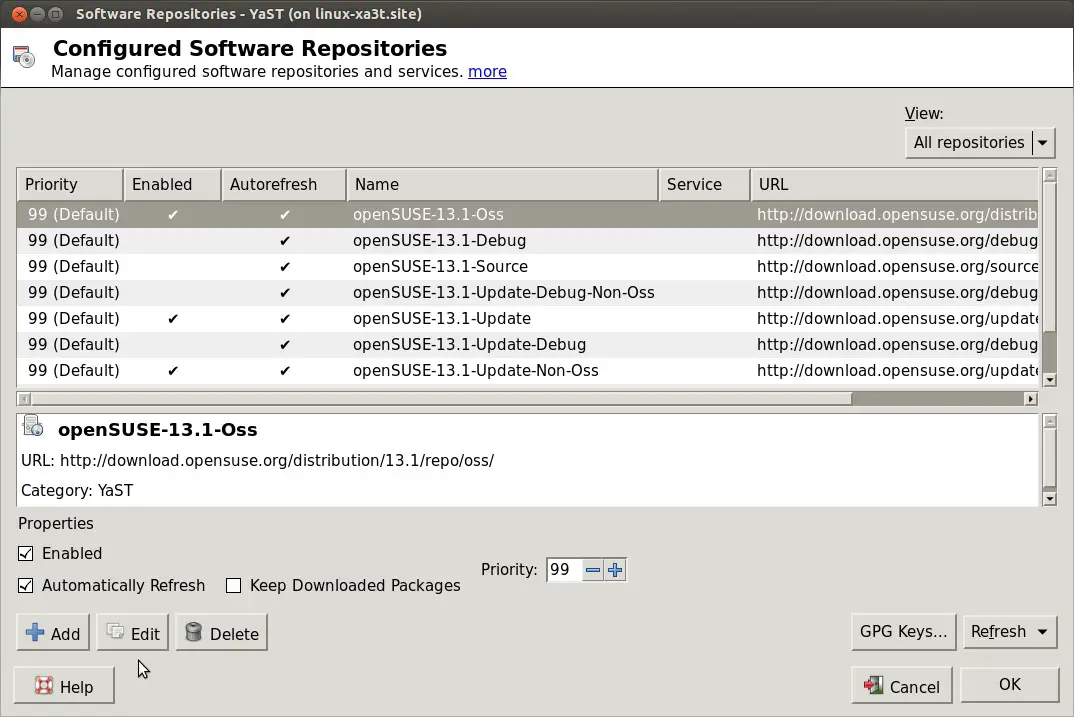
Click on Add to add a new Repository
Click on Edit to modify the existing repository
Click on Delete to remove a repository.
Example:4 Configure & Change Hostname
Open the terminal and type “yast2 host” command
linux-xa3t:~ # yast2 host
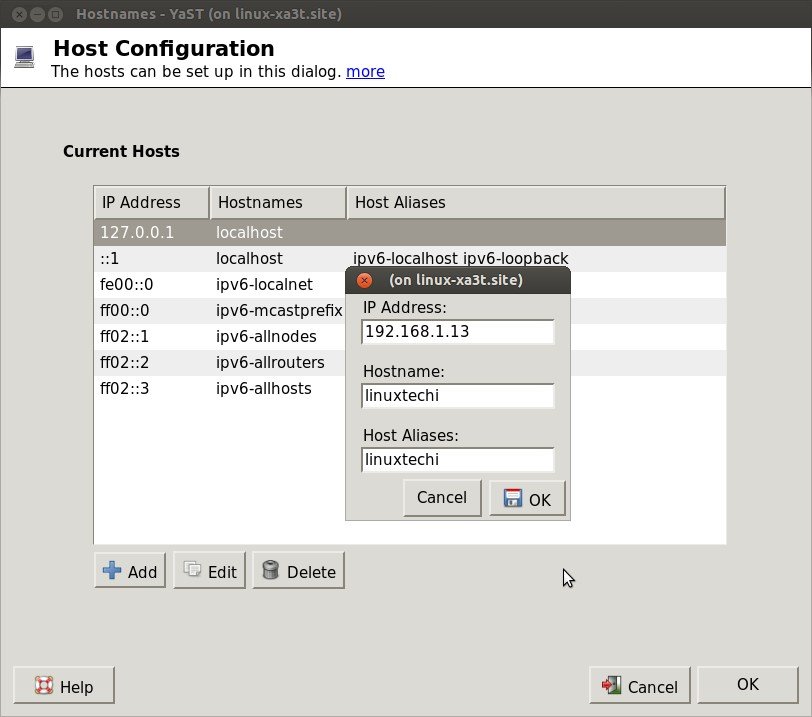
Click on OK.
In my case i am setting the hostname of my machine as linuxtechi.
Example:5 Mount NFS share using yast2 command.
Suppose NFS server has exported some folders now i want to use that share in my suse Linux machine. We can access or mount that share using yast2.
linux-xa3t:~ # yast2 host
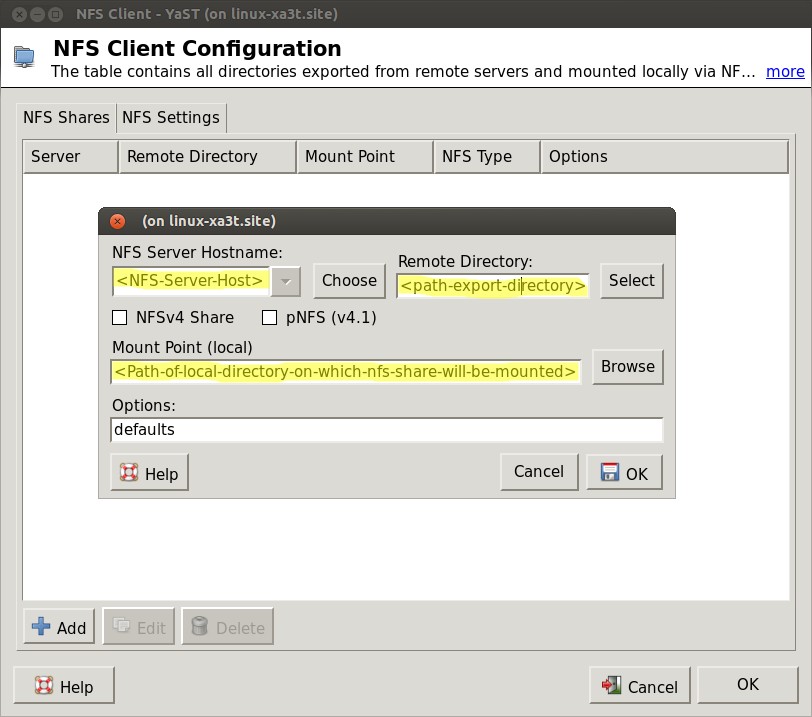
click on OK
Example:6 Managing Local Accounts using yast2
In Linux we usually use commands like useradd / usermode / passwd / groupadd to manage local accounts but using yast2 we can also do the user administration task.
linux-xa3t:~ # yast2 users
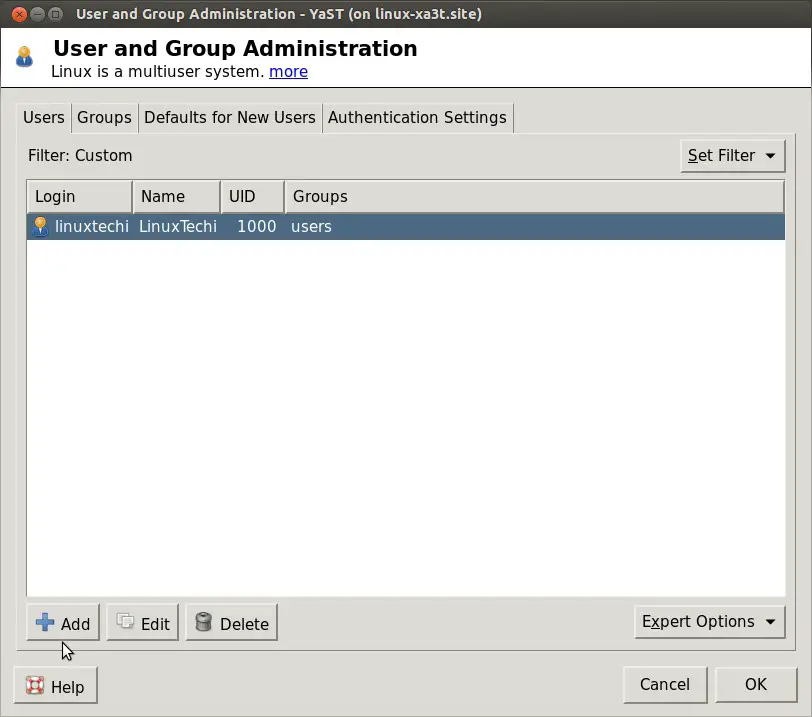
Click on ‘Default on New Users‘ to see the default settings for newly created users.
To create a new click on ‘Add‘ option
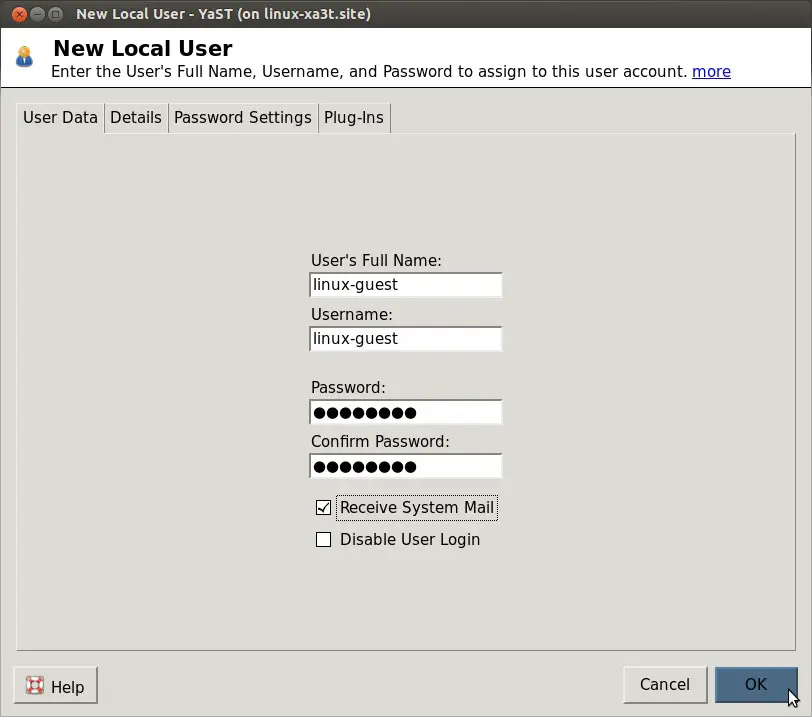
Click on OK
To see the default password Policy click on ‘Password Settings‘ Option,
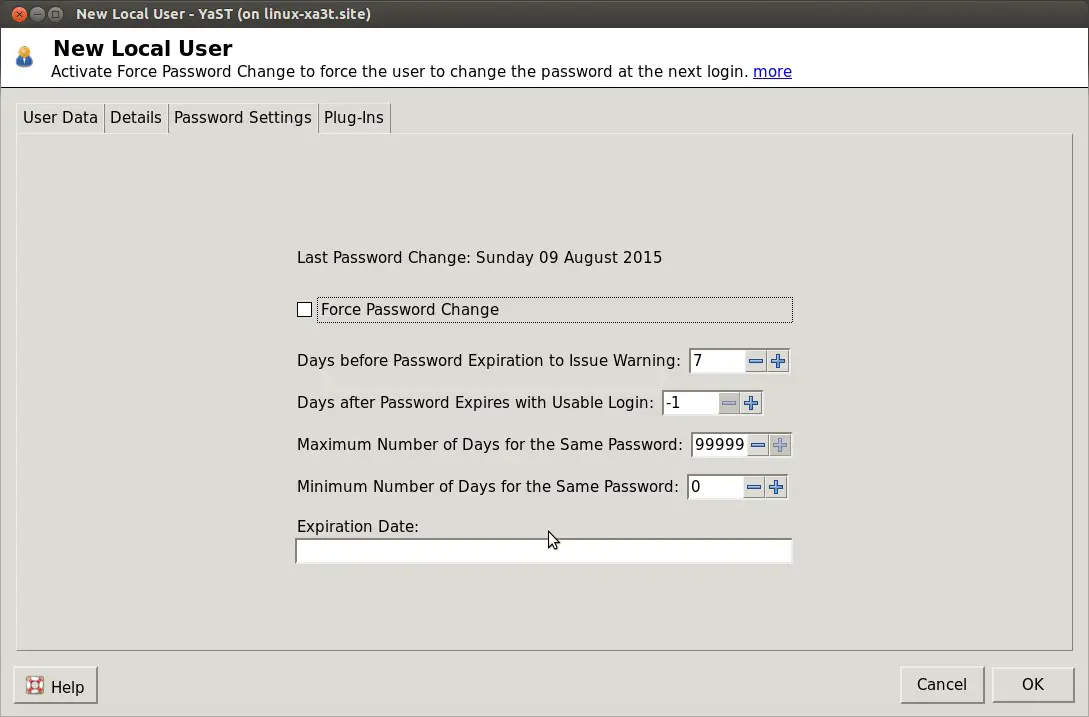
Example:7 Sync time with NTP Servers.
As most of Production Linux servers are getting time from the NTP servers. So to sync the server’s time with NTP servers, use below Steps
linux-xa3t:~ # yast2 ntp-client
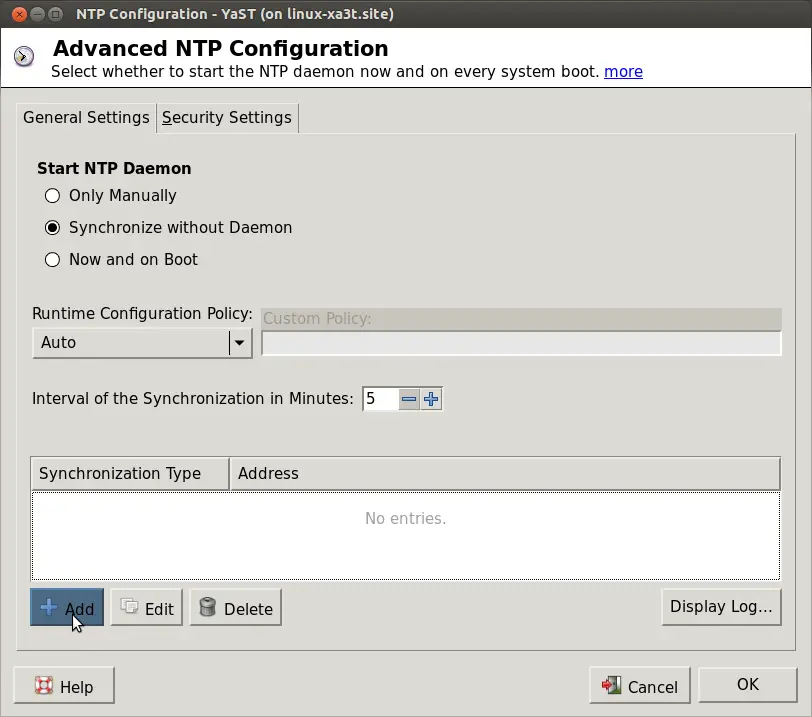
Click on Add option and add the NTP server from which you want to sync the time.
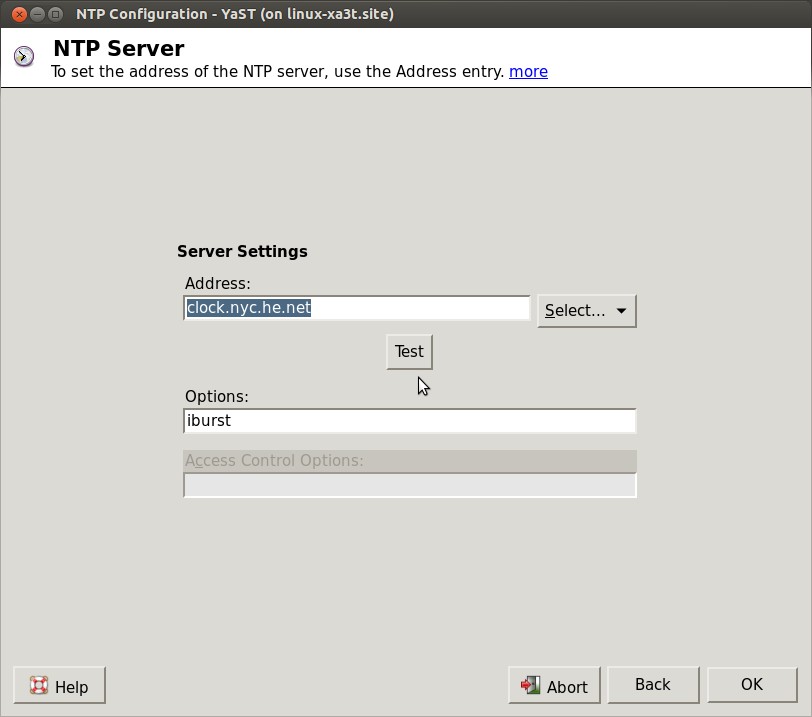
Click on Test, to check whether the server is reachable or not then Click on OK.
Example: 8 Change the Time Zone of your Machine.
linux-xa3t:~ # yast2 timezone
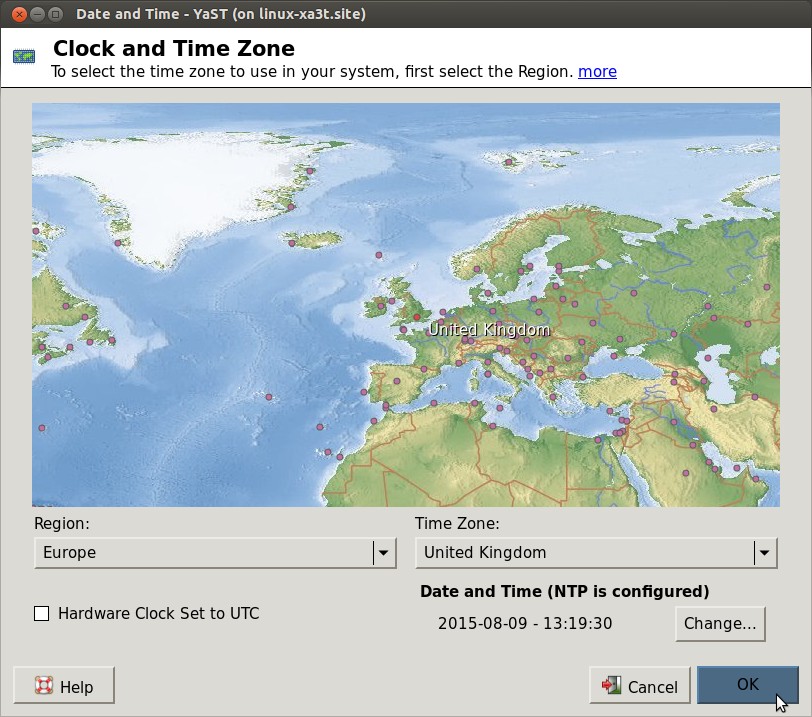
Select the Region and Time Zone as per your requirement.
Example:9 To see the existing partition scheme for the Disk
linux-xa3t:~ # yast2 disk
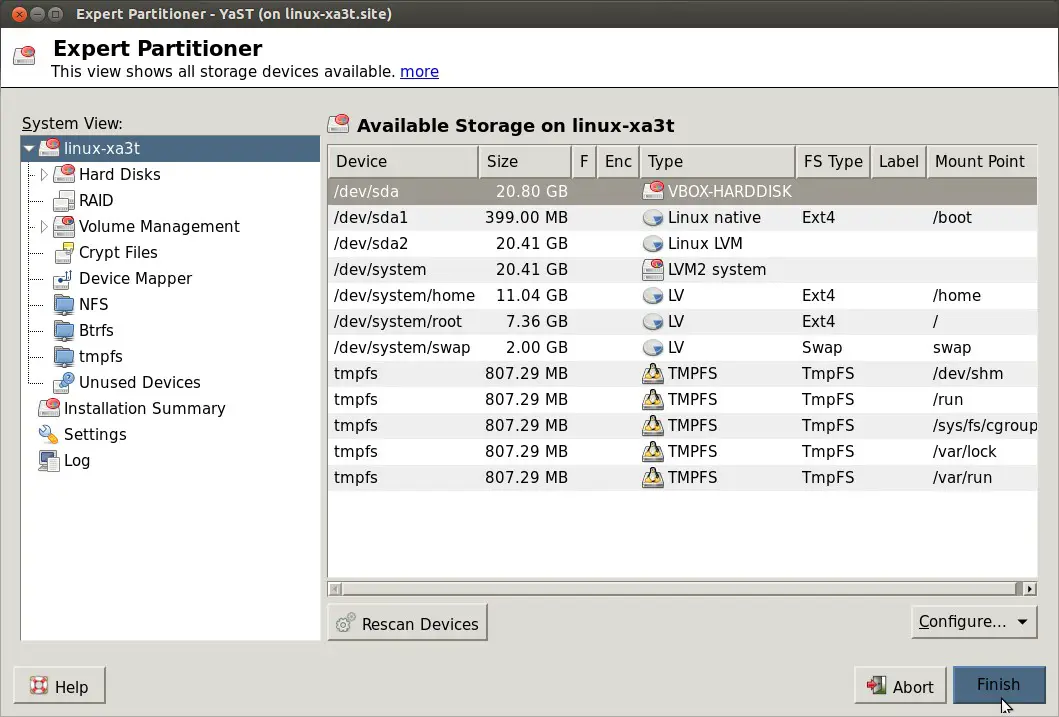
To Scan the newly allocated disk , click on Rescan Devices . We can also Configure iscsi disk and can enable Multipathing using this tool.
Example:10 Configuring Firewall using Yast2
When Firewall is enable on the Linux server it makes your box more secure and less vulnerable to the intruders.
So to enable and Configure firewall rules use the below command.
linux-xa3t:~ # yast2 firewall
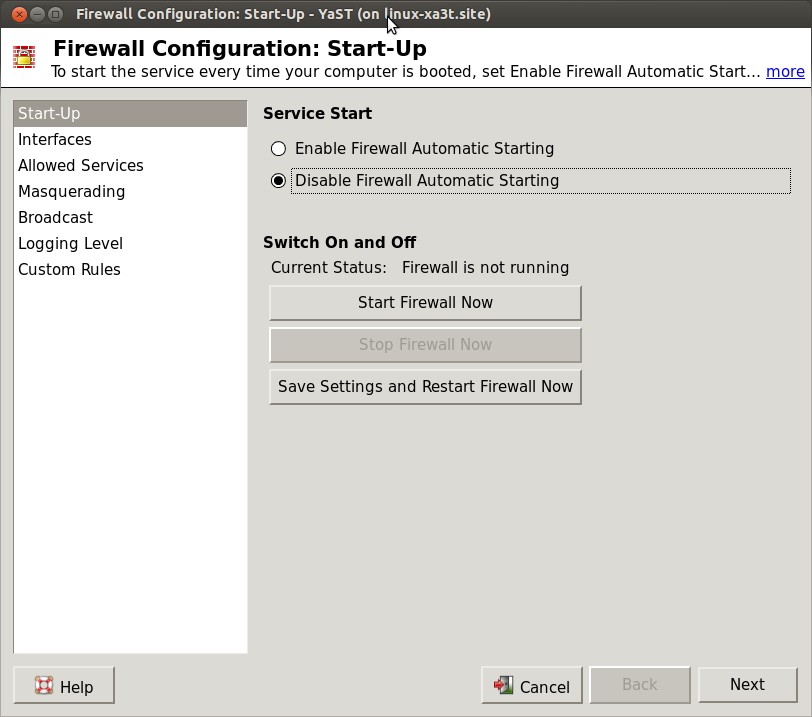
Enable the Firewall and then click on ‘Start Firewall Now‘
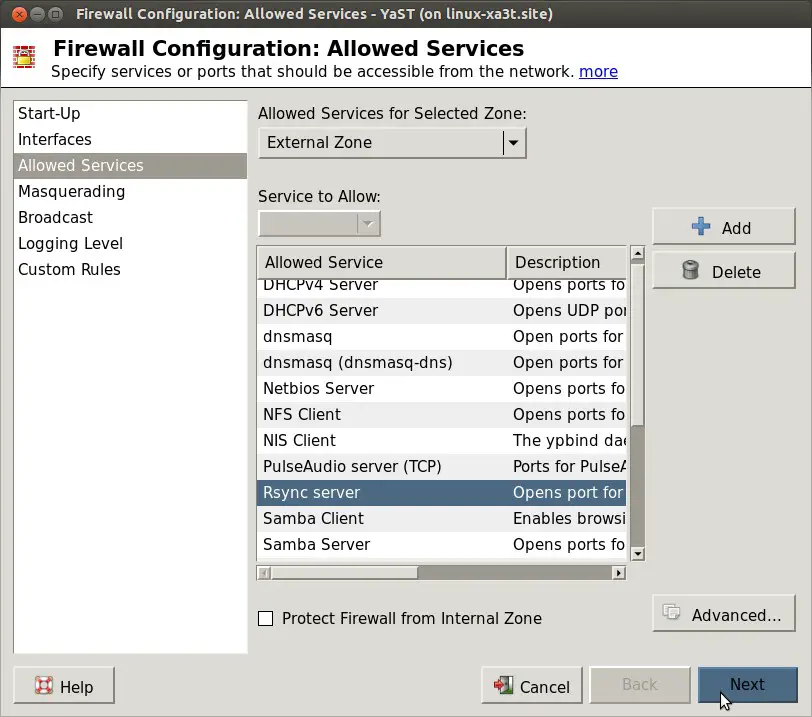
To See the list of services which are allowed to the external zone , click on Allowed Services.
