Debian 10 code name Buster is the latest LTS release from the house of Debian and the latest release comes packed with a lot of features. So if you have already installed the Debian 10 in your system and thinking what next, then please continue reading the article till the end as we provide you with the top 8 things to do after installing Debian 10. For those who haven’t installed Debian 10, please read this guide Debian 10 (Buster) Installation Steps with Screenshots. So lets continue with the article:
1) Install and Configure sudo
Once you complete setting up Debian 10 in your system, the first thing you need to do is install the sudo package as it enables you to get administrative privileges to install any package you need. In order to install and configure sudo, please use the following command:
Become the root user and then install sudo package using the beneath command,
pkumar@linuxtechi:~$ su -
Password:
root@linuxtechi:~# apt install sudo -y
Add your local user to sudo group using the following usermod command,
root@linuxtechi:~# usermod -aG sudo  pkumar
root@linuxtechi:~#
Now verify whether local user got the sudo rights or not,
pkumar@linuxtechi:~$ id
uid=1000(pkumar) gid=1000(pkumar) groups=1000(pkumar),27(sudo)
pkumar@linuxtechi:~$ sudo vi /etc/hosts
[sudo] password for pkumar:
pkumar@linuxtechi:~$
2) Fix Date and time
Once you’ve successfully configured the sudo package, next thing you need to fix the date and time according to your location. In order to fix the date and time,
Go to System Settings –> Details –> Date and Time and then change your time zone that suits to your location.
Once the time zone is changed, you can see the time changed automatically in your clock
3) Apply all updates
After Debian 10 installation, it is recommended to install all updates which are available via Debian 10 package repositories, execute the beneath apt command,
pkumar@linuxtechi:~$ sudo apt update
pkumar@linuxtechi:~$ sudo apt upgrade -y
Note: If you are a big fan of vi editor then install vim using the following command apt command,
pkumar@linuxtechi:~$ sudo apt install vim -y
4) Tweak Desktop Settings using Tweak tool
When we install Gnome Desktop then tweak tool gets installed, as the name suggests it helps us to change or tweak our desktop settings,
Access Tweak tool :
Click on “Tweaks” icon and change the settings that suits to your desktop
5) Install Software like VLC, SKYPE, FileZilla and Screenshot tool
So now we’ve enabled flash player, it is time to install all other software like VLC, Skype, Filezilla and screenshot tool like flameshot in our Debian 10 system.
Install VLC Media Player
To install VLC player in your system using apt command,
pkumar@linuxtechi:~$ sudo apt install vlc -y
After the successful installation of VLC player, try to play your favorite videos
Install Skype:
First download the latest Skype package as shown below:
pkumar@linuxtechi:~$ wget https://go.skype.com/skypeforlinux-64.deb
Next install the package using the apt command as shown below:
pkumar@linuxtechi:~$ sudo apt install ./skypeforlinux-64.deb
After successful installation of Skype, try to access it and enter your Credentials,
Install Filezilla
To install Filezilla in your system use the following apt command,
pkumar@linuxtechi:~$ sudo apt install filezilla -y
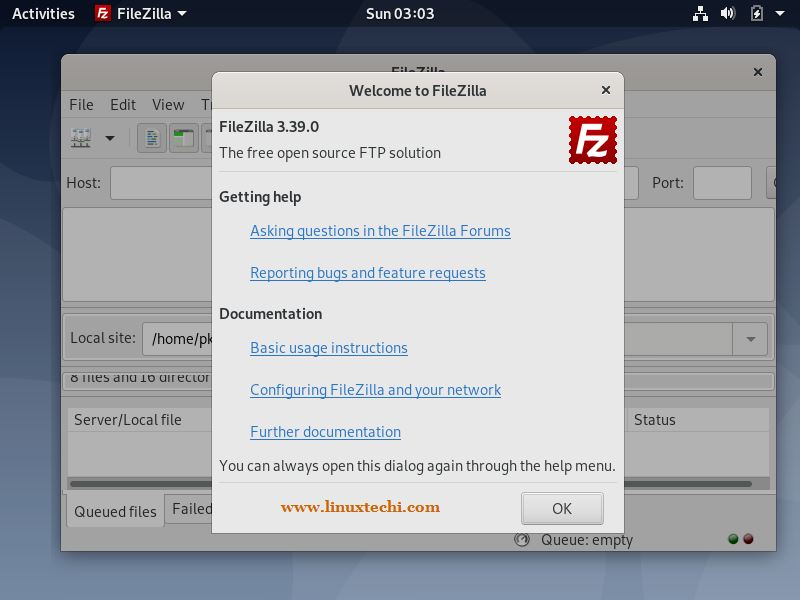
Once FileZilla package is installed successfully, try to access it,
Install Screenshot tool (flameshot)
Use the following command to install screenshoot tool flameshot,
pkumar@linuxtechi:~$ sudo apt install flameshot -y
Note: Shutter Tool in Debian 10 has been removed
6) Enable and Start Firewall
It is always recommended to start firewall to make your secure over the network. If you are looking to enable firewall in Debian 10, UFW (Uncomplicated Firewall) is the best tool handle firewall. Since UFW is available in the Debian repositories, it is quite easy to install as shown below:
pkumar@linuxtechi:~$ sudo apt install ufw
Once you have installed UFW, the next step is to set up the firewall. So, to setup the firewall, disable all incoming traffic by denying the ports and allow only the required ports like ssh, http and https.
pkumar@linuxtechi:~$ sudo ufw default deny incoming
Default incoming policy changed to 'deny'
(be sure to update your rules accordingly)
pkumar@linuxtechi:~$ sudo ufw default allow outgoing
Default outgoing policy changed to 'allow'
(be sure to update your rules accordingly)
pkumar@linuxtechi:~$
Allow SSH port
pkumar@linuxtechi:~$ sudo ufw allow ssh
Rules updated
Rules updated (v6)
pkumar@linuxtechi:~$
In case you have installed Web Server in your system then allow their ports too in the firewall using the following ufw command,
pkumar@linuxtechi:~$ sudo ufw allow 80
Rules updated
Rules updated (v6)
pkumar@linuxtechi:~$ sudo ufw allow 443
Rules updated
Rules updated (v6)
pkumar@linuxtechi:~$
Finally, you can enable UFW using the following command
pkumar@linuxtechi:~$ sudo ufw enable
Command may disrupt existing ssh connections. Proceed with operation (y|n)? y
Firewall is active and enabled on system startup
pkumar@linuxtechi:~$
In case if you want to check the status of your firewall, you can check it using the following command
pkumar@linuxtechi:~$ sudo ufw status
7) Install Virtualization Software (VirtualBox)
First step in installing Virtualbox is by importing the public keys of the Oracle VirtualBox repository to your Debian 10 system
pkumar@linuxtechi:~$ wget -q https://www.virtualbox.org/download/oracle_vbox_2016.asc -O- | sudo apt-key add -
OK
pkumar@linuxtechi:~$ wget -q https://www.virtualbox.org/download/oracle_vbox.asc -O- | sudo apt-key add -
OK
pkumar@linuxtechi:~$
If the import is successful, you will see a “OK” message displayed.
Next you need to add the repository to the source list
pkumar@linuxtechi:~$ sudo add-apt-repository "deb http://download.virtualbox.org/virtualbox/debian buster contrib"
pkumar@linuxtechi:~$
Finally, it is time to install VirtualBox 6.0 in your system
pkumar@linuxtechi:~$ sudo apt update
pkumar@linuxtechi:~$ sudo apt install virtualbox-6.0 -y
Once VirtualBox packages are installed successfully, try access it and start creating virtual machines,
8) Install latest AMD Drivers
Finally, you can also install additional AMD drivers needed like the graphics card, ATI Proprietary and Nvidia Graphics drivers. To Install the latest AMD Drivers, first we must modify /etc/apt/sources.list file, add non-free word in lines which contains main and contrib, example is shown below
pkumar@linuxtechi:~$ sudo vi /etc/apt/sources.list
…………………
deb http://deb.debian.org/debian/ buster main non-free contrib
deb-src http://deb.debian.org/debian/ buster main non-free contrib

deb http://security.debian.org/debian-security buster/updates main contrib non-free
deb-src http://security.debian.org/debian-security buster/updates main contrib non-free

deb http://ftp.us.debian.org/debian/ buster-updates main contrib non-free
……………………
Now use the following apt commands to install latest AMD drivers in Debian 10 system
pkumar@linuxtechi:~$ sudo apt update
pkumar@linuxtechi:~$ sudo apt install firmware-linux firmware-linux-nonfree libdrm-amdgpu1 xserver-xorg-video-amdgpu -y
That’s all from this article, I hope you got an idea what one should after installing Debian 10. Please do share your feedback and comments in comments section below.




Hi, why there is – y after install software?
If we don’t pass -y option in apt command then we have manually type y(or yes) to install packages
it will just auto do Yes for you. So instead of it asking do you want to continue yes or no, it will just select yes for you. I wouldnt recommend it if you are still new, mistakes happen lol. wait till you get more comfortable and do commands with the -y at the end. Im new and thats what im doing.
apt-get install -y virt-manager qemu-kvm seems a way better choice than virtualbox
Flash is dead. You should only need HTML5 to play videos these days.
You don’t need install Flash Player to play YouTube videos.
Boss, FLASH was cremated long ago…!! Now its HTML 5
the flash is not used to play YouTube Videos , but it is used to play some games …
I hate flash, but flash is needed in a lot of old unsupported firmware admin web pages.
Complain to your vendor(s) then and let’s kill this security bloatware off for good.
maybe one if the FIRST things to do would be to tell people how to add a user to usermod BEFORE telling them to use the command ‘usermod’?
Firezilla will only backup drives that are unmounted. I have installed this on ubuntu 18.04. And it has errors when trying to backup.
I been using clonezilla live usb had no issues with for images. I have restored once with no issues.
Firstly thank you time and effort.
I was looking for how to update firefox as this computer couldn’t play ABC iview, so I updated and upgraded everything.
Then I installed Skype and am about to install ‘flameshot’ to give it a try.
Your instructions and explanations make the processes crystal clear.
Marj