As we know NGINX is a highly rated web server which can also be used as reverse proxy, load balancer and HTTP cache. In this article, we will demonstrate how to setup highly available (HA) NGINX web server with keepalived in Linux. Keepalived works on VRRP (Virtual Router Redundancy Protocol) which allows one static IP to be fail-over between two Linux systems.
Following are my lab details for NGINX HA:
- Node 1 – 192.168.1.130 – nginx1.example.com – minimal CentOS 8 / RHEL 8
- Node 2 – 192.168.1.140 – nginx2.example.com – minimal CentOS 8 / RHEL 8
- Virtual IP (VIP) – 192.168.1.150
- sudo user pkumar
- Firewalld enbled
- SELinux Running
Let’s jump into the Installation and configuration steps,
Step 1) Install NGINX Web Server from command line
NGINX package is available in the default CentOS 8 / RHEL 8 repositories, so run below dnf command on both the nodes to install nginx web sever
$ sudo dnf install -y nginx
For CentOS 7 / RHEL 7
NGINX package is not available in default CentOS 7 / RHEL 7 repositories, so to install it first we have to enable epel repository. Run the following command on both the nodes
$ sudo yum install epel-release -y
$ sudo yum install -y nginx
For Ubuntu / Debian
For Debian based Linux distributions, nginx web server package is available in default package repositories, so to install nginx, run
$ sudo apt update
$ sudo apt install -y nginx
Step 2) Configure Custom index.html file for both nodes
Let’s create custom index.html file for both the nodes so that we can easily identify which server is serving the web site while accessing via virtual ip.
For node 1, run following echo command,
[pkumar@nginx1 ~]$ echo "<h1>This is NGINX Web Server from Node 1</h1>" | sudo tee /usr/share/nginx/html/index.html
For node 2, run
[pkumar@nginx2 ~]$ echo "<h1>This is NGINX Web Server from Node 2</h1>" | sudo tee /usr/share/nginx/html/index.html
Step 3) Allow NGINX port in firewall and start its service
In case firewall is enabled and running on both the nodes then allow port 80 by executing following commands,
For CentOS / RHEL System
$ sudo firewall-cmd --permanent --add-service=http
$ sudo firewall-cmd –reload
For Ubuntu / Debian System
$ sudo ufw allow 'Nginx HTTP'
Start and enable nginx service by running beneath command commands on both the nodes,
$ sudo systemctl start nginx
$ sudo systemctl enable nginx
Test NGINX Web server of both the nodes by running following curl command from outside,
$ curl http://192.168.1.130
<h1>This is NGINX Web Server from Node 1</h1>
$ curl http://192.168.1.140
<h1>This is NGINX Web Server from Node 2</h1>
Perfect, above command’s output confirm that nginx is running and accessible from outside with system’s ip address.
Step 4) Install and Configure Keepalived
For CentOS / RHEL systems, keepalived package and its dependencies are available in the default package repositories, so its installation is straight forward, just run below command on both the nodes.
$ sudo dnf install -y keepalived       // CentOS 8/ RHEL 8
$ sudo yum install -y keepalived      // CentOS 7 / RHEL 7
For Ubuntu / Debian System,
$ apt install -y keepalived
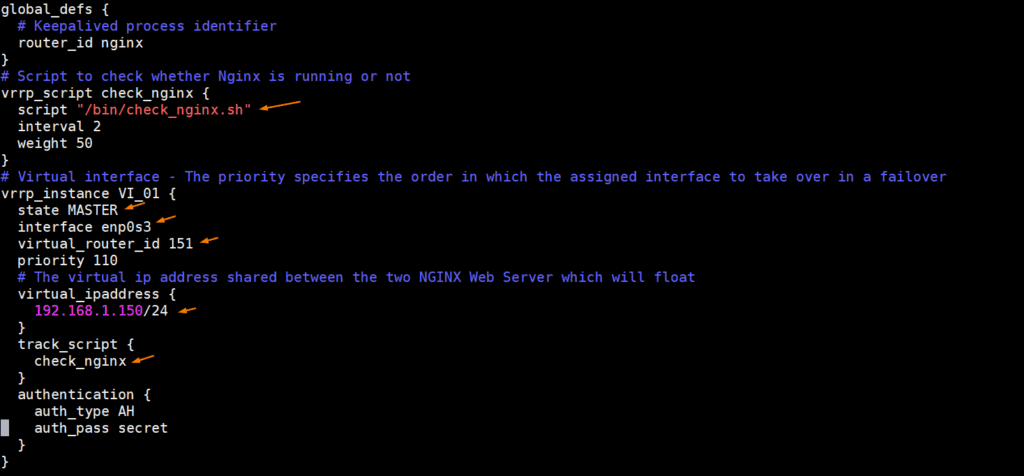
Once the keepalived is installed then configure it by editing its configuration file ‘/etc/keepalived/keepalived.conf’. We will keep node 1 as master node and node 2 as backup node.
Take backup of configuration file,
[pkumar@nginx1 ~]$ sudo cp /etc/keepalived/keepalived.conf /etc/keepalived/keepalived.conf-org
Replace the content of keepalived.conf with below:
[pkumar@nginx1 ~]$ echo -n | sudo tee /etc/keepalived/keepalived.conf
[pkumar@nginx1 ~]$ sudo vi /etc/keepalived/keepalived.conf
Paste the following contents
global_defs {
  # Keepalived process identifier
  router_id nginx
}

# Script to check whether Nginx is running or not
vrrp_script check_nginx {
  script "/bin/check_nginx.sh"
  interval 2
  weight 50
}

# Virtual interface - The priority specifies the order in which the assigned interface to take over in a failover
vrrp_instance VI_01 {
  state MASTER
  interface enp0s3
  virtual_router_id 151
  priority 110

  # The virtual ip address shared between the two NGINX Web Server which will float
  virtual_ipaddress {
    192.168.1.150/24
  }
  track_script {
    check_nginx
  }
  authentication {
    auth_type AH
    auth_pass secret
  }
}
Now create a script with the following contents which will check whether nginx service is running or not. Keepalived will always check the output of check_nginx.sh script, if it finds that nginx service is stopped or not responding then it will move virtual ip address on backup node.
[pkumar@nginx1 ~]$ sudo vi /bin/check_nginx.sh
#!/bin/sh
if [ -z "`pidof nginx`" ]; then
  exit 1
fi
save & close the file and set the required permission with chmod command,
[pkumar@nginx1 ~]$ sudo chmod 755 /bin/check_nginx.sh
Now copy the keepalived.conf and check_nginx.sh files from node 1 to node 2 using following scp command.
[pkumar@nginx1 ~]$ scp /etc/keepalived/keepalived.conf [email protected]:/etc/keepalived/
[pkumar@nginx1 ~]$ scp /bin/check_nginx.sh [email protected]:/bin/
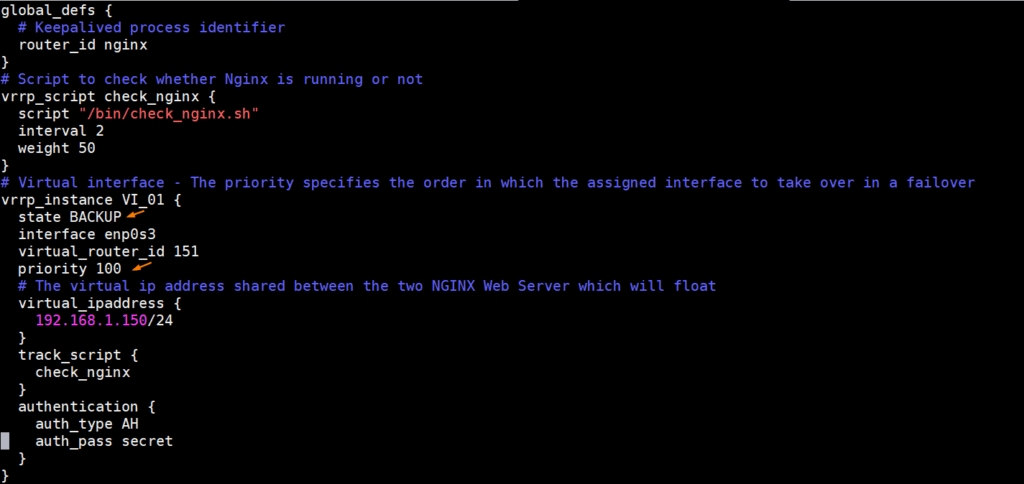
Once files are copied then login to Node 2 and make couple of changes in keepalived.conf file. Change State from MASTER to BACKUP and lower the priority by setting it as 100. After making the changes, keepalived.conf on Node 2 would look like below,
In Case OS firewall is running then allow VRRP by the running following commands,
Note – Execute these commands on both the nodes
For CentOS / RHEL Systems
$ sudo firewall-cmd --add-rich-rule='rule protocol value="vrrp" accept' --permanent
$ sudo firewall-cmd --reload
For Ubuntu / Debian Systems
Allow VRRP by executing followings, from the master node (Node 1), run
$ sudo ufw allow to 224.0.0.18 comment 'VRRP Broadcast'
$ sudo ufw allow from 192.168.1.140 comment 'VRRP Router'
From the Backup / Slave Node (Node 2)
$ sudo ufw allow to 224.0.0.18 comment 'VRRP Broadcast'
$ sudo ufw allow from 192.168.1.130 comment 'VRRP Router'
Now finally start keepalived service by running beneath systemctl commands from both the nodes,
$ sudo systemctl start keepalived
$ sudo systemctl enable keepalived
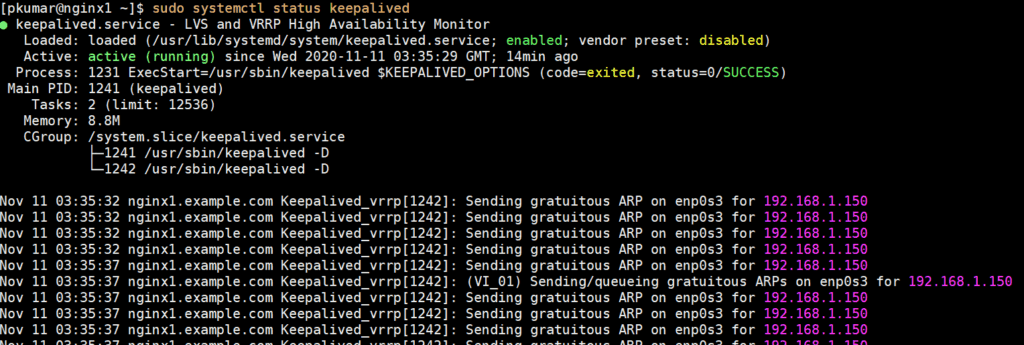
Verify the keepalived service by running below:
$ sudo systemctl status keepalived
Perfect, now verify VIP (virtual ip address) status on master node, in our case VIP is 192.168.1.130
$ ip add show
Above output confirms VIP is configure on master node on its enp0s3 interface. So, lets do keepalived and nginx testing in the next step.
Step 5) Keepalived and NGINX Testing
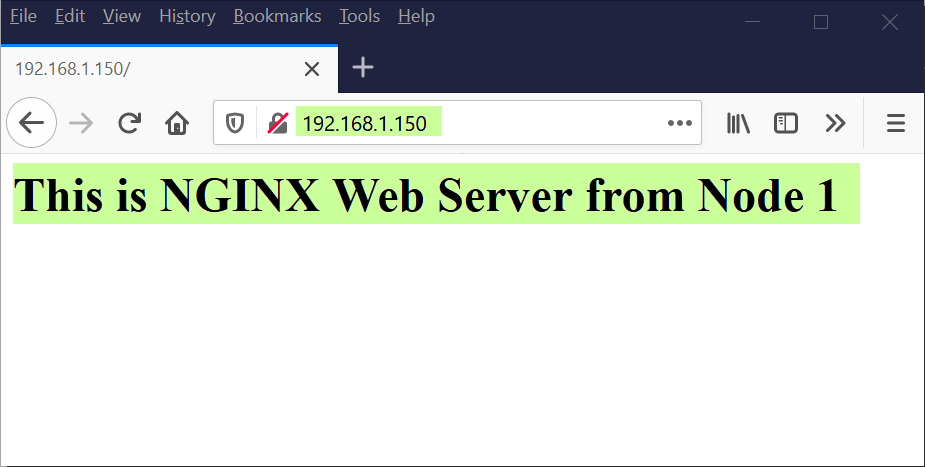
To perform the testing, try access nginx web server with virtual IP (192.168.1.150), currently it should show us node 1 nginx page.
Open the wen browser and type ‘http://192.168.1.150’ and hit enter,
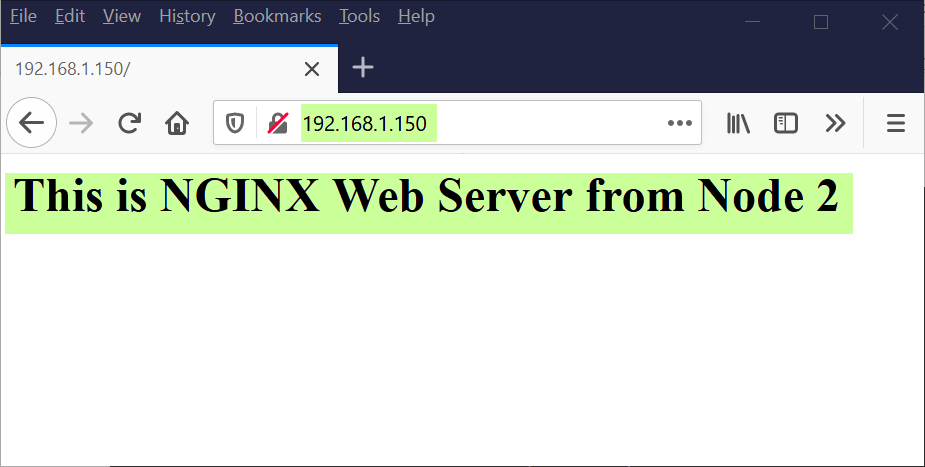
Now try to stop the NGINX service on node 1 and see whether virtual IP is switched from Node 1 to Node 2 and then try to access nginx web page with VIP (192.168.1.150) and this time it should show us nginx page from node 2.
[pkumar@nginx1 ~]$ sudo systemctl stop nginx
[pkumar@nginx1 ~]$ ip add show
Login to node 2 and run ip command to see verify the virtual IP address,
[pkumar@nginx2 ~]$ ip add show
Now, let’s try to access web page using virtual ip,
Great, above confirms that we have successfully setup highly available NGINX Web server with keepalived. That’s all from this article, please do share your feedback, comments and suggestions.







Many thanks for your topic.
In my case: My master 1 have ip: 192.168.56.8. Master 2 have ip: 192.168.56.10
And VIP is: 192.168.56.22
When I do the step 5, I stopped the nginx but it still keep the VIP at the master 1: inet 192.168.56.22/24 scope global secondary enp0s8
And I can’t connect to VIP
[root@k8s-master ~]# curl 192.168.56.22
curl: (7) Failed connect to 192.168.56.22:80; Connection refused
Here is my log
[root@k8s-master ~]# ip add show
1: lo: mtu 65536 qdisc noqueue state UNKNOWN
link/loopback 00:00:00:00:00:00 brd 00:00:00:00:00:00
inet 127.0.0.1/8 scope host lo
valid_lft forever preferred_lft forever
inet6 ::1/128 scope host
valid_lft forever preferred_lft forever
2: enp0s3: mtu 1500 qdisc pfifo_fast state UP qlen 1000
link/ether 08:00:27:fb:5e:98 brd ff:ff:ff:ff:ff:ff
inet 10.0.2.15/24 brd 10.0.2.255 scope global dynamic enp0s3
valid_lft 80833sec preferred_lft 80833sec
inet6 fe80::a00:27ff:fefb:5e98/64 scope link
valid_lft forever preferred_lft forever
3: enp0s8: mtu 1500 qdisc pfifo_fast state UP qlen 1000
link/ether 08:00:27:51:d9:b6 brd ff:ff:ff:ff:ff:ff
inet 192.168.56.8/24 brd 192.168.56.255 scope global enp0s8
valid_lft forever preferred_lft forever
inet 192.168.56.22/24 scope global secondary enp0s8
valid_lft forever preferred_lft forever
inet6 fe80::a00:27ff:fe51:d9b6/64 scope link
valid_lft forever preferred_lft forever
4: docker0: mtu 1500 qdisc noqueue state UP
link/ether 02:42:fc:47:e1:a5 brd ff:ff:ff:ff:ff:ff
inet 172.17.0.1/16 brd 172.17.255.255 scope global docker0
valid_lft forever preferred_lft forever
inet6 fe80::42:fcff:fe47:e1a5/64 scope link
valid_lft forever preferred_lft forever
6: veth9d436d3@if5: mtu 1500 qdisc noqueue master docker0 state UP
link/ether c6:e2:f3:38:0b:b6 brd ff:ff:ff:ff:ff:ff link-netnsid 0
inet6 fe80::c4e2:f3ff:fe38:bb6/64 scope link
valid_lft forever preferred_lft forever
7: cali9c19db3d39d@if3: mtu 1440 qdisc noqueue state UP
link/ether ee:ee:ee:ee:ee:ee brd ff:ff:ff:ff:ff:ff link-netnsid 1
inet6 fe80::ecee:eeff:feee:eeee/64 scope link
valid_lft forever preferred_lft forever
8: tunl0@NONE: mtu 1440 qdisc noqueue state UNKNOWN
link/ipip 0.0.0.0 brd 0.0.0.0
inet 192.168.235.192/32 brd 192.168.235.192 scope global tunl0
valid_lft forever preferred_lft forever
need add:
1) on Master:
unicast_src_ip *.*.*.* # Private IP address of master
unicast_peer {
*.*.*.* # Private IP address of the backup nginx
on Backup:
unicast_src_ip *.*.*.* # Private IP address of the backup nginx
unicast_peer {
*.*.*.* # Private IP address of the master nginx
}
*.*.*.* = your IP
Thank you. Tested on Rocky Linux 8 everything is working