In this blog post, we will cover how to setup agent node in Jenkins step-by-step. We will add Linux based agent node in Jenkins master server, which will help you to distribute the pipeline workload and run jobs on different environments.
Prerequisites
Before we begin, make sure you have following things are in place.
- A running Jenkins master server
- A Linux machine for the agent
- SSH access to the agent machine
- Sudo privileges on the agent machine
Note: We are using Rocky Linux 9 for the agent machine.
Setup Agent Node in Jenkins
Without any further delay, let’s get started.
1) Prepare the Agent Machine
First, let’s prepare our agent machine, ssh into the agent node and install the Java using the following command.
$ sudo dnf install java-21-openjdk -y
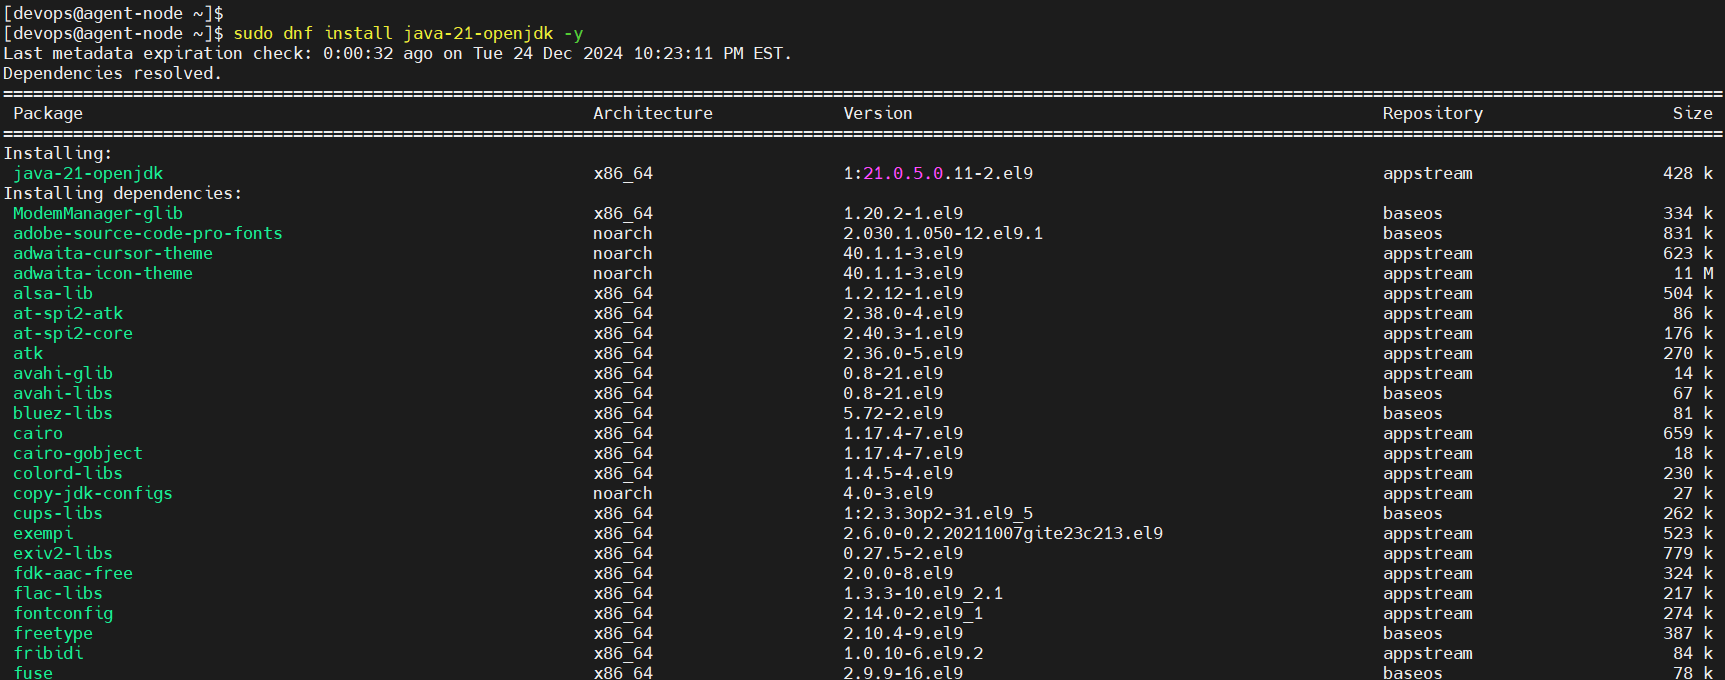
After the installation. Verify the java version, run
$ java --version

Next, create a Jenkins user, add it to wheel group and then generate the SSH keys for the Jenkins user.
Run the following set of commands one after the another.
$ sudo useradd -G wheel jenkins
$ sudo passwd jenkins
$ su - jenkins
$ ssh-keygen -t rsa
$ cd .ssh/
$ touch authorized_keys
$ cat id_rsa.pub > authorized_keys
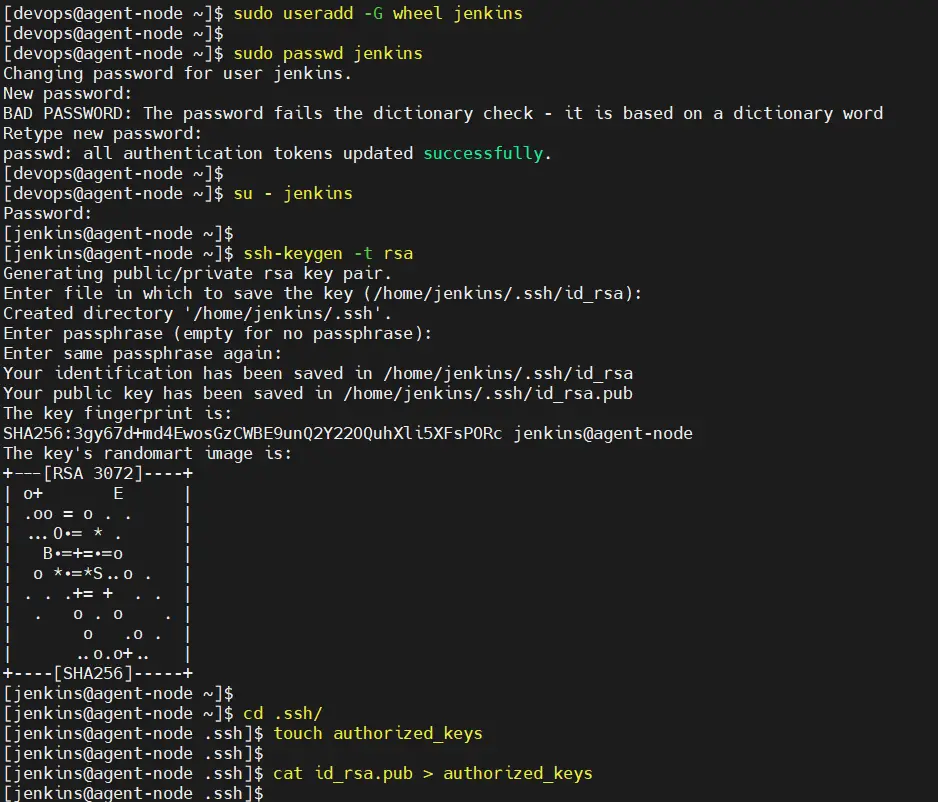
View the content of Jenkins user’s private key, we will need it while creating the credentials for this agent on Jenkins UI.
$ cat id_rsa
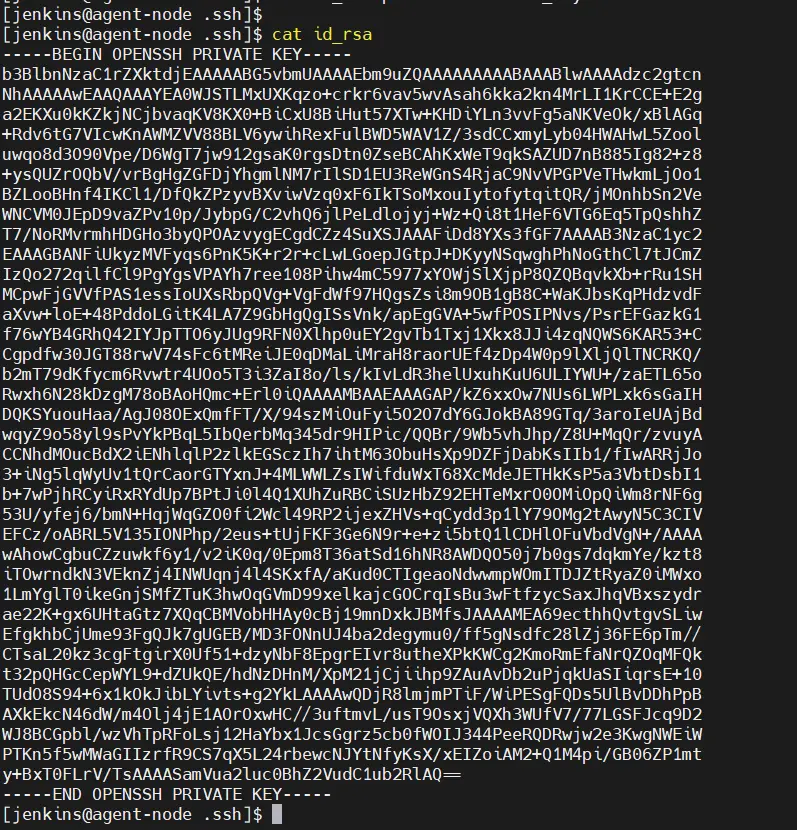
In the next step, head back to your Jenkins server GUI.
2) Create Credentials for Agent Node
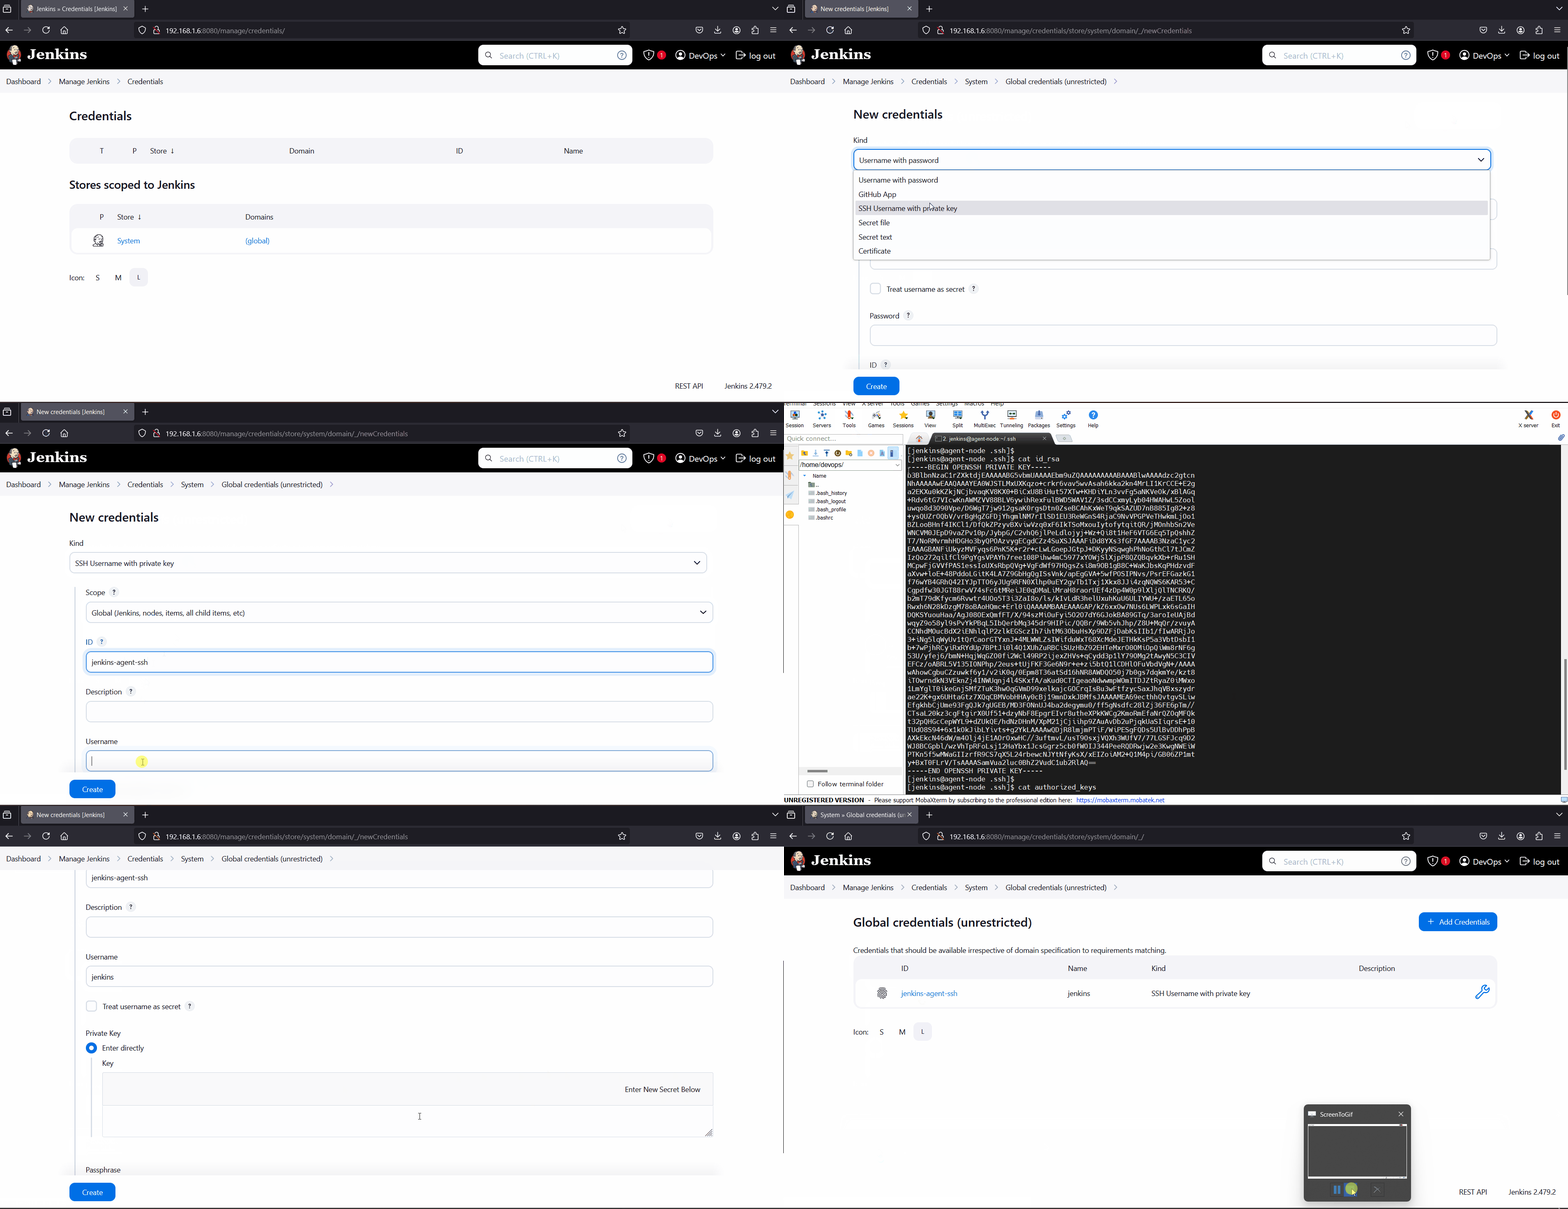
Navigate to Manage Jenkins –> Under Security –> Click on Credentials
Follow the instructions as shown below:
• Click “Add Credentials”
• Select “SSH Username with private key”
• Set scope to “Global”
• Enter ID: “jenkins-agent-ssh”
• Description: “SSH key for Linux agent”
• Username: jenkins
• Private Key: Enter directly
• Paste the private key from agent machine
• Click “Add”
3) Add the Agent Node
As all the prerequisites for setting up the agent node are completed, now add the agent node.
Navigate to Manage Jenkins –> Under System Configuration –> Click on Nodes –> Choose New Node.
Configure these settings:
- Name: linux-agent
- Description: Linux agent
- Number of executors: 2
- Remote root directory: /home/jenkins/
- Labels: linux
- Usage: Use this node as much as possible
- Launch method: Launch agents via SSH
- Host: [Your Agent IP]
- Credentials: Choose ‘jenkins’
- Host Key Verification Strategy: Non verifying
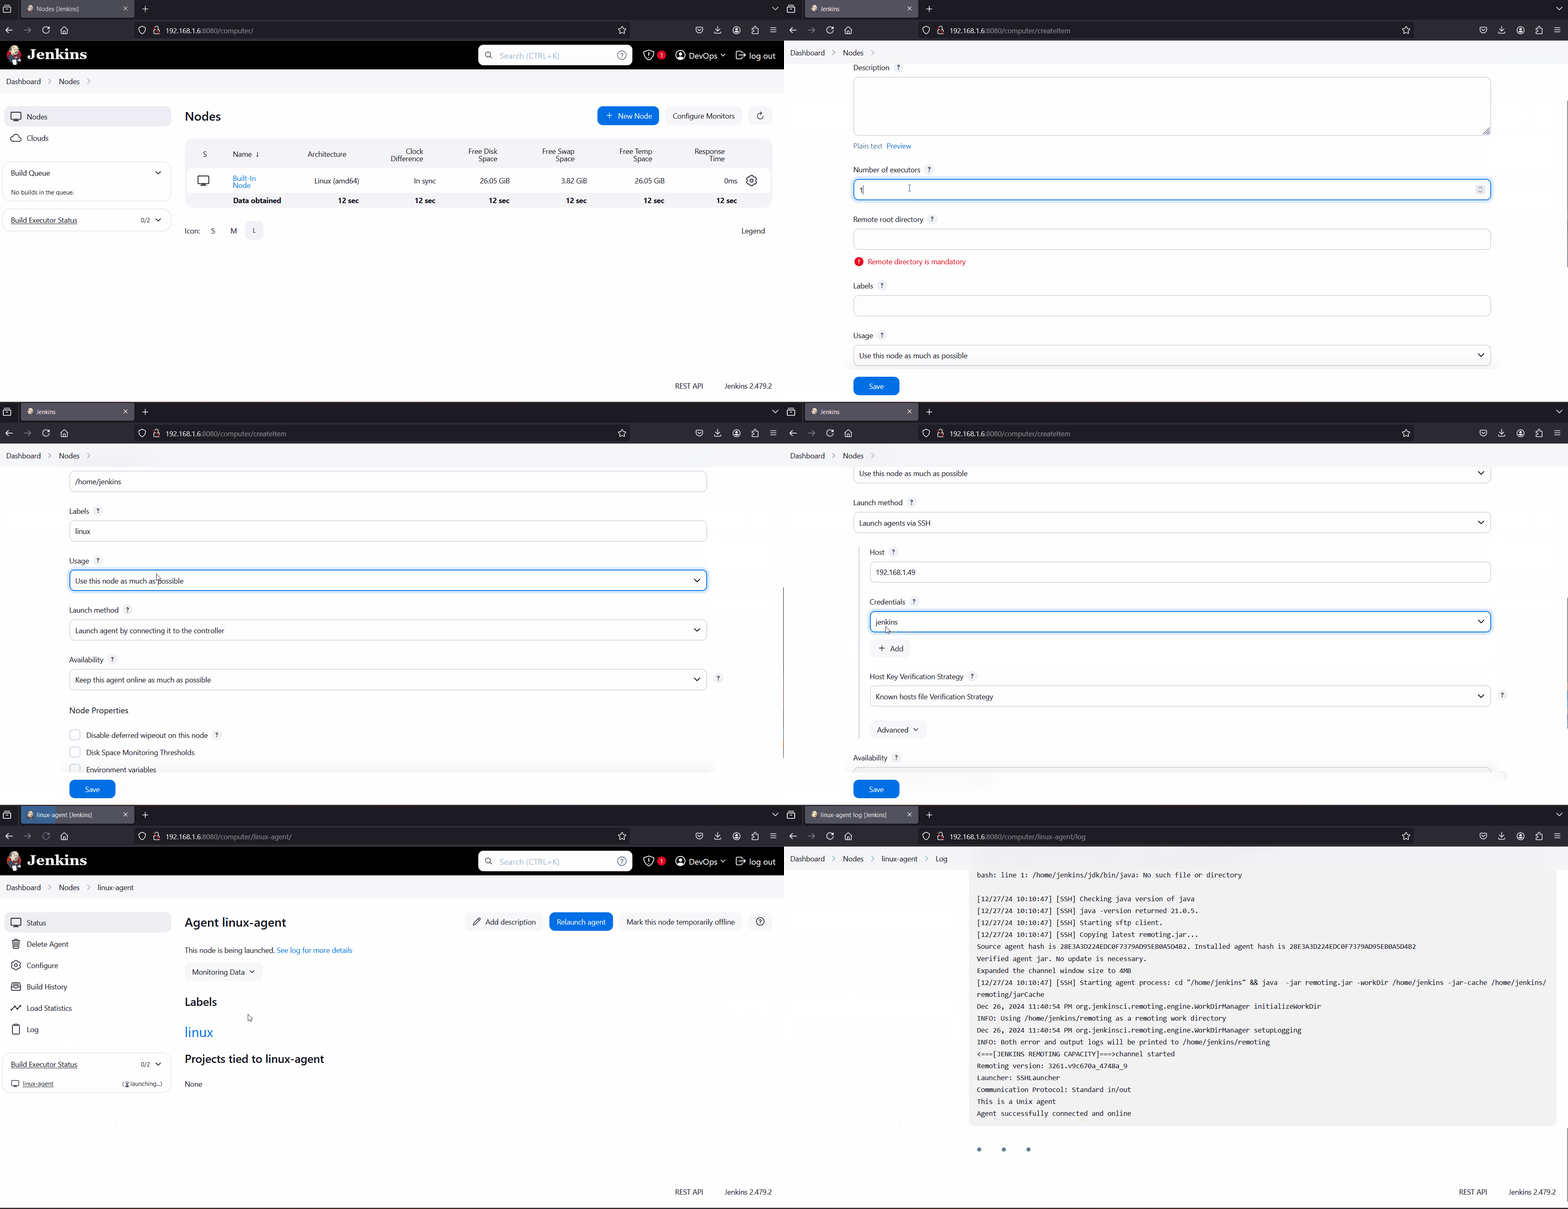
Above confirms that Linux based agent node has been added success in your Jenkins master server.
In order to test the functionality of newly added agent, let try to run some sample job on it.
4) Create & Run Job on New Agent node
From the jenkins GUI, create a freestyle project job and force the job to run on newly added linux based agent node. Example is shown below:
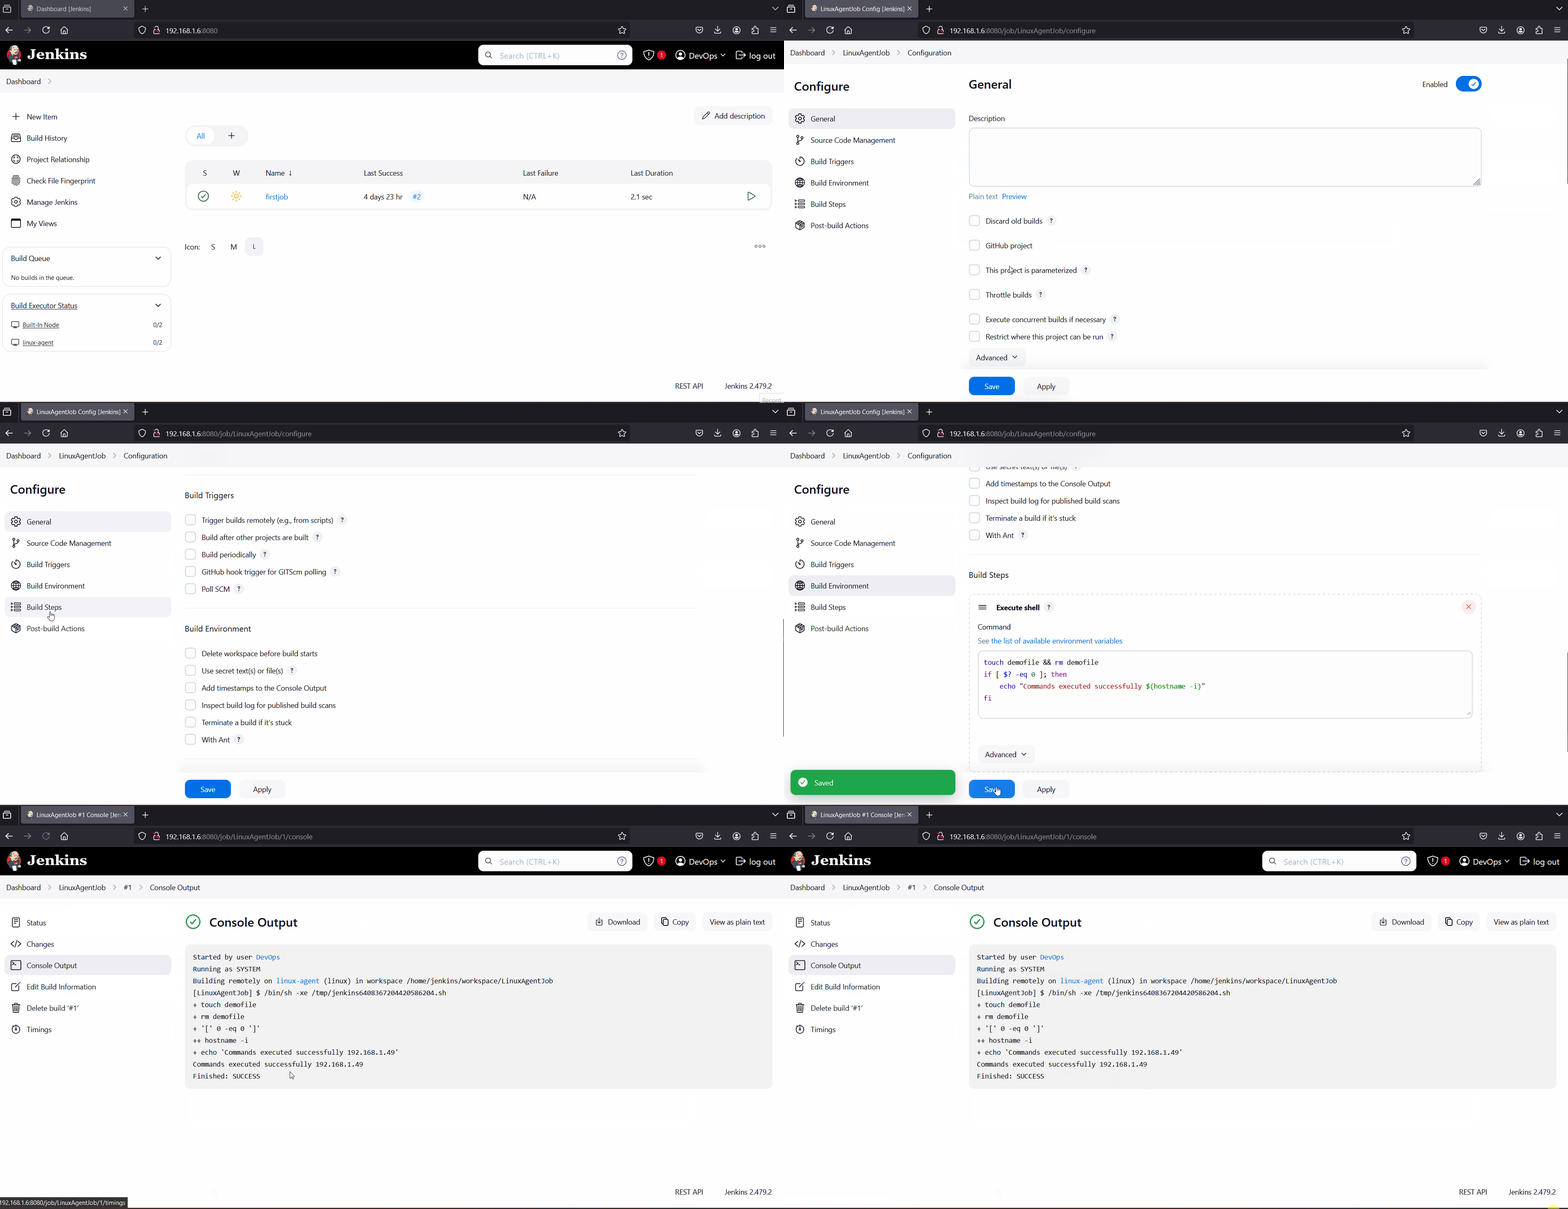
Console logs of the job confirm that it has been executed on our new Linux based agent node.
That’s all from this post, I hope these steps help you to setup agent node (slave node) in Jenkins. Feel free to post your queries and feedback in below comments section.
Also Read: How to Add New Kubernetes Worker Node Step-by-Step


