In this post, we will cover how to set static ip address on rhel 9 system.
It is strongly recommended to set static ip address on your linux system specially on servers. The main benefit of static IP address is that it will be persistent across the reboots.
There are different ways to set static ip address. We can use any one of it.
- nmcli
- nmtui
- nmstatectl
Prerequisites
- Minimal Installed RHEL 9
- Sudo User with admin rights or root user
Without any further delay, let’s deep dive into the following methods to assign static ip address on RHEL9.
Static IP Address using nmcli command
It is a command line tool to manage networking on a modern Linux distributions.. To set static ip address , refer the following set of commands.
To get the interface name attached to your system, run
$ nmcli device
DEVICE  TYPE      STATE      CONNECTION
enp0s3  ethernet  connected  enp0s3
lo      loopback  unmanaged  --
$
Execute following to view current connection,
$ nmcli connection show
NAME    UUID                                  TYPE      DEVICE
enp0s3  25d9c990-7b03-31bf-873b-489740d6e561  ethernet  enp0s3
$
In our case, interface and connection name is ‘enp0s3’. So, I will assign following static IP address on this interface (enp0s3)
- IP: 192.168.1.181
- netmask: 255.255.255.0
- gateway: 192.168.1.1
- dns: 4.2.2.2
Here we have two options either modify the existing connection or create a new connection. In this guide, I will be modifying the existing connection.
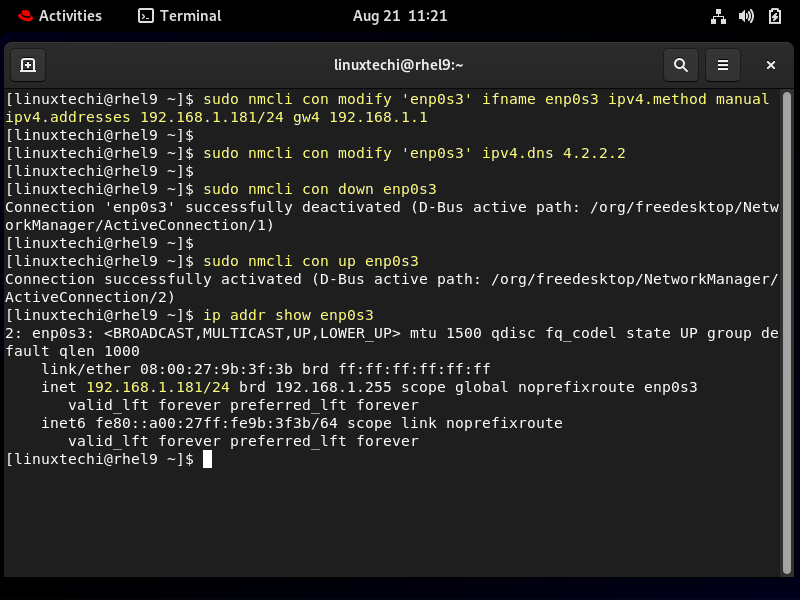
$ sudo nmcli con modify 'enp0s3' ifname enp0s3 ipv4.method manual ipv4.addresses 192.168.1.181/24 gw4 192.168.1.1
$ sudo nmcli con modify 'enp0s3' ipv4.dns 4.2.2.2
$ sudo nmcli con down 'enp0s3'
$ sudo nmcli con up 'enp0s3'
Run following ip command to view ip address on enp0s3 interface
$ ip addr show enp0s3
Output of above commands would be,
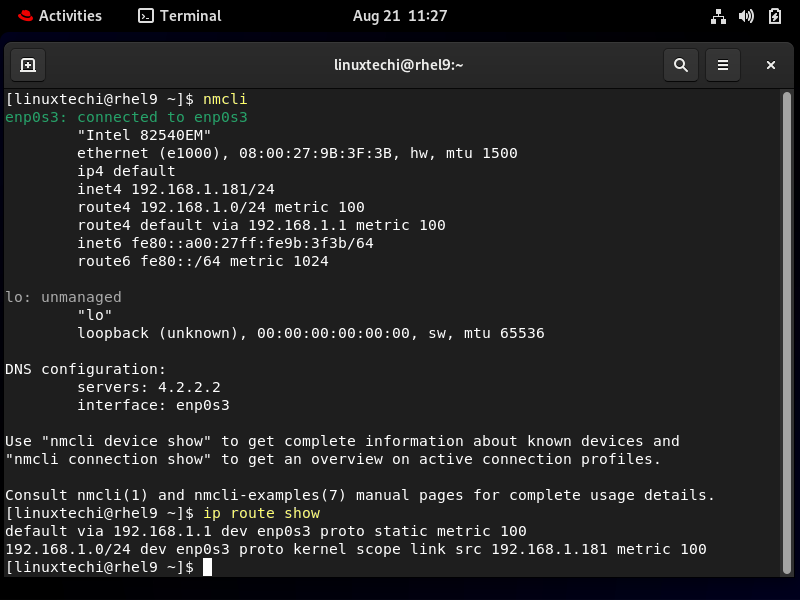
To view details about above configured ip address and route, run following commands,
$ nmcli
$ ip route show
Output,
Output above confirms that static ip address along with route and DNS ip are configured successfully.
Static IP Address using nmtui utility
It is text-based user interface for managing the networking on modern Linux systems. To set static ip address using nmtui, run following command,
$ sudo nmtui
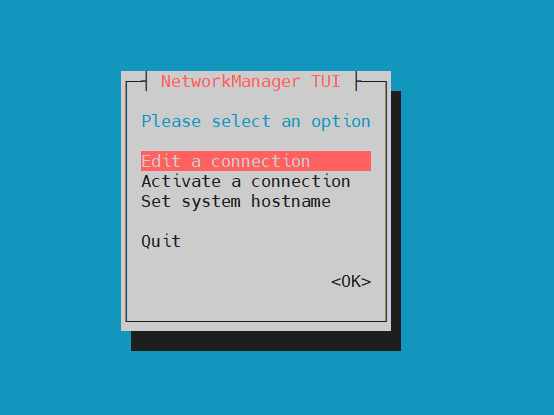
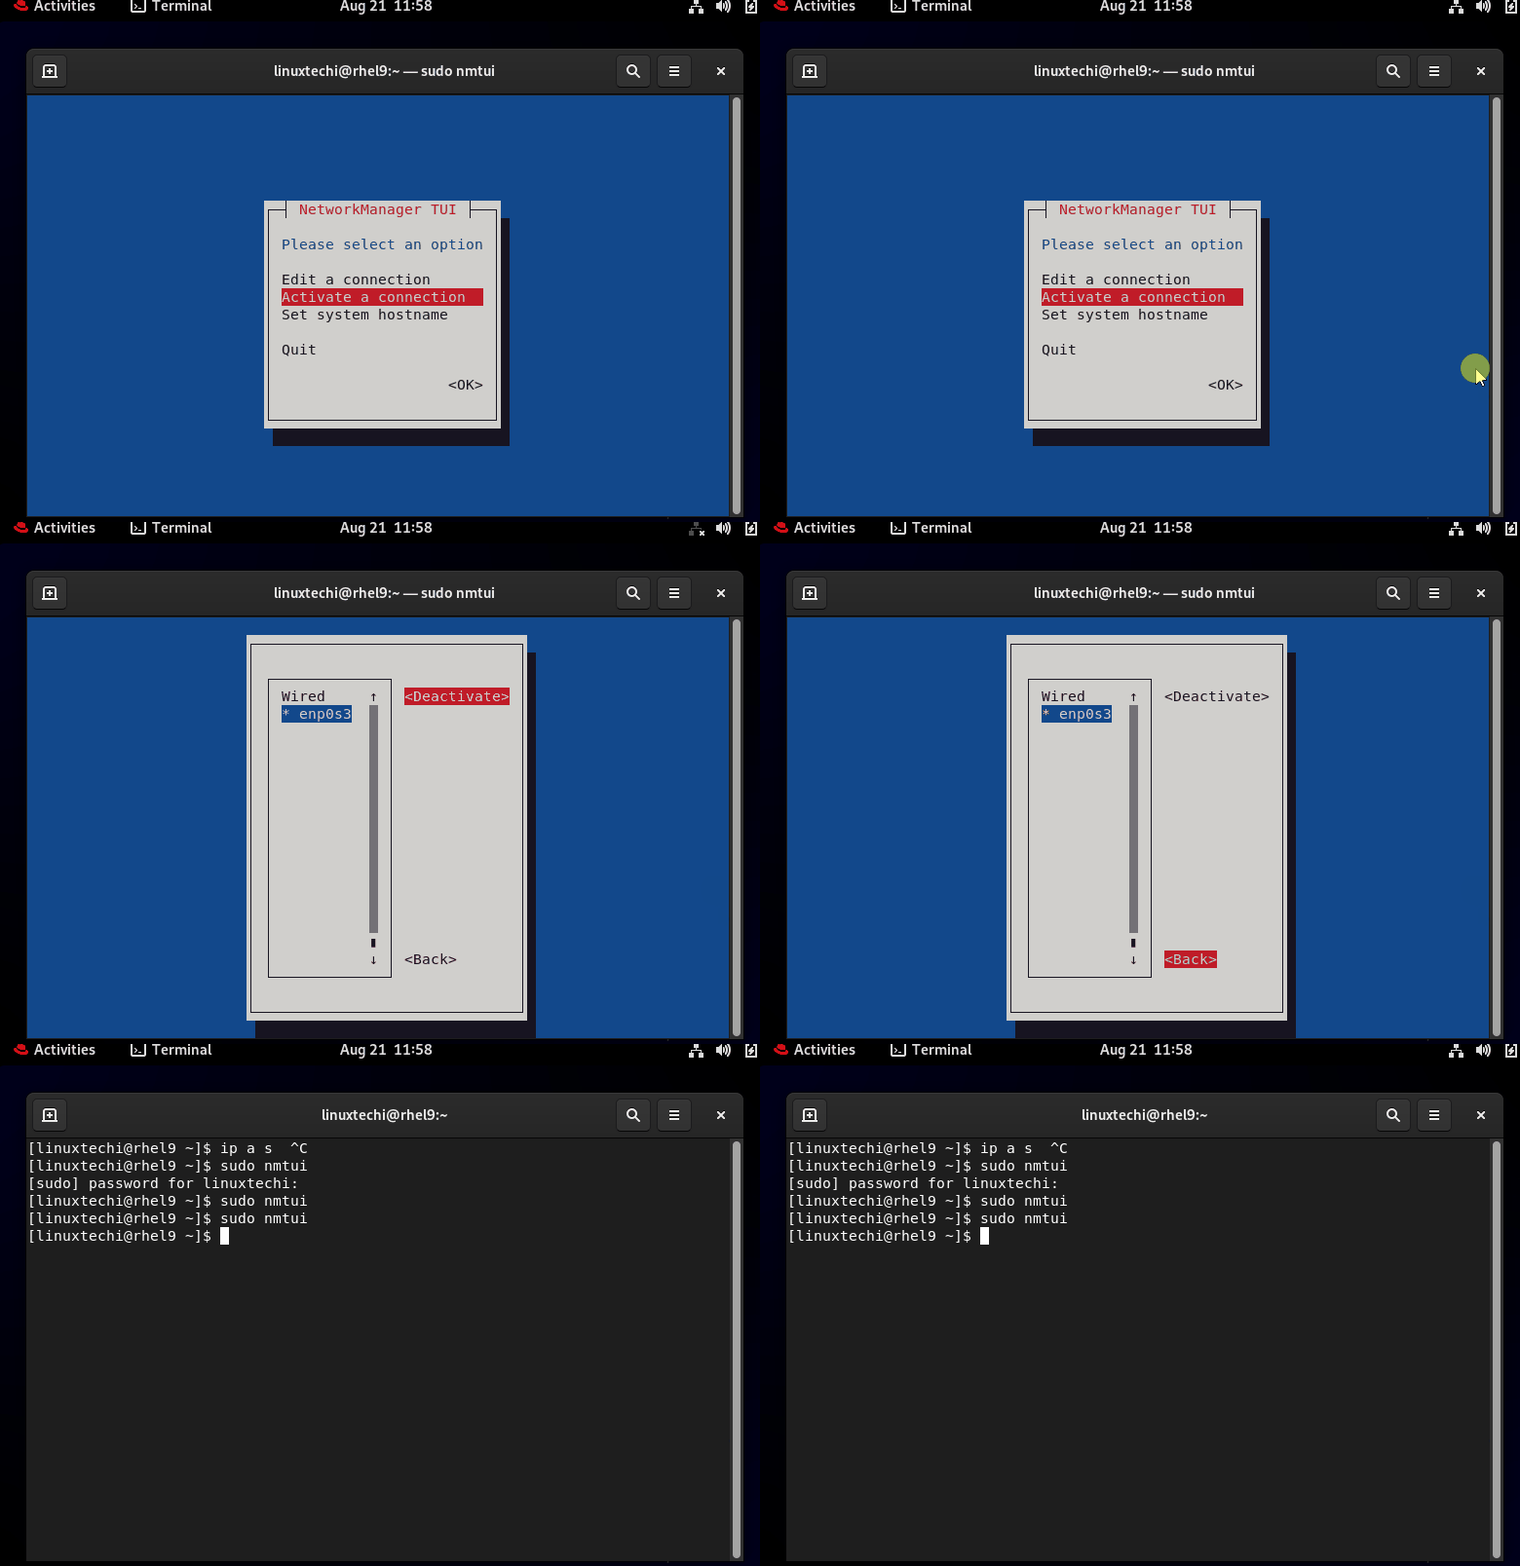
It will start the text-based interface,
Choose ‘Edit a connection’ and hit enter,
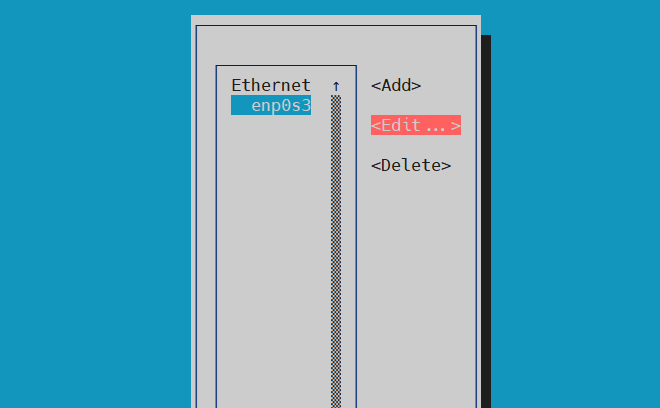
Select the interface (in my case it is enp0s3) and then choose edit and press enter,
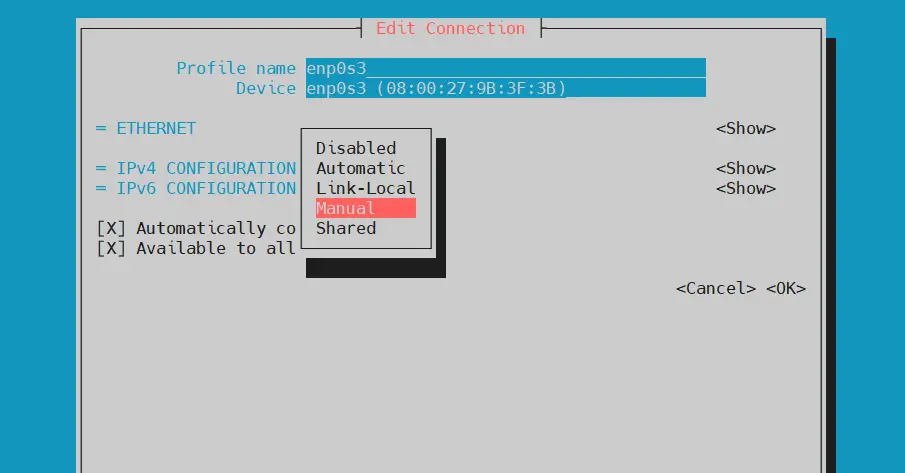
In the following screen, change IPv4 Configuration from Automatic to Manual.
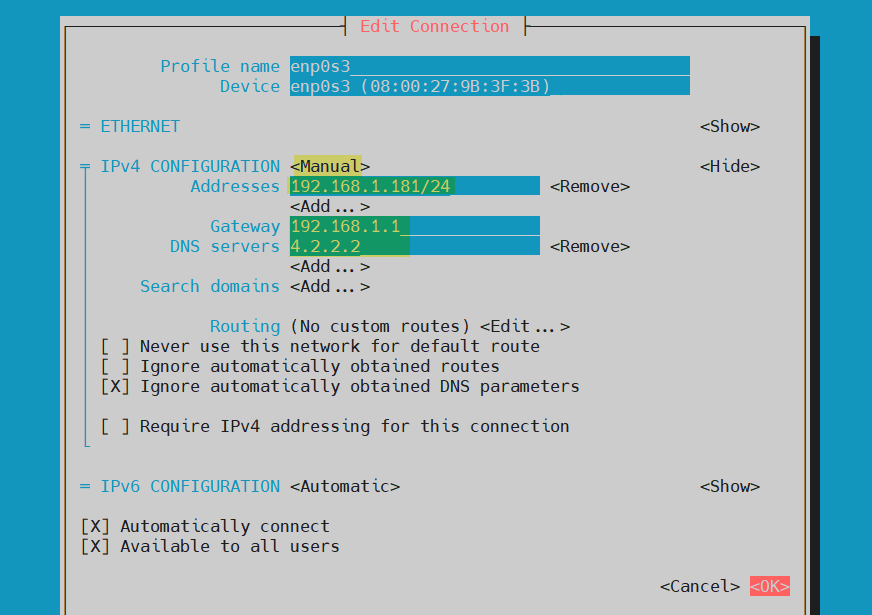
Specify the IP details as,
Now, choose OK and hit enter.
To make above changes into the effect, deactivate and activate the connection as show below,
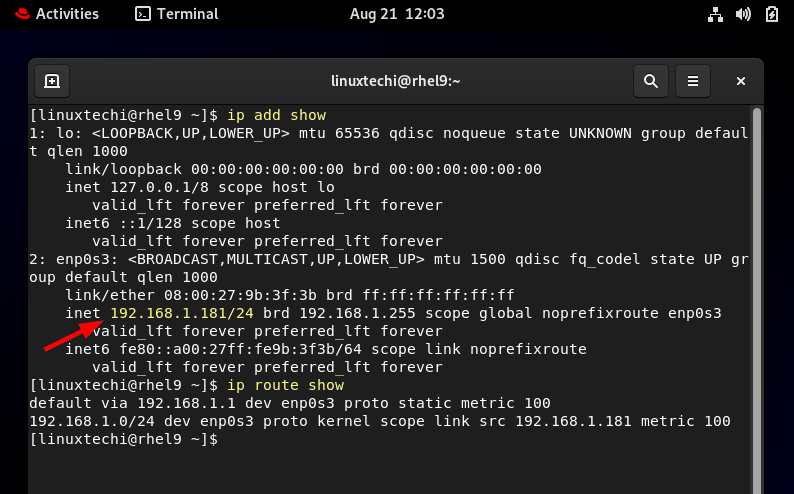
Execute ip command to verify whether static ip is assigned to interface enp0s3
$ ip add show
$ ip route show
Perfect, above commands output confirms that Static IP has been assigned successfully.
Static IP address using nmstatectl utility
It is also a command line utility to configure networking on rhel 9 systems. It is not installed as a part of default installation. So, first install ‘nmstate’ package using the following dnf command,
$ sudo dnf install -y nmstate
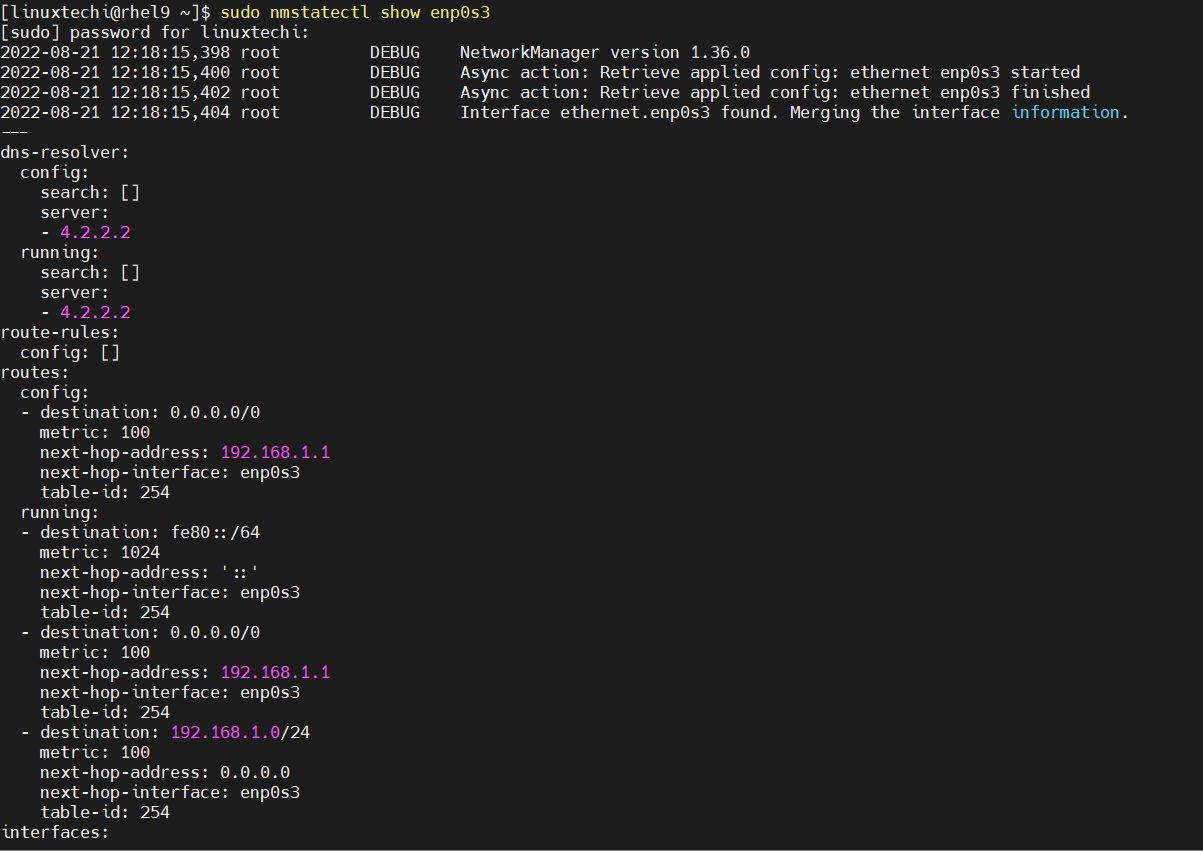
To view the exiting settings of an interface, run
$ sudo nmstatectl show enp0s3
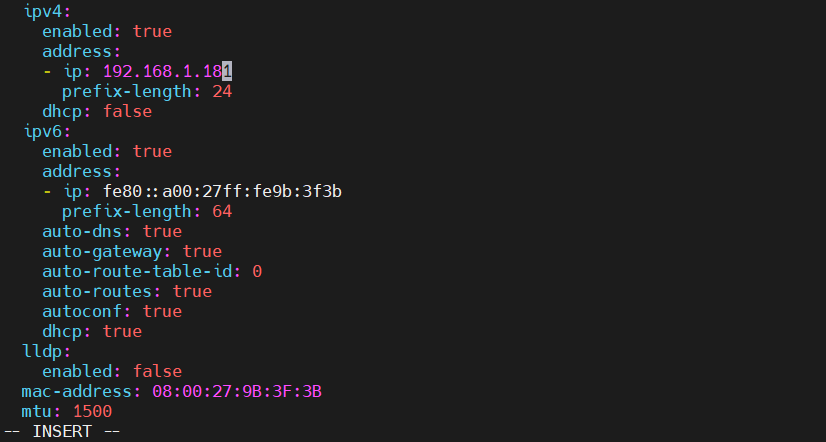
To change the settings of an interface, run
$ sudo nmstatectl eddit enp0s3
It will open interface settings in edit mode, so make the changes as per your requirement.
Save and close the file to make changes into the effect.
That’s all from this guide. I hope it helps you to configure static ip address on your rhel 9 system from the command line. Kindly do post your queries and feedback in below comments section.



thanks for sharing
They just make it so difficult and tedious.
First we had ifconfig. Then ifcfg.eth0 whatnot.
Later we swapped ip2 for nmcli
nmcli is the most cumbersome and convoluted out of the lot. Perhaps it works if we do away with admins, and just let AWS etc do it for us, but it does not help us admins.
vi /etc/NetworkManager/system-connections/eth0.nmconnection