In this guide, we will explain how to repair corrupted XFS filesystem using the xfs_repair utility.
Originally developed by Silicon Graphics, the XFS file system is a robust, high-performance journaling filesystem first introduced to the Linux kernel in 2001. Over time, its popularity has grown significantly, and by 2014, XFS was adopted by major Linux distributions. Today, XFS is the default filesystem in Red Hat-based distributions like RHEL, CentOS, and Rocky Linux. Known for its exceptional speed and robustness, XFS excels at handling large files efficiently.
Despite its reliability, XFS is not immune to filesystem corruption. Common causes of such issues include ungraceful shutdowns, NFS write errors, power outages, and hardware problems such as bad blocks on a drive. Filesystem corruption can lead to severe problems, including corrupted files or even an unbootable system if critical boot files are affected.
Several tools are available to diagnose and fix filesystem errors. One such tool is the fsck (Filesystem Check) command, which checks the overall health of a filesystem. It identifies potential and existing errors, repairs them, and generates a report. The fsck command is pre-installed in most Linux distributions, requiring no additional setup.
Another valuable tool is xfs_repair, a system utility designed specifically for the XFS filesystem. Highly scalable, xfs_repair efficiently scans and repairs large filesystems with numerous inodes, making it ideal for managing XFS filesystems effectively.
1) Simulate File corruption
In this tutorial, we will simulate filesystem corruption on an XFS filesystem to demonstrate the repair process. For this example, we will use an 8GB external USB drive as our block device, identified as /dev/sdb1, as shown in the command below.
$ lsblk | grep sd
The first step is to format it to xfs filesystem using the mkfs command.
$ sudo mkfs.xfs -f /dev/sdb1
This displays the output shown
The next step is to create a mount point that we shall later use to mount the block volume.
$ sudo mkdir /mnt/data
Next, mount the partition using the mount command.
$ sudo mount /dev/sdb1 /mnt/data
You can verify if the partition was correctly mounted as shown.
$ sudo mount | grep /dev/sdb1
Our partition is now successfully mounted as an xfs partition. Next, we are going to simulate filesystem corruption by trashing random filesystem metadata blocks using the xfs_db command.
But before that, we need to unmount the partition.
$ sudo umount /dev/sdb1
Next, corrupt the filesystem by running the command below to trash random filesystem metadata blocks.
$ sudo xfs_db -x -c blockget -c "blocktrash -s 512109 -n 1000" /dev/sdb1
2) Repair Corrupted XFS filesystem using xfs_repair
To repair the file system using xfs_repair command, use the syntax:
$ sudo xfs_repair /dev/device
But before we embark on repairing the filesystem, we can perform a dry run using the -n flag as shown. A dry run provides a peek into the actions that will be performed by the command when is it executed.
$ sudo xfs_repair -n /dev/device
For our case, this translates to:
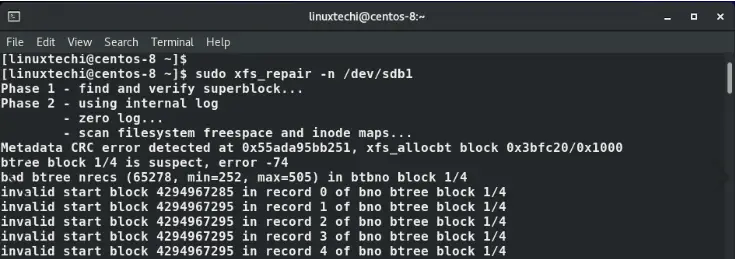
$ sudo xfs_repair -n /dev/sdb1
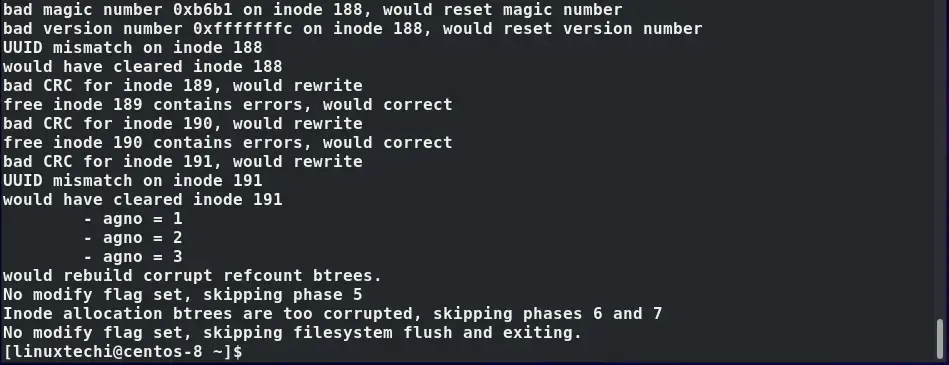
From the output, we can see some metadata errors and inode inconsistencies. The command terminates with a brief summary of the steps the actual command would have carried out. The corrective measures that would have been applied in steps 6 and 7 have been skipped.
To perform the actual repair of the XFS filesystem, we will execute the xfs_repair command without the -n option
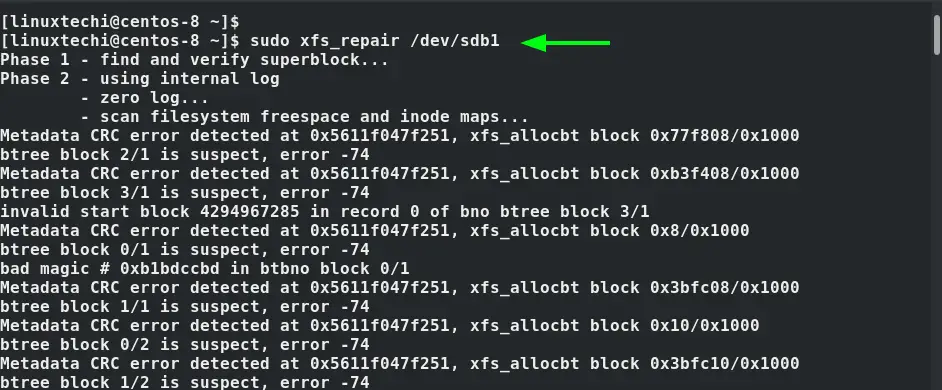
$ sudo xfs_repair /dev/sdb1
The command detects the errors and inconsistencies in the filesystem.
And performs remediation measures to the inodes and rectifies any other errors. The output provided shows that the command completes its tasks successfully.
For more xfs_repair options visit the man page.
$ man xfs_repair
Conclusion
The xfs_repair utility is a powerful tool for restoring XFS filesystems to a stable state after corruption. With this guide, you can confidently diagnose and repair a corrupted XFS partition. Feel free to post your queries and feedback in below comments section.
Read Also : How to Monitor Linux System with Glances Command


Hi James Kiarie,
I ran the command sudo badblocks -v /dev/mapper/my_device > badblocks_n_sdb1.txt, and here are the results:
Checking blocks 0 to 1048560639
Checking for bad blocks (read-only test): done
Pass completed, 20 bad blocks found. (20/0/0 errors)
The bad blocks identified are:
33598904
33598905
33598906
33598907
1038368660
1038368661
1038368662
1038368663
1038369840
1038369841
1038369842
1038369843
1038376936
1038376937
1038376938
1038376939
1038378116
1038378117
1038378118
1038378119
I suspect these bad blocks are related to hardware issues. Is there a way to mark them as unusable sectors?
Thank you!
Hi,
To mark the bad sectors as unusable, you can use `fsck` with the `-c` option:
sudo fsck -c -v /dev/mapper/my_deviceThis scans and updates the filesystem to avoid using the bad blocks. If you’re using an EXT filesystem, you can also pass the `badblocks` output to `e2fsck` using:
sudo e2fsck -l badblocks_n_sdb1.txt /dev/mapper/my_device
If bad blocks persist, consider checking the disk’s health with `smartctl`. Let me know if you need more help!