As Docker usage and adoption is growing faster and faster, monitoring Docker container images is becoming more challenging. As multiple Docker container images are getting created day-by-day, monitoring them is very important. There are already some in built tools and technologies, but configuring them is little complex. As micro-services based architecture is becoming the de-facto standard in coming days, learning such tool adds one more arsenal to your tool-set.
Based on the above scenarios, there was in need of one light weight and robust tool requirement was growing. So Portainer.io addressed this. “Portainer.io“,(Latest version is 1.20.2) the tool is very light weight(with 2-3 commands only one can configure it) and has become popular among Docker users.
This tool has advantages over other tools; some of these are as below,
- Light weight (requires only 2-3 commands to be required to run to install this tool) {Also installation image is only around 26-30MB of size)
- Robust and easy to use
- Can be used for Docker monitor and Build
- This tool provides us a detailed overview of your Docker environments
- This tool allows us to manage your containers, images, networks and volumes.
- Portainer is simple to deploy – this requires just one Docker command (can be run from anywhere.)
- Complete Docker-container environment can be monitored easily
Portainer is also equipped with,
- Community support
- Enterprise support
- Has professional services available(along with partner OEM services)
Functionality and features of Portainer tool are,
- It comes-up with nice Dashboard, easy to use and monitor.
- Many in-built templates for ease of operation and creation
- Support of services (OEM, Enterprise level)
- Monitoring of Containers, Images, Networks, Volume and configuration at almost real-time.
- Also includes Docker-Swarm monitoring
- User management with many fancy capabilities
Read Also : How to Install Docker CE on Ubuntu 16.04 / 18.04 LTS System
How to install and configure Portainer.io on Ubuntu Linux / RHEL / CentOS
Note: This installation is done on Ubuntu 18.04 but the installation on RHEL & CentOS would be same. We are assuming Docker CE is already installed on your system.
shashi@linuxtechi:~$ lsb_release -a
No LSB modules are available.
Distributor ID: Ubuntu
Description:    Ubuntu 18.04 LTS
Release:        18.04
Codename:       bionic
shashi@linuxtechi:~$
Create the Volume for portainer
shashi@linuxtechi:~$ sudo docker volume create portainer_data
portainer_data
shashi@linuxtechi:~$
Launch and start Portainer Container using the beneath docker command,
shashi@linuxtechi:~$ sudo docker run -d -p 9000:9000 -v /var/run/docker.sock:/var/run/docker.sock -v portainer_data:/data portainer/portainer
Unable to find image 'portainer/portainer:latest' locally
latest: Pulling from portainer/portainer
d1e017099d17: Pull complete
0b1e707a06d2: Pull complete
Digest: sha256:d6cc2c20c0af38d8d557ab994c419c799a10fe825e4aa57fea2e2e507a13747d
Status: Downloaded newer image for portainer/portainer:latest
35286de9f2e21d197309575bb52b5599fec24d4f373cc27210d98abc60244107
shashi@linuxtechi:~$
Once the complete installation is done, use the ip of host or Docker using port 9000 of the Docker engine where portainer is running using your browser.
Note: If OS firewall is enabled on your Docker host then make sure 9000 port is allowed else its GUI will not come up.
In my case, IP address of my Docker Host / Engine is “192.168.1.16” so URL will be,
http://192.168.1.16:9000
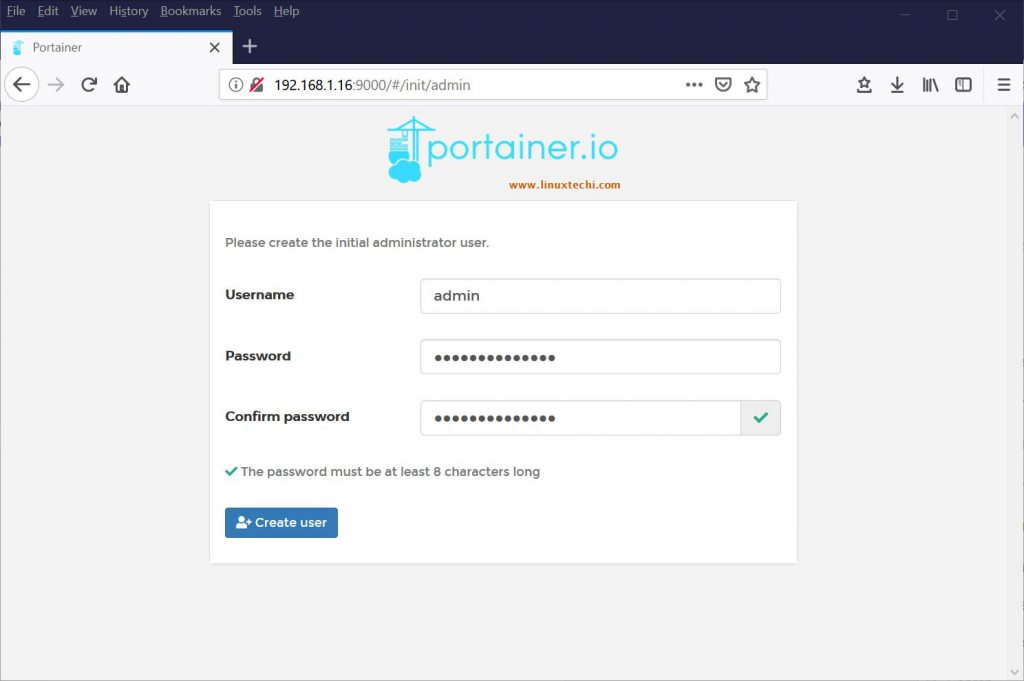
Please make sure that you enter 8-character passwords. Let the admin be the user as it is and then click “Create user”.
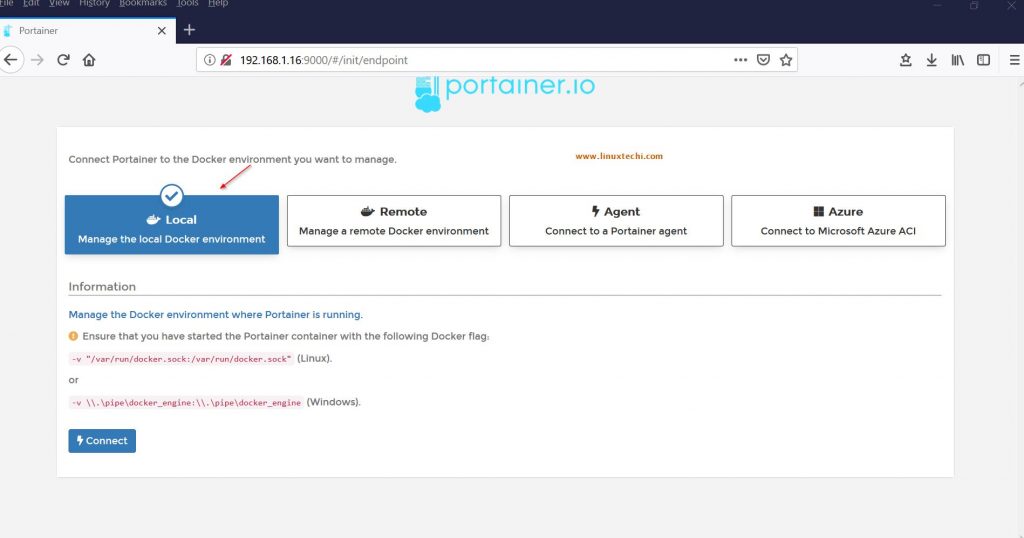
Now the following screen appears, in this select “Local” rectangle box.
Click on “Connect”
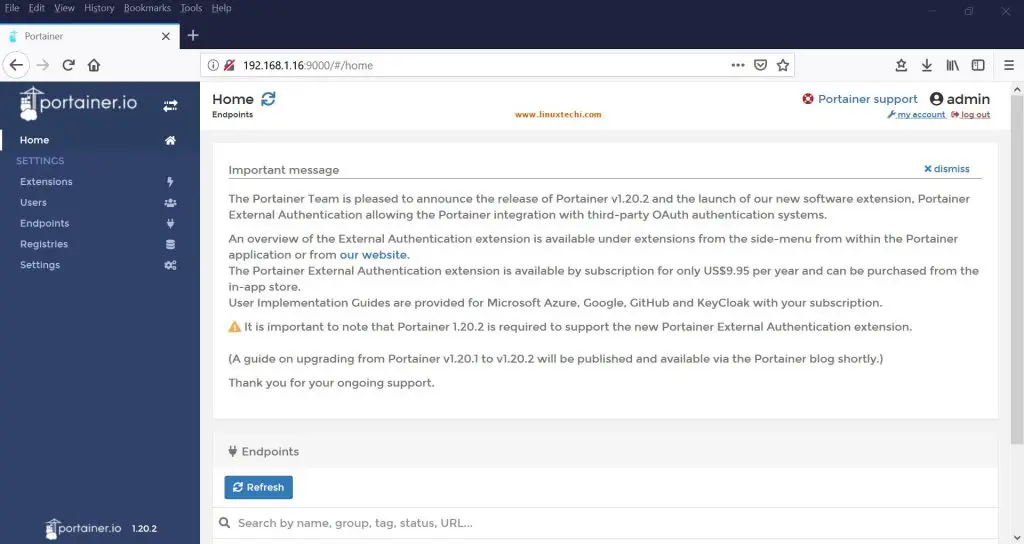
Nice GUI with admin as user home screen appears as below,
Now Portainer is ready to launch and manage your Docker containers and it can also be used for containers monitoring.
Bring-up container image on Portainer tool
Now check the present status, there are two container images are already running, if you create one more that appears instantly.
From your command line kick-start one or two containers as below,
shashi@linuxtechi:~$ sudo docker run --name test -it debian
Unable to find image 'debian:latest' locally
latest: Pulling from library/debian
e79bb959ec00: Pull complete
Digest: sha256:724b0fbbda7fda6372ffed586670573c59e07a48c86d606bab05db118abe0ef5
Status: Downloaded newer image for debian:latest
root@d45902e717c0:/#
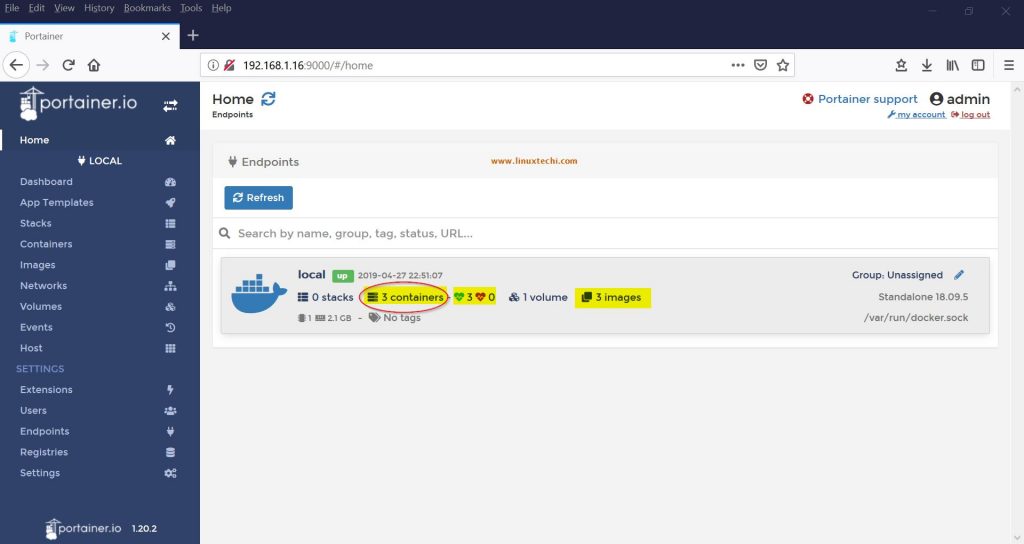
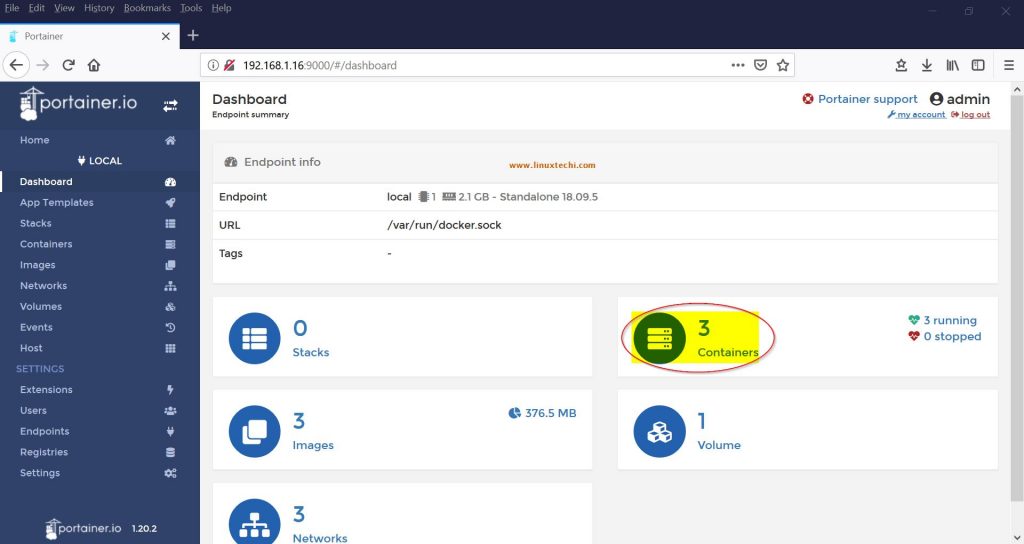
Now click Refresh button (Are you sure message appears, click “continue” on this) in Portainer GUI, you will now see 3 container images as highlighted below,
Click on the “containers” (in which it is red circled above), next window appears with “Dashboard Endpoint summary”
In this page, click on “Containers” as highlighted in red color. Now you are ready to monitor your container image.
Simple Docker container image monitoring
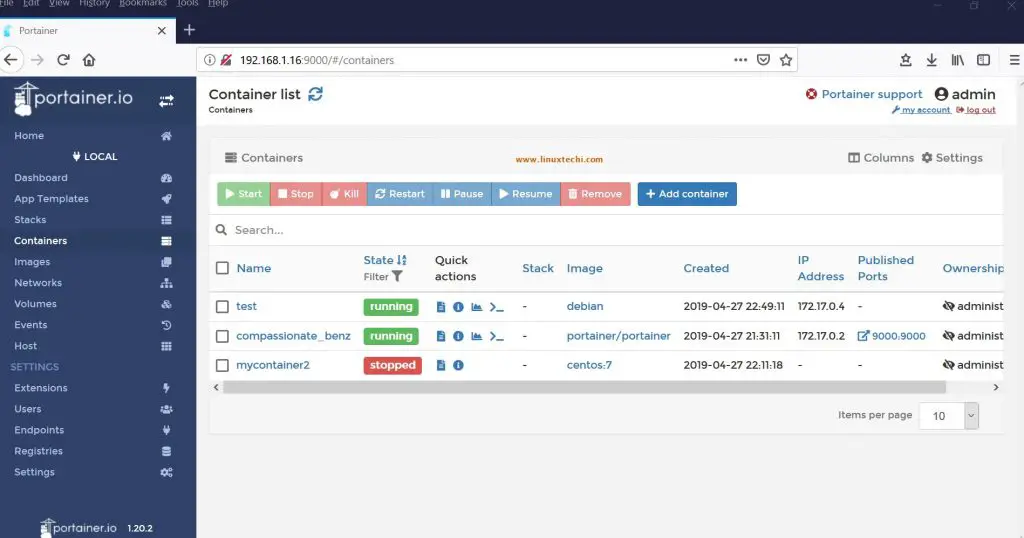
From the above step, it appears that a fancy and nice looking “Container List” page appears as below,
All the container images can be controlled from here (stop, start, etc)
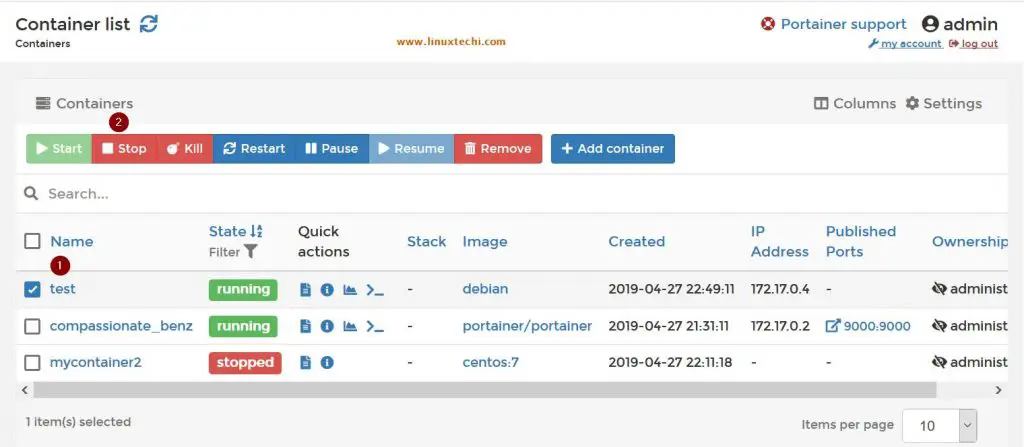
1) Now from this page, stop the earlier started {“test” container (this was the debian image that we started earlier)}
To do this select the check box in front of this image and click stop button from above,
From the command line option, you will see that this image has been stopped or exited now,
shashi@linuxtechi:~$ sudo docker container ls -a
CONTAINER ID        IMAGE                 COMMAND             CREATED             STATUS                       PORTS                    NAMES
d45902e717c0        debian                "bash"              21 minutes ago      Exited (0) 49 seconds ago                             test
08b96eddbae9        centos:7              "/bin/bash"         About an hour ago   Exited (137) 9 minutes ago                            mycontainer2
35286de9f2e2        portainer/portainer   "/portainer"        2 hours ago         Up About an hour             0.0.0.0:9000->9000/tcp   compassionate_benz
shashi@linuxtechi:~$
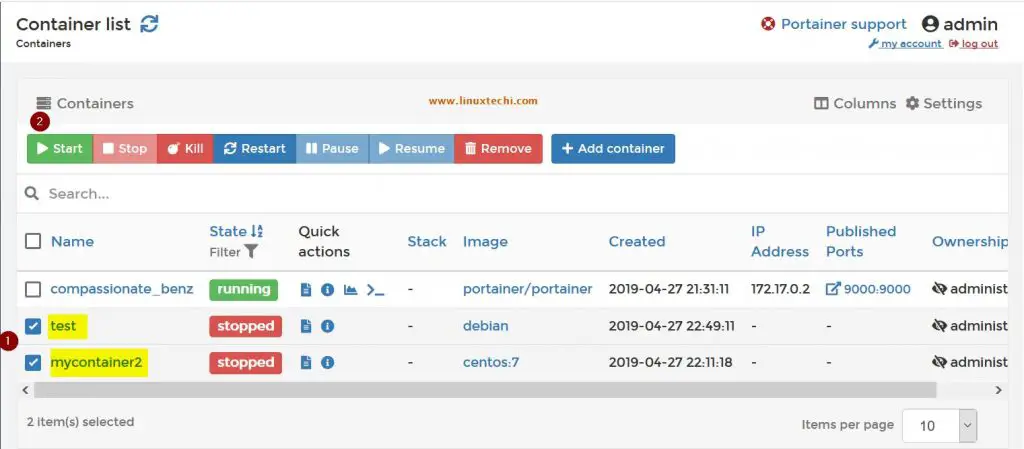
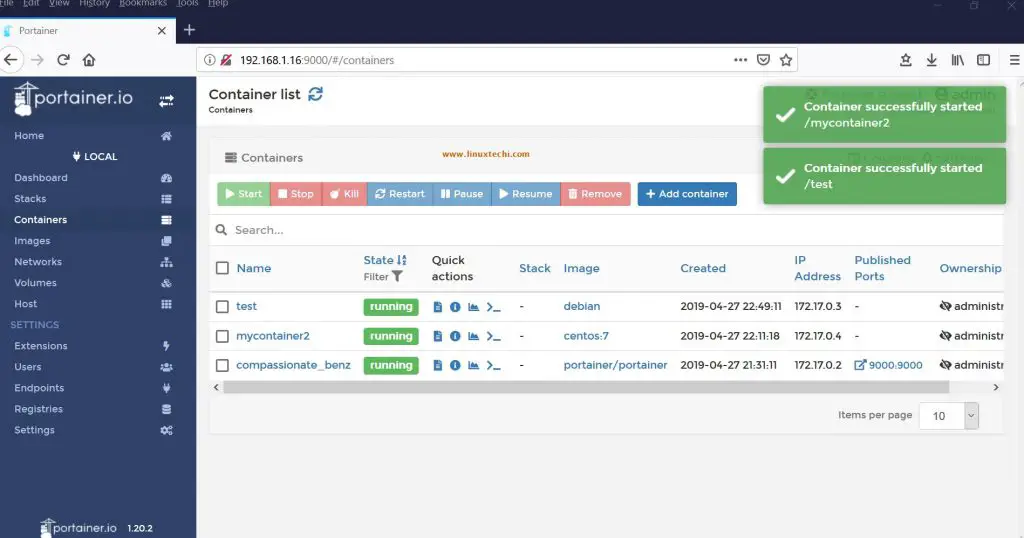
2) Now start the stopped containers (test & mycontainer2) from Portainer GUI,
Select the check box in front of stopped containers, and the click on Start
You will get a quick window saying, “Container successfully started” and with running state
Various other options and features are explored as below step-by-step
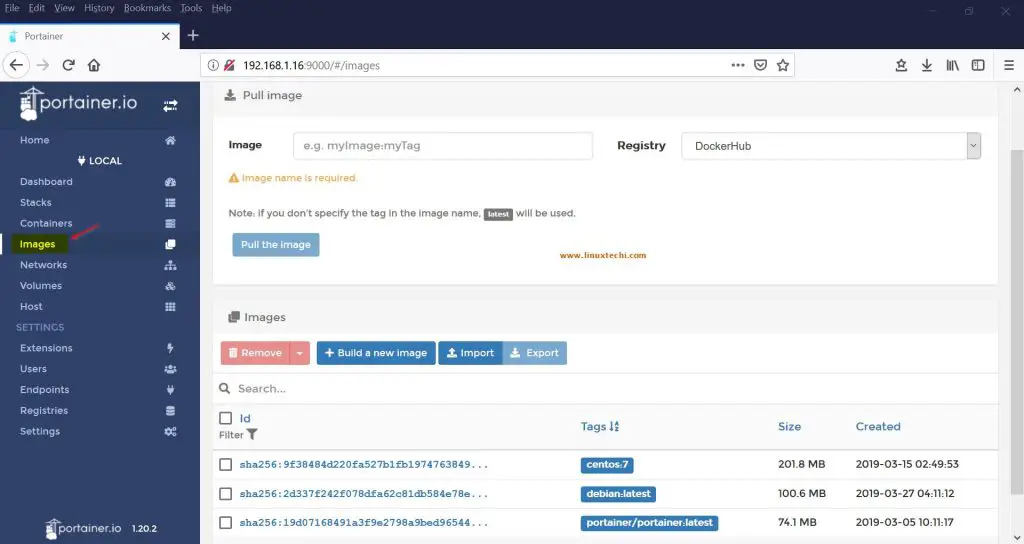
1) Click on “Images” which is highlighted, you will get the below window,
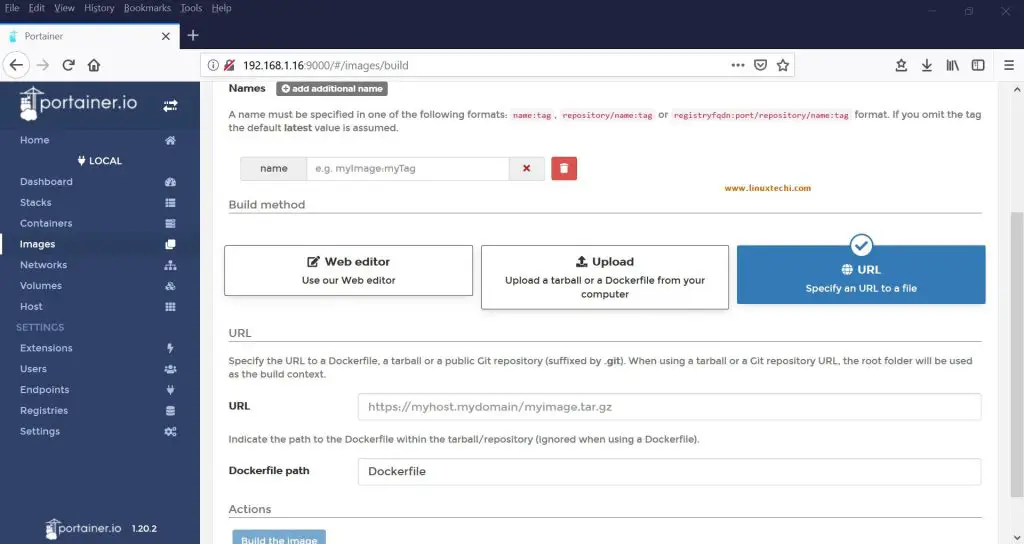
This is the list of container images that are available but some may not running. These images can be imported, exported or uploaded to various locations, below screen shot shows the same,
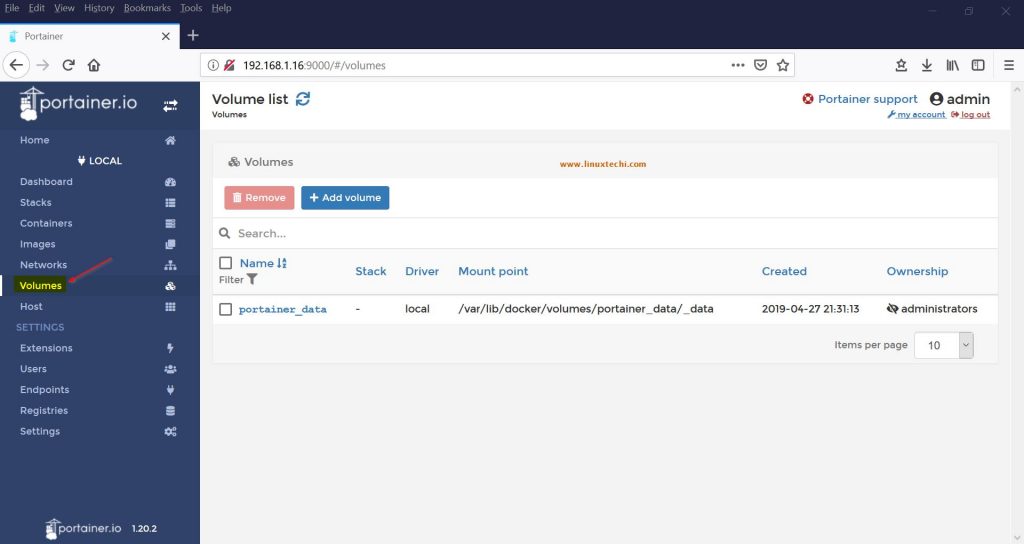
2) Click on “volumes” which is highlighted, you will get the below window,
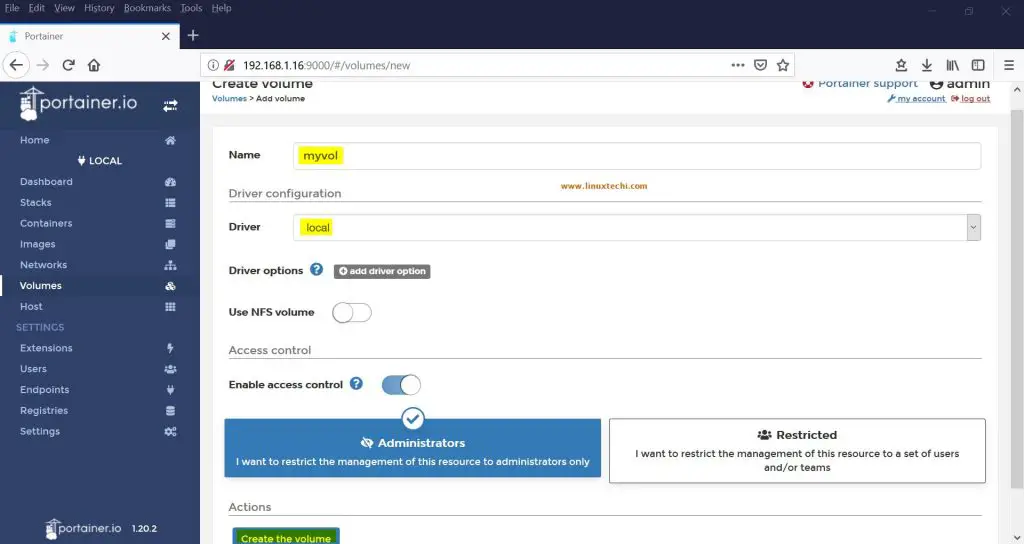
3) Volumes can be added easily with following option, click on add volume button, below window appears,
Provide the name as “myvol” in the name box and click on “create the volume” button.
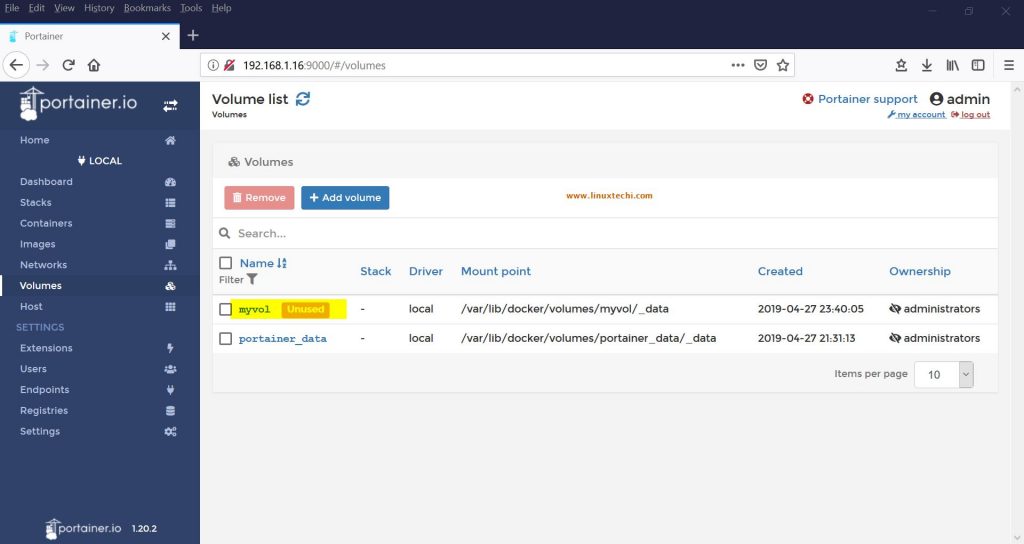
The newly created volume appears as below, (with unused state)
Conclusion:
As from the above installation steps, configuration and playing around with various options you can see how easy and fancy looking is Portainer.io tool is. This provides multiple features and options to explore on building, monitoring docker container. As explained this is very light weight tool, so doesn’t add any overload to host system. Next set-of options will be explored in part-2 of this series.
Read Also: Monitor and Manage Docker Containers with Portainer.io (GUI tool) – Part-2
