In this post, we cover how to install terraform on RHEL 9, Rocky Linux 9 or AlmaLinux 9.
Before we proceed further, what is Terraform? Created by Hashicorp, Terraform is a free and opensource declarative coding tool that allows you to automate and manage your IT infrastructure and various services that run on servers. In fact, Terraform is popularly referred to as ‘Infrastructure as a Code’ (Iac) tool.
Terraform makes use of a simple syntax to efficiently and safely provision resources across on-premise and cloud platforms such as Microsoft Azure, Google Cloud Platform and AWS. Where required, it can also re-provision these changes in response to changes in configuration.
Without much further ado, let us walk you through the installation steps of Terraform.
Install Terraform on RHEL 9, Rocky Linux 9 or AlmaLinux 9
Terraform rpm package is not available in the default package repositories of RHEL based distributions. So for its installation we must add its official yum or dnf repository to our system.
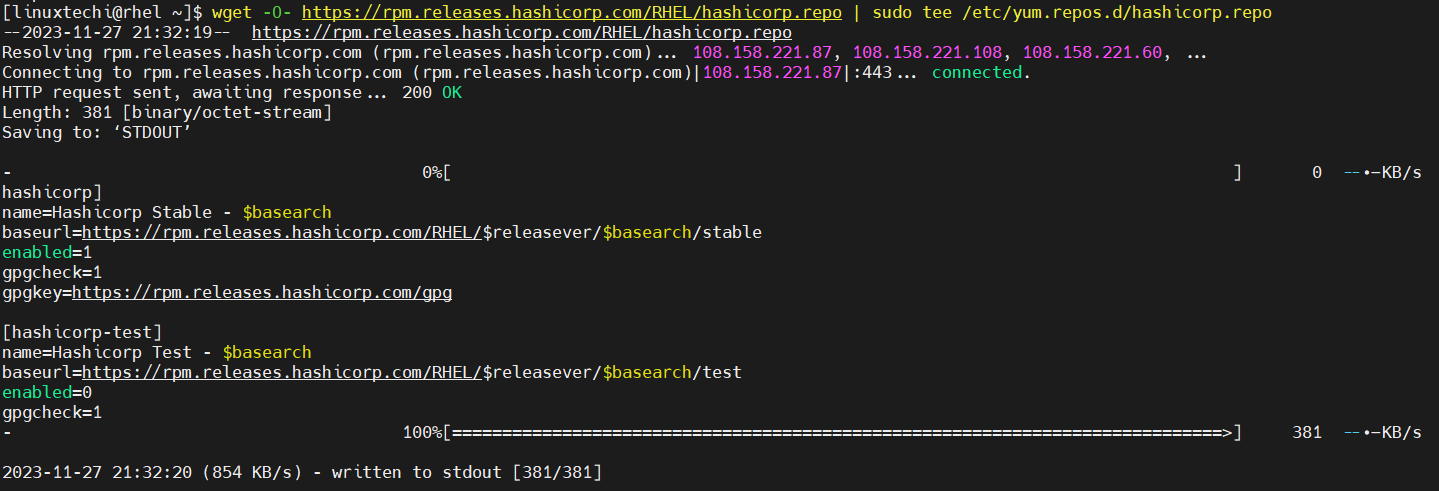
For RHEL 9 system, run beneath commands to add yum repository.
$ wget -O- https://rpm.releases.hashicorp.com/RHEL/hashicorp.repo | sudo tee /etc/yum.repos.d/hashicorp.repo
For Rocky Linux 9 or AlmaLinux 9, run
$ sudo dnf install -y dnf-plugins-core
$ sudo dnf config-manager --add-repo https://rpm.releases.hashicorp.com/$release/hashicorp.repo
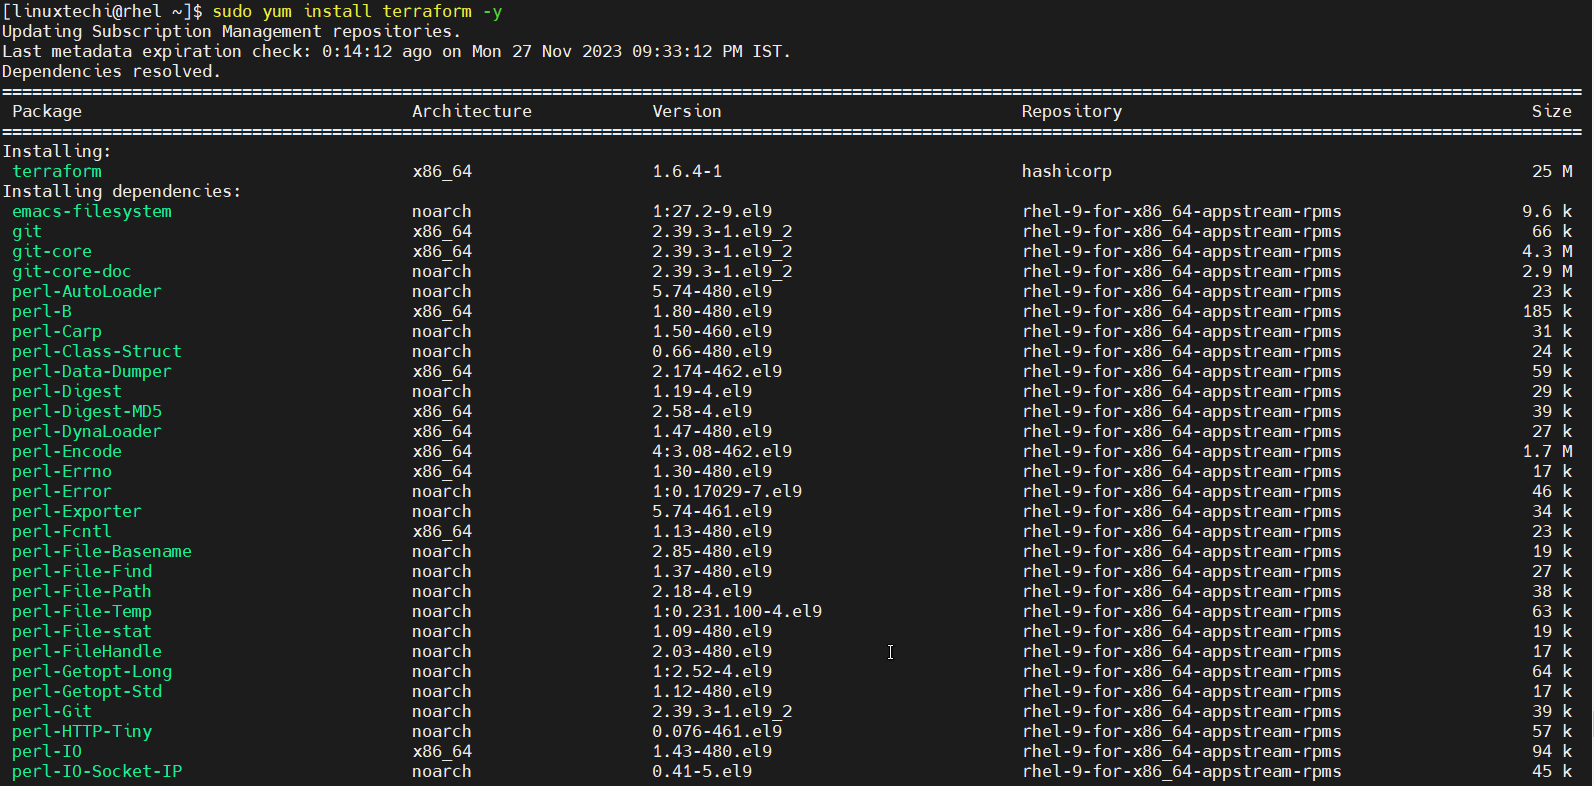
Next, run following command to install latest terraform,
$ sudo yum install terraform -y
or
$ sudo dnf install terraform -y
After the installation, verify terraform version, run
$ terraform version
Terraform v1.6.4
on linux_amd64
$
Test Terraform Installation
Before testing terraform, let’s understand it’s basic configuration files. A terraform project usually have following files:
- main.tf : This is the primary file where you define your main infrastructure components, such as resources, providers, and data sources.
- variables.tf: This file is used to declare input variables for your Terraform configuration. It allows you to parameterize your infrastructure code.
- outputs.tf: In this file, you define output values that can be queried after the Terraform apply. Outputs are useful for extracting information from your infrastructure.
- terraform.tfvars: This file is used to assign values to the variables declared in variables.tf. It allows you to specify actual values for your deployment.
- terraform.tfstate: Terraform maintains the state of your infrastructure in this file. It records the relationships between resources to track changes and updates.
- backend.tf: This file defines the backend configuration for storing the Terraform state. Common backends include remote storage solutions like AWS S3, Azure Storage, or HashiCorp Terraform Cloud.
In order to test terraform installation, let’s create a sample terraform project and will provision a file using local_file resource.
$ mkdir local-terraform
$ cd local-terraform/
Next, create main.tf file with following content.
$ vi main.tfresource "local_file" "devops-tools" {
  filename = "/tmp/distros.txt"
  content = "There are multiple DevOps tolls like Jenkins, Gitlab, Github, Docker and Kubernetes etc"
}
save and close the file.
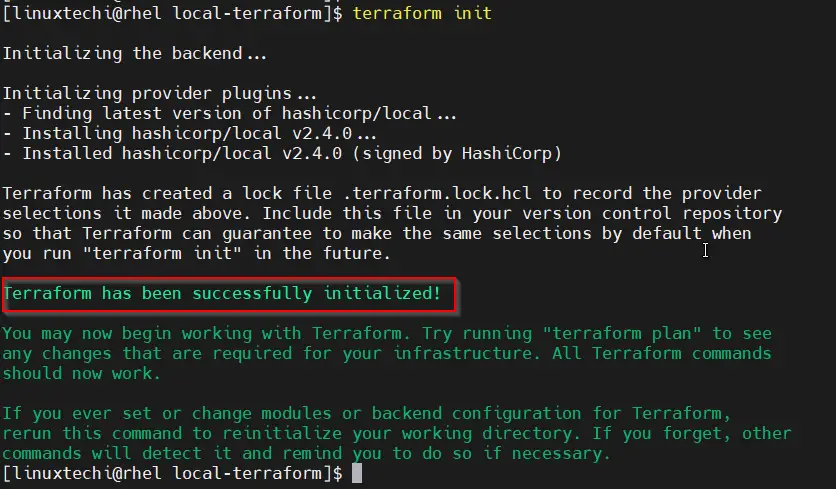
Now, initialize the terraform project, run beneath commands from folder where you have created main.tf file.
$ terraform init
Above command will download the required provider plugin, in our case it is “local_file”.
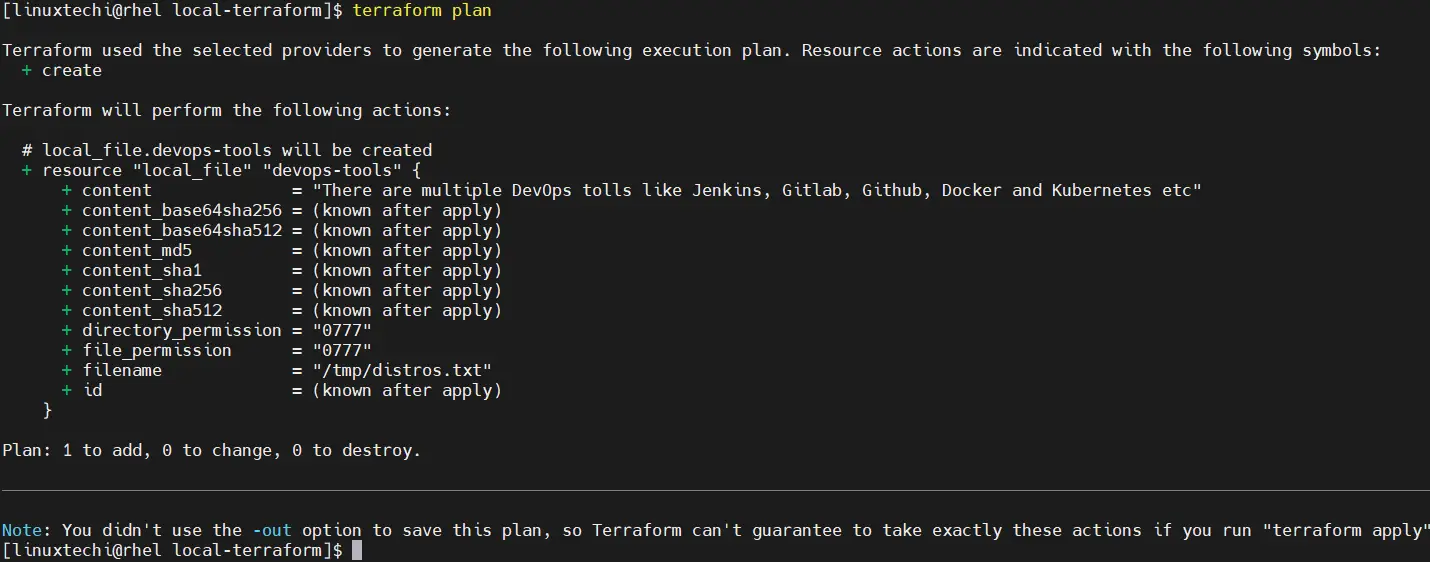
Next, run “terraform plan” to see which resources will be created. It is just like a dry run and will not create the actual resources.
$ terraform plan
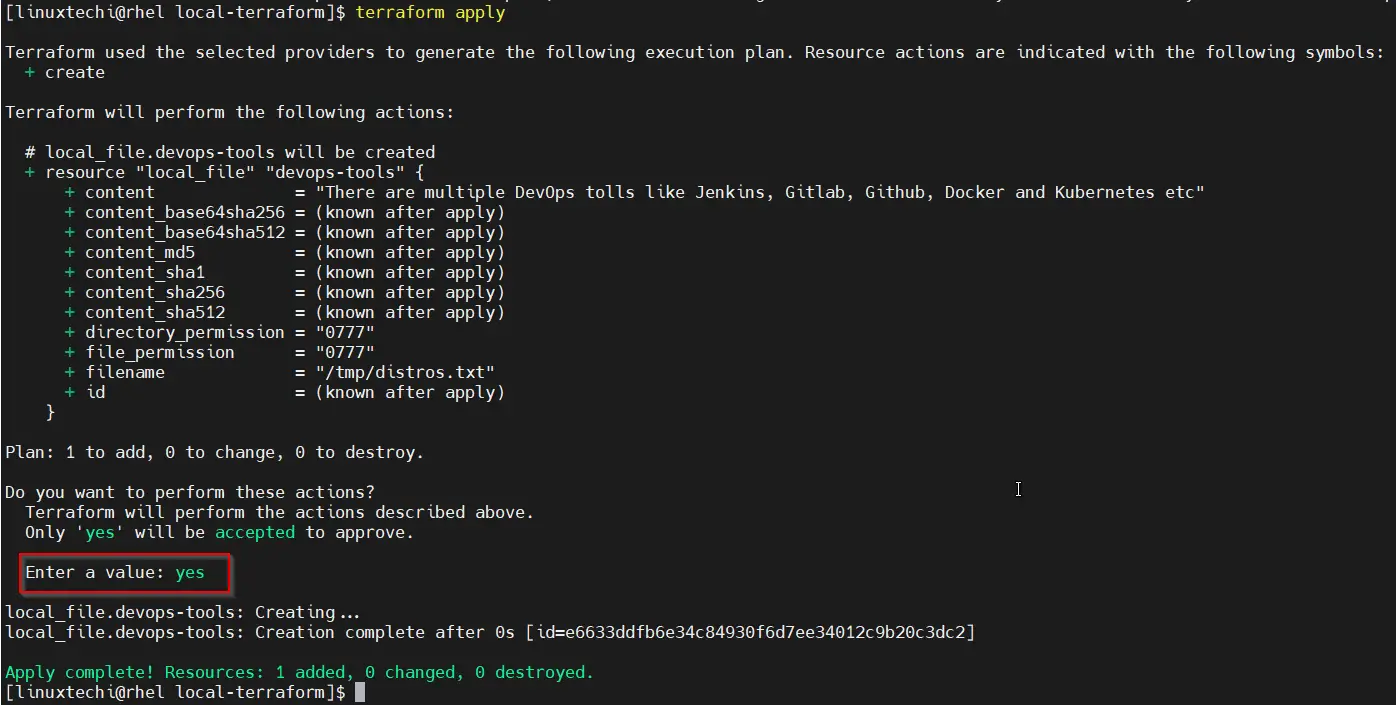
If you are fine with plan then go ahead and deploy the changes using ‘terraform apply‘ command.
$ terraform apply
Type yes to allow the actions
Output above confirms command has been executed successfully. To verify the resources status, run
$ terraform show
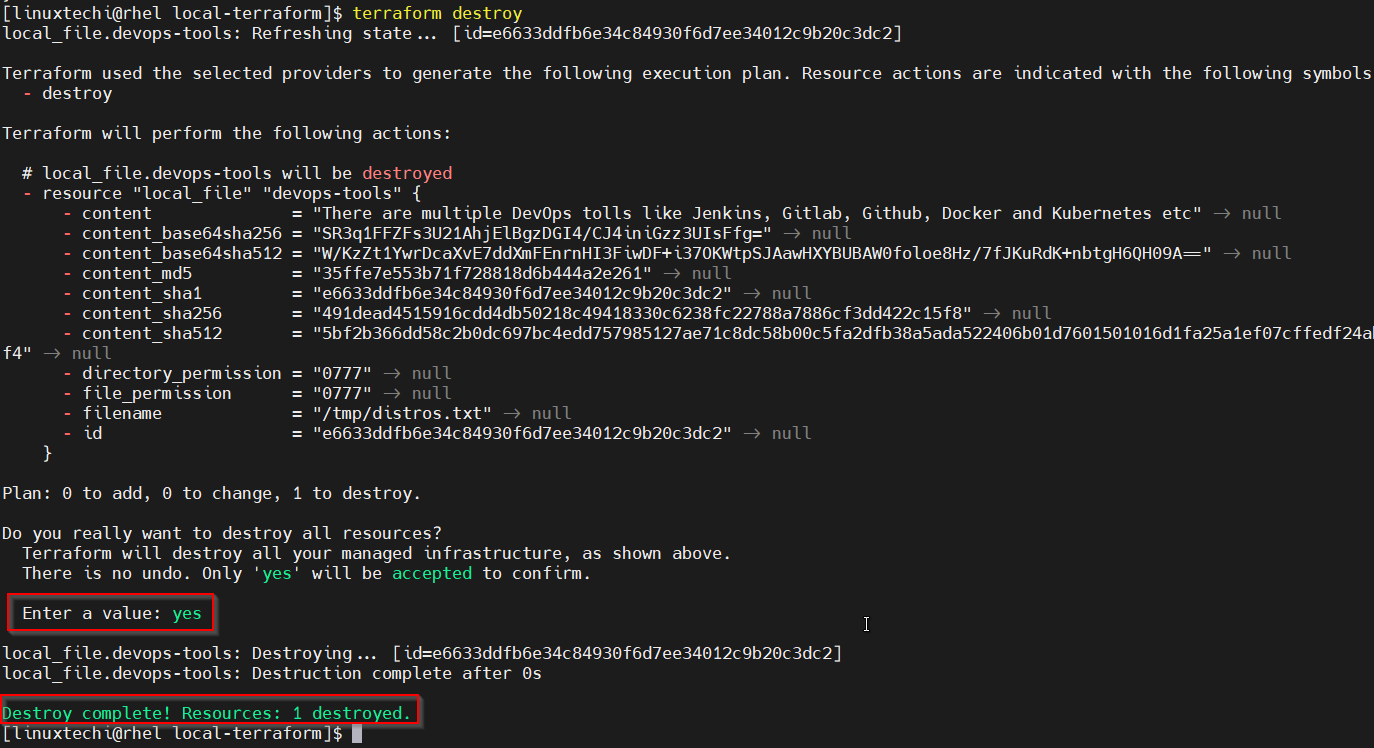
To remove above created resources, run “terrafom destroy” and type yes to perform the action.
$ terraform destroy
That’s all from this post, we hope that you have found it useful and informative. Kindly do post your queries and feedback in below comments section.




Thanks for the very useful post.