ReaR or Relax & Recover is a migration & disaster recovery tool. REAR creates a bootable image for the running Linux machine & when required same bootable image can be used to recover the system. Same image can be used to restore the OS to different hardware as well & hence REAR can also be used as a migration tool. REAR even detects the change of network cards, disk layouts or storage devices i.e. IDE to SCSI or CCISS.
REAR preserves the last condition of the OS including its partition, boot loader configuration, all the system data etc. It is successor to mkcdrc, it has been designed to simple & maintenance free. Its simple setup & forget nature make it the perfect solution for disaster recovery & migrations, in fact it is the leading open source disaster recovery solution.
In this tutorial, we will discuss how to setup REAR & use it to create a recovery of OS, store it on a NFS share & then we will restore the OS from created recovery image.
So before we proceed with REAR installation, we will create a NFS share on a remote machine for storing our recovery images.
Creating NFS share
We are using another CentOS 7 machine with IP address 192.168.0.106 for using as a NFS server. To install NFS on the machine, execute the following command,
[linuxtechi@localhost ~]$ sudo yum install nfs-utils
After NFS package has been installed, we will create a directory for storing the image
[linuxtechi@localhost ~]$ sudo mkdir /backup
Now we will configure the created directory for NFS share, open the NFS configuration file
Edit the file ‘/etc/exports’ and make the following entry,
[linuxtechi@localhost ~]$ sudo vi /etc/exports

/backup       *(fsid=0,rw,sync,no_root_squash,no_subtree_check,crossmnt)
Once done, save the file, exit & restart the NFS service to implement the changes made,
[linuxtechi@localhost ~]$ sudo systemctl restart nfs
Next we will install & configure the REAR server.
REAR installation & configuration on CentOS 7 / RHEL 7
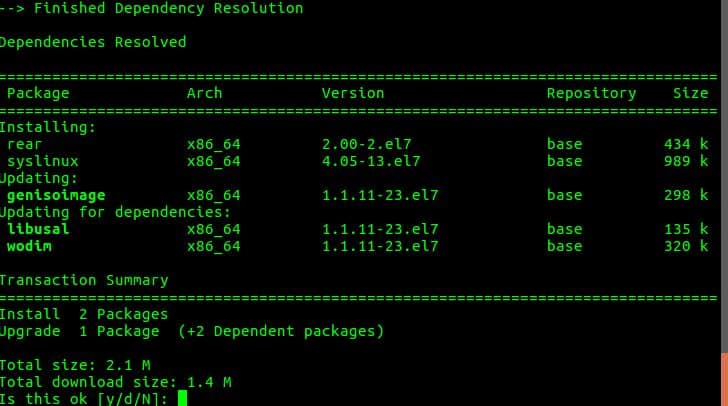
We now need to install the packages for REAR & required packages for creating ISO image of the backup server. To install all these packages, run the following command
[linuxtechi@localhost ~]$ sudo yum install rear syslinux genisoimage
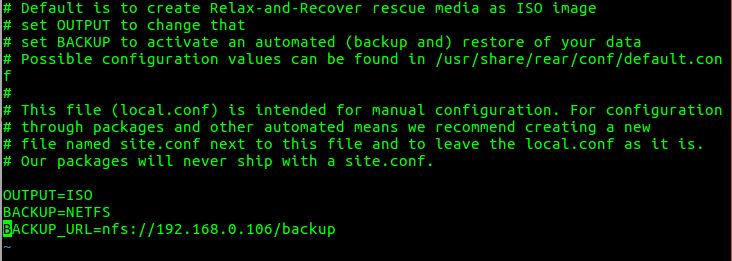
Next we will configure the REAR server to storing the created backup ISO images on our remote NFS server. Open the REAR configuration file i.e. ‘/etc/rear/local.conf‘,
Add the below details for NFS server in the following format,
[linuxtechi@localhost ~]$ sudo vi /etc/rear/local.conf
OUTPUT=ISO
BACKUP=NETFS
BACKUP_URL=nfs://192.168.0.106/backup
Save file & exit. We are now ready to create our first backup image of the system.
Creating Backup ISO
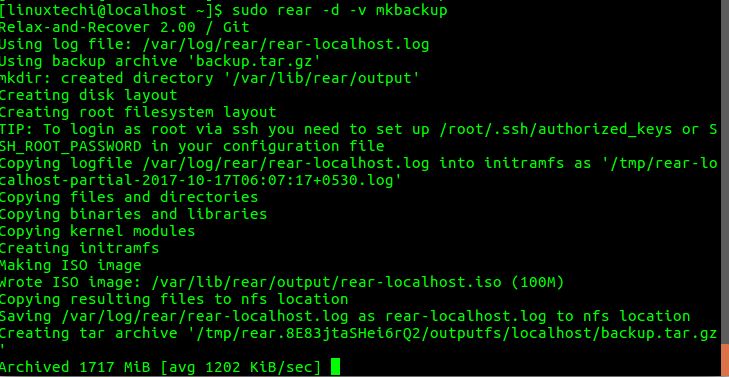
To create the disaster recovery of the system & generate the backup file, execute the following command,
[linuxtechi@localhost ~]$ sudo rear -d -v mkbackup
REAR will now examine & gather the necessary files required like disk layout, boot loader information etc & then will create an ISO image for OS under the directory ‘/var/lib/rear/output‘. After which all the files along with backup ISO image will be transferred to the NFS share.
Note:- This process can take some time depending on the size of the operating system.
Recovering the system
Now we need the recovery ISO (rear-localhost.iso) that was created & is available on our NFS server,
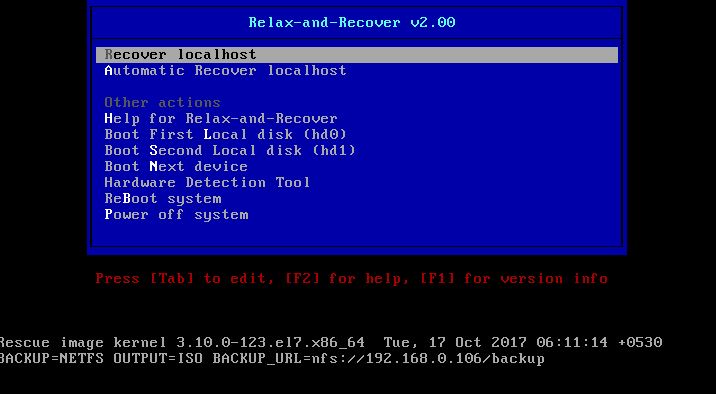
We will burn the ISO on CD or DVD & will boot up the system using the same. Once the system boots up with the image, we will be presented with a REAR menu,
Select the first option i.e. ‘Recover localhost‘ (‘localhost’ is the hostname of the system) & press enter. After this, we will now have our login menu, login using root without password,
Note:- We could also choose second option “Automatic Recover localhost“, but we need to make sure that there should not be any errors during recovery. Some common errors occurring during automatic recovery are due to network changes, disk layout changes etc. So if you are restoring the OS to same system, you can try out ‘Automatic Recovery‘ to automate the recovery process otherwise opt for Manual recovery.
Next step is to configure networking on our system as all other system related files are on our NFS share. To add an IP address, execute the following command
# ip addr add 192.168.0.50/24 dev enp0s3
# ip link set enp0s3 up
We can now access our NFS server, so we can now start the system recovery. Start recovery by executing,
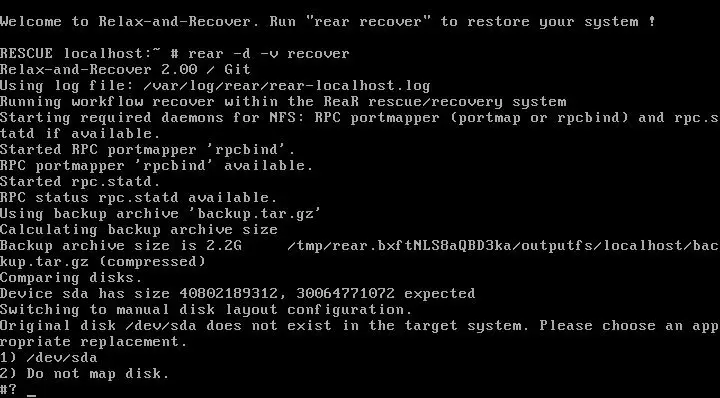
# rear -d -v recover
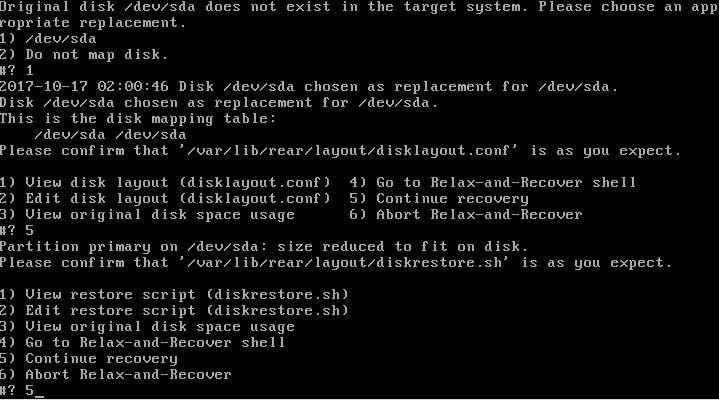
Now follow the on screen instructions,
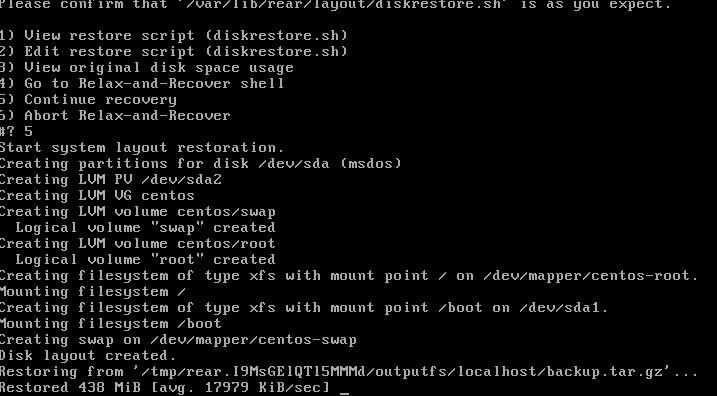
It will now ask for HDD layout (if it differ from original), after selecting the layout start recovery by pressing ‘5‘, system recovery will now start ,
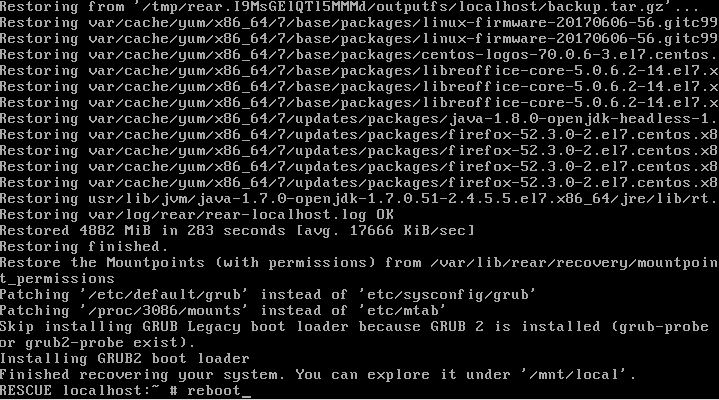
Depending on system data, recovery will take some time. Once the recovery has been completed, reboot the system.
Now remove the recovery DVD from the system & let the system start. Once fully booted, you can access the system with the same credentials as before & system will have all the data & services as there were previously on your system.
This completes our tutorial on REAR, Relax & Recover . If you have any queries or questions, please so leave them in the comment box below.




Hi, I am trying to recover a kvm guest but when type ” rear -d -v recover” , it does not go forward and fails generating the following error
mount.nfs: portmap query failed: RPC: Remote system error – Network is unreachable
——
ERROR : Mount command ‘mount -v -t nfs -o nfsvers=3,nolock <nfs-server-ip:/ /tmp/rear.ZBovVKifdgtx1zE/outoutfs’ failed.
Please advise
Hi Jack,
I believe your rear export location is not properly exported. First try to mount it manually. If worked, then go for rear. From the error it seems you have port connectivity issue.
1. Check you have network connectivity with nfs server. : –>ping nfs_server from recovery point.
2. Try to mount the exported filesystem -> mount -t nfs nfs_server_ip:/exported_dir /local_mount
you have to add these 2 commands after entering recovery mode
# ip addr add 192.168.0.50/24 dev enp0s3
# ip link set enp0s3 up
Hi,
I already get the rear-localhost-iso, but may I know for the other like “backup.tar.gz” that your show above do i need to create this or it already been create with ” sudo rear -d -v mkbackup”
Hi,
1)I successful make “rear-localhost.iso”, do I need to make “backup.tar.gz”?
2)Can I make pendrive as bootable instead burn to CD/DVD? because I already try use pendrive as bootable, it cannot load to “REAR” interface
Please advise.
Thanks
Hello admin!
Can you make a tutorial about REAR recovery from Network version (boot from network to the REAR server to recover the system)?
thanks