Nextcloud is a free and open source file hosting solution which allows the users to keep and sync their files, mails, contacts and calendars from their mobile devices and desktop client to nextcloud server. Nextcloud is founded by the co-founder of ownCloud ‘Frank Karlitschek‘
Some of the Key features of Nextcloud are listed below:
Perquisites to Install Nextcloud on RHEL 7 and CentOS 7
- Minimum of 512 MB RAM
- Web Server : Apache (httpd) / Nginx
- Database Server : MariaDB / MySQL / PostgreSQL
- PHP 5.4 +
Refer the following steps to install and configure Nextcloud 9 on CentOS 7.x and RHEL 7.x
Step:1 Install Apache Web Server, PHP and its dependent packages.
Use the below yum command to install Apache Web Server (httpd), PHP packages and its other dependent packages.
In the default CentOS and RHEL repositories PHP 5.4 packages are available
[root@nextcloud ~]# yum install httpd php php-mysql sqlite php-dom php-mbstring php-gd php-pdo php-json php-xml php-zip php-gd curl php-curl php-mcrypt php-pear
Start and enable Apache Web server’s service using beneath systemctl command :
[root@nextcloud ~]# systemctl start httpd ; systemctl enable httpd
Step:2 Install and Configure MariaDB database for Nextcloud
Run the below yum command to install MariaDB database.
[root@nextcloud ~]# yum install -y mariadb-server mariadb
Start and enable the MariaDB database service
[root@nextcloud ~]# systemctl start mariadb; systemctl enable mariadb
Execute the beneath command to set the root password for MaraiDB and configure other parameters like removing test database and disallow remoter root login
[root@nextcloud ~]# mysql_secure_installation
Create a Database with name ‘nextcloud_db’. Connect to the database with mysql command from the terminal and execute the below command
[root@nextcloud ~]# mysql -u root -p
Enter password:
Welcome to the MariaDB monitor. Commands end with ; or \g.
Your MariaDB connection id is 10
Server version: 5.5.47-MariaDB MariaDB Server
Copyright (c) 2000, 2015, Oracle, MariaDB Corporation Ab and others.
Type 'help;' or '\h' for help. Type '\c' to clear the current input statement.
MariaDB [(none)]> create database nextcloud_db;
Query OK, 1 row affected (0.00 sec)
MariaDB [(none)]>
Create a database user (nxtuser) and grant all the privileges to the user on the database ‘nextcloud_db‘
MariaDB [(none)]> grant all on nextcloud_db.* to 'nxtuser'@'localhost' identified by 'Nextcloud@123#';
Query OK, 0 rows affected (0.00 sec)
MariaDB [(none)]> FLUSH PRIVILEGES;
Query OK, 0 rows affected (0.00 sec)
MariaDB [(none)]> exit
Bye
[root@nextcloud ~]#
Step:4 Download the latest version of NextCloud
There are two ways to download latest version of nextcloud. Either Go to the nextcloud official site ‘https://download.nextcloud.com/server/releases/’ and download its latest version or we can download it from server’s command line using below wget command
[root@nextcloud ~]# wget https://download.nextcloud.com/server/releases/nextcloud-9.0.53.tar.bz2
Note: Please make sure wget and bzip2 packages are installed on your server, in case these packages are not installed then use the below command to install it.
[root@nextcloud ~]# yum install wget bzip2 -y
Extract the downloaded nextcloud ‘tar.biz2‘ file to Web Server’s document root (/var/www/html)
[root@nextcloud ~]# tar -jxpvf nextcloud-9.0.53.tar.bz2 -C /var/www/html/
Set the required permissions on nextcloud directory and its sub directories and files
[root@nextcloud ~]# cd /var/www/html/
[root@nextcloud html]# chown -R apache:apache nextcloud
Step:5 open the ports in firewall for nextcloud
In Case Firewall is running on your system then set the following firewall rules using ‘firewall-cmd‘ command.
[root@nextcloud ~]# firewall-cmd --permanent --zone=public --add-service=http
[root@nextcloud ~]# firewall-cmd --permanent --zone=public --add-service=https
[root@nextcloud ~]#  firewall-cmd --reload
In my Case I am putting selinux in permissive mod using below command
[root@nextcloud ~]# setenforce 0
Make it permanent by updating the below parameter in the file “/etc/sysconfig/selinux”
SELINUX=permissive
Step:6 Now Access nextCloud portal from Web Browser
Complete the nextcloud installation by accessing it from web browser.
http://<ip-address-your-server>/nextcloud
In my Case server’s ip address is “192.168.56.15”
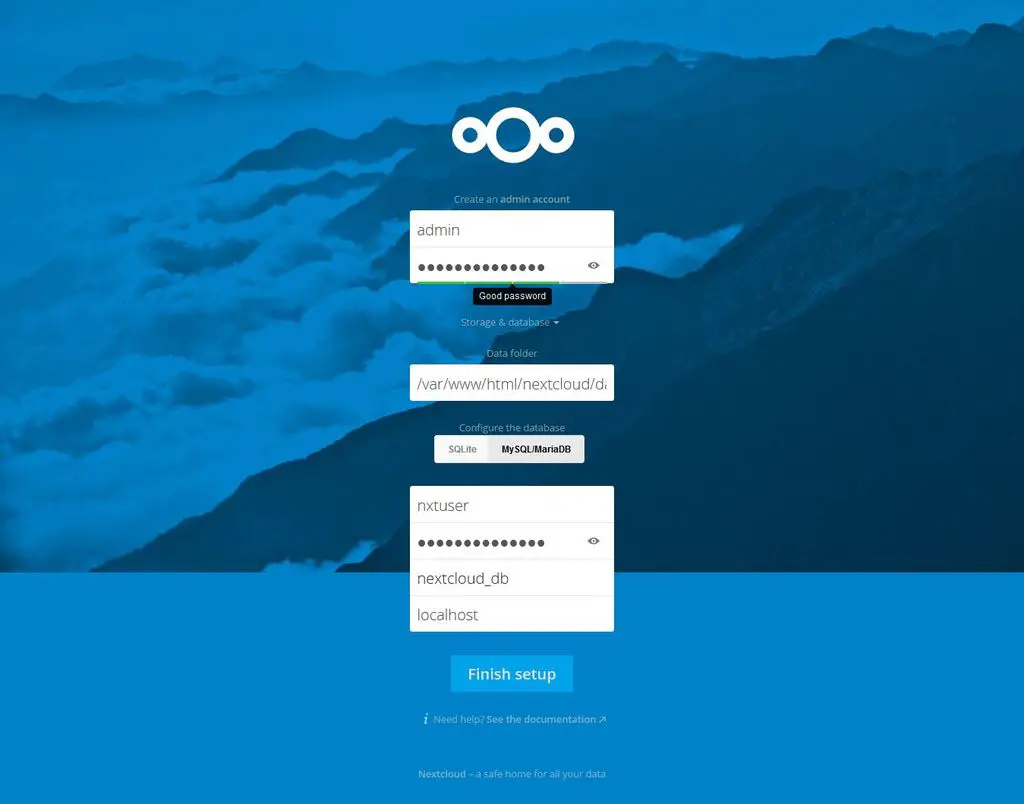
Specify the user name as admin and password that you want to set, Select the Database type as MariaDB and mentioned the database name, database user and its credentials. Once you’re are done with settings then click on finish Setup.
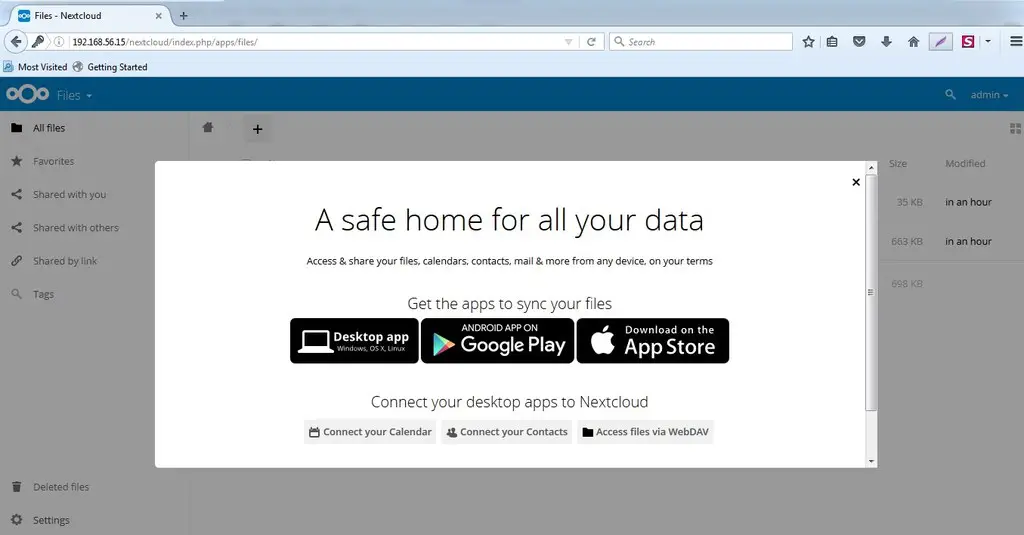
Select the application that you will be using for syncing your files. You can also skip this by clicking on cross symbol (x).
Step:7 Change the upload file size limit for nextcloud.
By default maximum of 2MB file can be uploaded on nextcloud, if you wish to upload files larger than 2 MB then we need to change some parameter value in /etc/php.ini
[root@nextcloud ~]# vi /etc/php.ini
…………………
post_max_size = 30M
upload_max_filesize = 30M
………………………
Restart the Web server’s Service
[root@nextcloud ~]# systemctl restart httpd
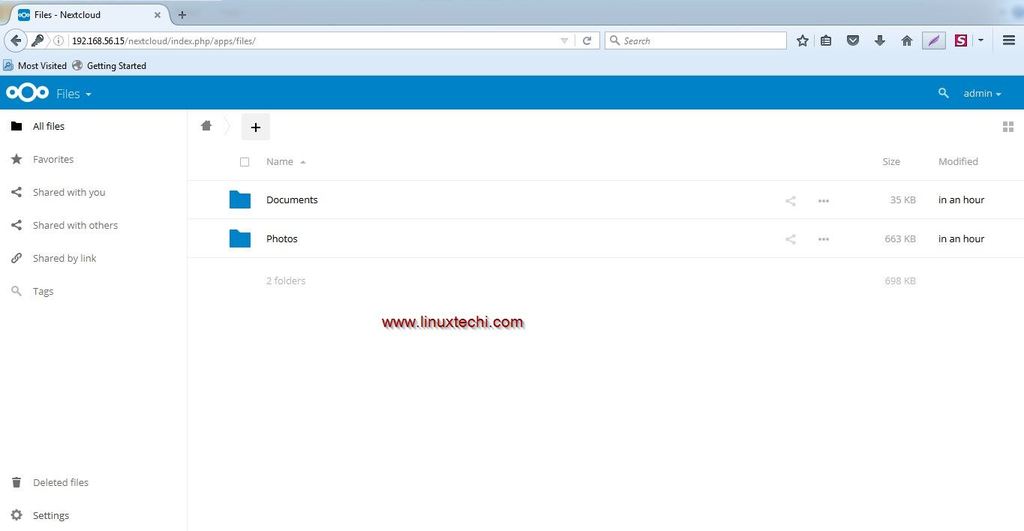
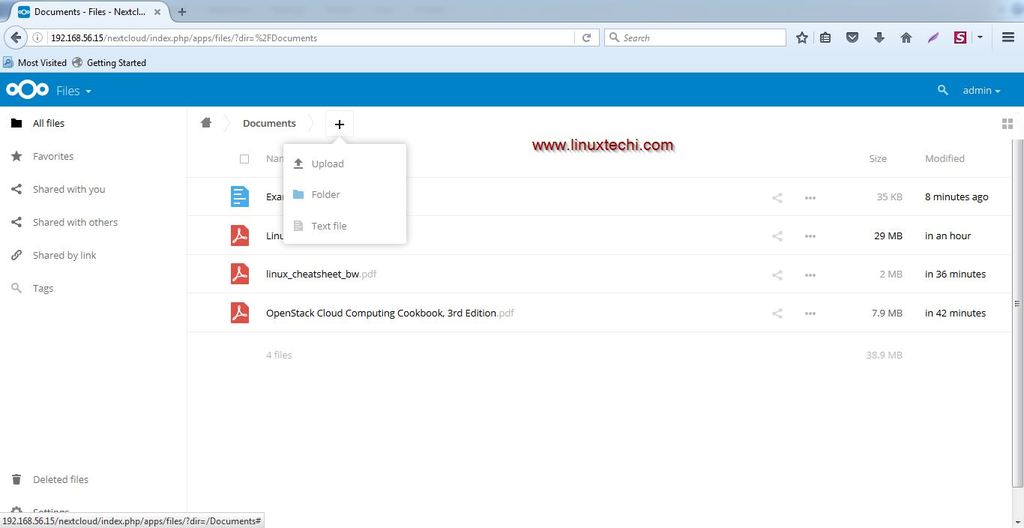
Now start uploading the files and share with your contacts
That’s all, Explore the Nextcloud and have fun 🙂

These instructions worked well. If you have another server like nginx running, be sure to go into apache.config and change the port to something else for the apache webserver to run along with making a rule for the firewall for apache.
Setting up a Server to permissive mode is a bad idea. Refer to the SELINUX section of NextCloud Admin guide for proper apps, data and config folder permissions.
Hello Jl ,
Thanks for the Comments, In Case SELINUX is enabled on your Linux box, One should run the beneath commands as root .
[root@nextcloud ~]# semanage fcontext -a -t httpd_sys_rw_content_t ‘/var/www/html/nextcloud/data’
[root@nextcloud ~]# restorecon ‘/var/www/html/nextcloud/data’
[root@nextcloud ~]# semanage fcontext -a -t httpd_sys_rw_content_t ‘/var/www/html/nextcloud/config’
[root@nextcloud ~]# restorecon ‘/var/www/html/nextcloud/config’
[root@nextcloud ~]# semanage fcontext -a -t httpd_sys_rw_content_t ‘/var/www/html/nextcloud/apps’
[root@nextcloud ~]# restorecon ‘/var/www/html/nextcloud/apps’
I have configure the same steps but when i access webpage from other pc it shows me some php scripts instead of that blue page of login…please guide
Try the following via command line:
php -v
If nothing pulls through sounds like PHP isn’t installed or installed correctly. Try the following:
yum install php php-mysql sqlite php-dom php-mbstring php-gd php-pdo php-json php-xml php-zip php-gd curl php-curl php-mcrypt php-pear -y
if that doesn’t work try the following:
yum install epel-release -y
yum install php php-mysql sqlite php-dom php-mbstring php-gd php-pdo php-json php-xml php-zip php-gd curl php-curl php-mcrypt php-pear -y
Hello. Just for your information when use version 10 of nextcloud (i dont know if those errors in version 9 exist).
When you do:
Create a database user (nxtuser) and grant all the privileges to the user on the database ‘nextcloud_db‘
Then you will get in log file this:
Database creation failed: An exception occurred while executing ‘GRANT ALL PRIVILEGES ON `nextcloud_db` . * TO ‘nxtuser”: SQLSTATE[42000]: Syntax error or access violation: 1044 Access denied for user ‘nxtuser’@’localhost’ to database ‘nextcloud_db’
You dont have to create a DB User. Just for the first time you start the installation wizzard, use the DB root user and password.
Then all is fine 🙂
It will generate a database user and random password. You can find it then in nexcloud installation folder /var/www/html/nextcloud/config/config.php (or where you installed it)
i.e. you choose the admin user in the wizzard with username “admin” then the database user “oc_admin” been create with the random password.
No errors then in log so far.
People who want to use php5.5 can use Red Hat Software Collections (SCL) repository.
‘https://docs.nextcloud.com/server/10/admin_manual/installation/php_55_installation.html’
Hello I have a weird problem, I set up everything and is working good. I install the NextCloud in a VM locally in my home. Setup HTTPS redirection and it is working perfectly when I am outside my home and everything seems to be working perfectly. But, the thing is if I access my cloud thru my domain, (cloud.mydomain.com) out of my local network, work perfectly. the problem is when I get home I cant do it that way. if I open the browser and type ‘https://cloud.mydomain.com’ it never get to the nextcloud. but If I type my local ip address in the address bar of the NextCloud Server it opens perfectly. witch it like anoying everytime I get home remove the domain name and login with my local ip address.
Please HELP I am frustrated
Hello Yoel ,
Problem seems to be DNS server, Please check the DNS server ip of your machine at your home. Work around is that you can update the hosts file of your system set the below entries :
‘ip -Address-of-nextcloud’ cloud.mydomain.com
Great tutorial! Much appreciated.
Will definitely be looking to enable SELinux without any interference though.
If you want to use UTF8 4-byte characters such as Emojis on your server, the database needs to be created with character set utf8mb4 and collate utf8mb4_general_ci, e.g.:
CREATE DATABASE nextcloud CHARACTER SET utf8mb4 COLLATE utf8mb4_general_ci;
copied from it’s official page (system requirements).
Hey brother Good day, Greetings;
I need upload file size at least 10GB! i edited the file “upload_max_filesize = 10G” from /etc/php.ini but updated 8M at admin panel & user cant upload over 8M files. would you please help me, how can i increase max_ upload_file size? at lease 10GB
Hello…..
Whenever I am specify the user name as admin and password that I want to set, Select the Database type as MariaDB and mentioned the database name, database user and its credentials. Once done with settings then click on finish Setup. Then getting below problem :
“Error can’t create or write into the date directory /var/www/html/nextcloud/data”