Apache Tomcat is free and open source Web server and Servlet container founded by Apache Software Foundation (ASF). It provides the required Java web Server platform for running the Java code. One of the prerequisite of Apache Tomcat 9 is “Java 8“.
In this article we will walk through the installation steps of Apache Tomcat 9 on CentOS 7.x/ RHEL 7.x and Ubuntu 16.04.
Step:1 Install Java 8 on CentOS 7.x and RHEL 7.x
Java 8 packages are available in the defaults CentOS and RHEL repositories, run the below yum command from the console.
[root@cloudworld ~]# yum install java-1.8.0
Run the beneath command to check Java version :
[root@cloudworld ~]# java -version
openjdk version "1.8.0_101"
OpenJDK Runtime Environment (build 1.8.0_101-b13)
OpenJDK 64-Bit Server VM (build 25.101-b13, mixed mode)
[root@cloudworld ~]#
Install Java 8 On Ubuntu 16.04 / 16.10
Java 8 is also available in Ubuntu 16.04/16.10 apt repositories, run the following apt command to install Java 8
linuxtechi@ubuntu:~$ sudo apt update
linuxtechi@ubuntu:~$ sudo apt install openjdk-8*
Check Java version
linuxtechi@ubuntu:~$ java -version
openjdk version "1.8.0_91"
OpenJDK Runtime Environment (build 1.8.0_91-8u91-b14-3ubuntu1~16.04.1-b14)
OpenJDK 64-Bit Server VM (build 25.91-b14, mixed mode)
linuxtechi@ubuntu:~$
Step:2 Download the Apache Tomcat 9 tar.gz file
We can download Apache tomcat 9 tar.gz either from its official Web site or using wget command from the terminal.
http://tomcat.apache.org/download-90.cgi
Downloading Tomcat from the terminal
[root@cloudworld ~]# wget http://www-eu.apache.org/dist/tomcat/tomcat-9/v9.0.0.M17/bin/apache-tomcat-9.0.0.M17.tar.gz
Step:3 Extract the downloaded file and set CATALINA_HOME variable
Run the beneath tar command to extract Apache tomcat 9 under the /opt folder.
[root@cloudworld ~]# tar -zxpvf apache-tomcat-9.0.0.M17.tar.gz -C /opt/
[root@cloudworld ~]# cd /opt/
[root@cloudworld opt]# mv apache-tomcat-9.0.0.M17.tar.gz tomcat
Before starting the Tomcat Service let’’s first set the required CATALINA_HOME environment variable using below commands :
[root@cloudworld ~]# echo "export CATALINA_HOME='/opt/tomcat/'" >> ~/.bashrc
[root@cloudworld ~]# source ~/.bashrc
[root@cloudworld ~]#
Step:4 Specify the Users for Manager GUI Page and Admin Page Access.
By default no user or account is allowed to access Manager GUI Page and Admin Page. So to grant access to the users add the following lines in the file “/opt/tomcat/conf/tomcat-users.xml” just above <tomcat-users> tag
<!-- User linuxtechi who can access only manager section -->
<role rolename="manager-gui" />
<user username="linuxtechi" password="<Enter-Secure-Password>" roles="manager-gui" />

<!-- User Admin Who can access manager and admin section both -->
<role rolename="admin-gui" />
<user username="admin" password="<Enter-Secure-Password>" roles="admin-gui" />
Step:5 Start Tomcat Service
Run the beneath commands one after the another to start tomcat service.
[root@cloudworld ~]# cd /opt/tomcat/bin/
[root@cloudworld bin]# ./startup.sh

To shutdown the tomcat service use below command
[root@cloudworld bin]# ./shutdown.sh
Open the tomcat ports in firewall.
As we know by default tomcat runs on 8080 port so in case firewall is running on your Linux box then set the following rule to open 8080 port on CentOS 7.x and RHEL 7.x.
[root@cloudworld ~]# firewall-cmd --permanent --zone=public --add-port=8080/tcp
success
[root@cloudworld ~]# firewall-cmd --reload
success
[root@cloudworld ~]#
Use the below command to open 8080 port in Ubuntu 16.04 / 16.10 firewall.
root@ubuntu:~# ufw allow 8080
Rule added
Rule added (v6)
root@ubuntu:~#
Note: You can skip this step if firewall is disabled on your server
Step:6 Access Apache Tomcat 9 page from the Web Browser
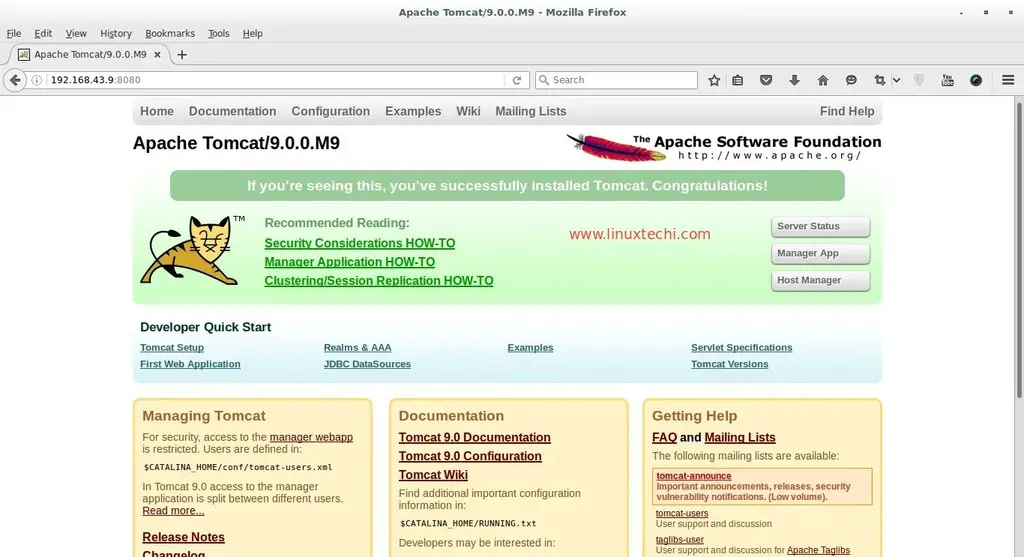
Open the web broswer type the following URL :
http://{ip-address-or-Hostname}:8080
In my case ip address of my server is “192.168.43.9”
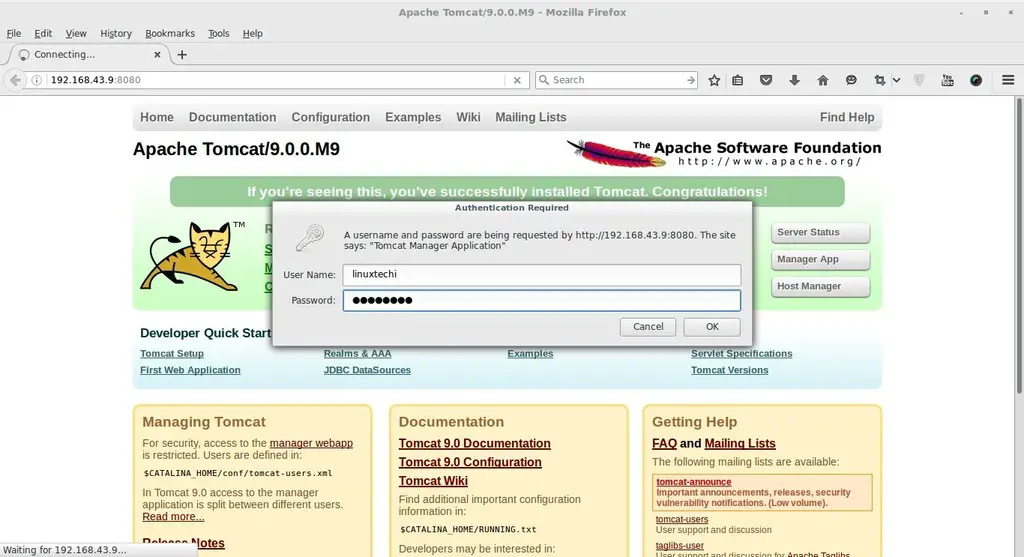
Click on “Manager App” , It will prompt us for the User name and password, specify the user’s credentials whatever we set in the file ‘tomcat-users.xml‘
Similarly We can view the Server Status by clicking on the option “Server Status”
Scenario : if you have installed Tomcat on remote server and want to access ‘Manger App’ and ‘Server Status’ on your local system’s web browser for that we need to create a file “manager.xml” under the folder “/opt/tomcat/conf/Catalina/localhost/” with the following content.
root@cloudworld ~]# cd /opt/tomcat/conf/Catalina/localhost/
[root@cloudworld localhost]# vi manager.xml
<Context privileged="true" antiResourceLocking="false"
  docBase="${catalina.home}/webapps/manager">
<Valve className="org.apache.catalina.valves.RemoteAddrValve" allow="^.*$" />
</Context>
Save and Exit the file
That’s all, Hope you like Tomcat 9 installation Steps 🙂
Sir,
I have configured apache-tomcat-9.0.31.tar.gz on RHEL 7.6 remote server at path /usr/local/tomcat9/ and followed ditto steps as you described beautifully.
Even I have created manager.xml file at path /opt/tomcat/conf/Catalina/localhost/ and added given content but getting errors on Server Status, Manager App and Host Manager button click.
‘HTTP Status 404 – Not Found’ for /manager/status, /manager/html and
‘403 Access Denied’ for /host-manager/html
Please guide.
Thank you. This is very help full.
Well explained. Very helpful.
Thank you so much.