Hello, readers! In this blog post, we will guide we will learn how to install PHP 8.4 or 8.3 on Ubuntu 24.04 LTS system. As of this writing, PHP 8.3 is available in the default repositories for Ubuntu 24.04, while PHP 8.4 can be found in the ppa:ondrej/php repository
As we know PHP is a server-side scripting language widely used in web development. PHP 8.4 / 8.3 comes with several improvements and new features such as enhanced performance, better error handling, and new language constructs that simplify coding.
Prerequisites
- Pre-install Ubuntu 24.04 Instance
- Local User with sudo rights
- Internet connectivity
Without any further delay let’s deep dive into PHP 8 installation steps on Ubuntu 24.04
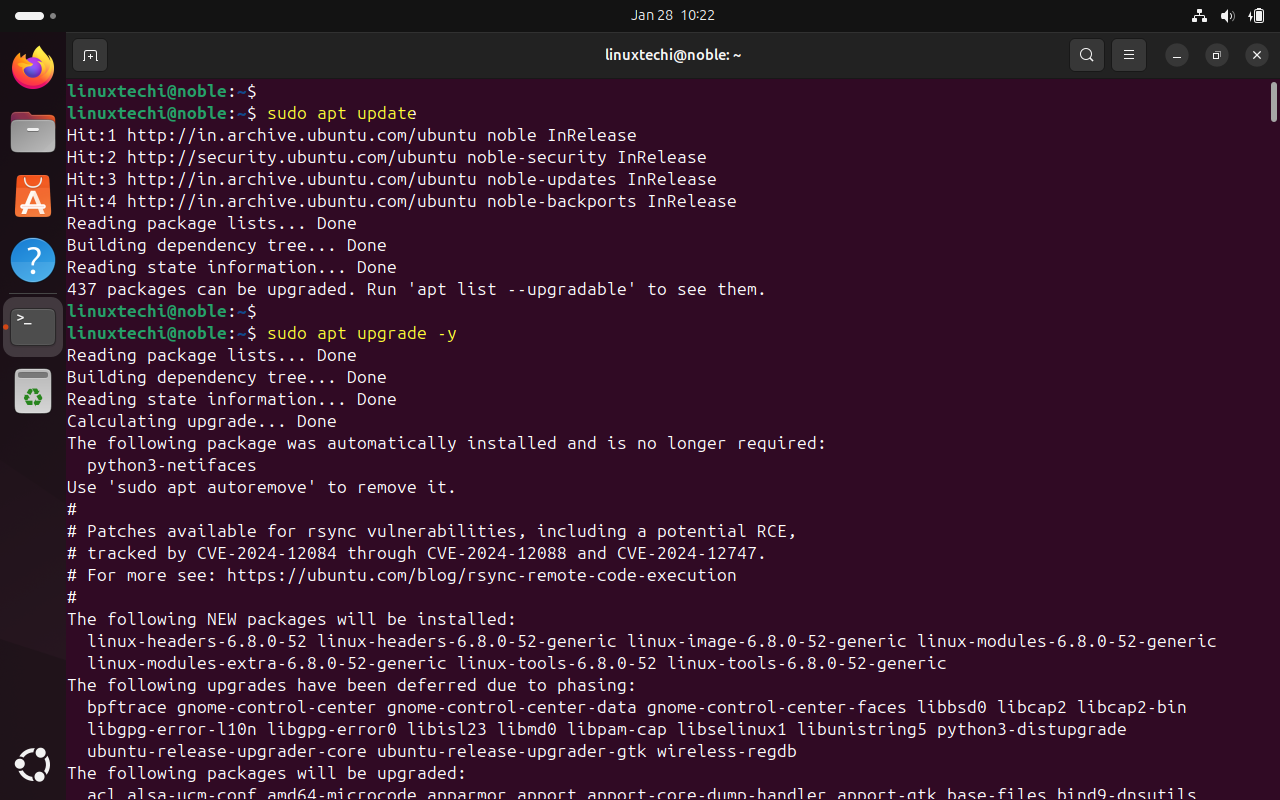
1) Update Your System
Before you begin, it’s a good idea to make sure your system is up to date. Open the terminal and run the following apt commands to install all available updates.
$ sudo apt update
$ sudo apt upgrade -y
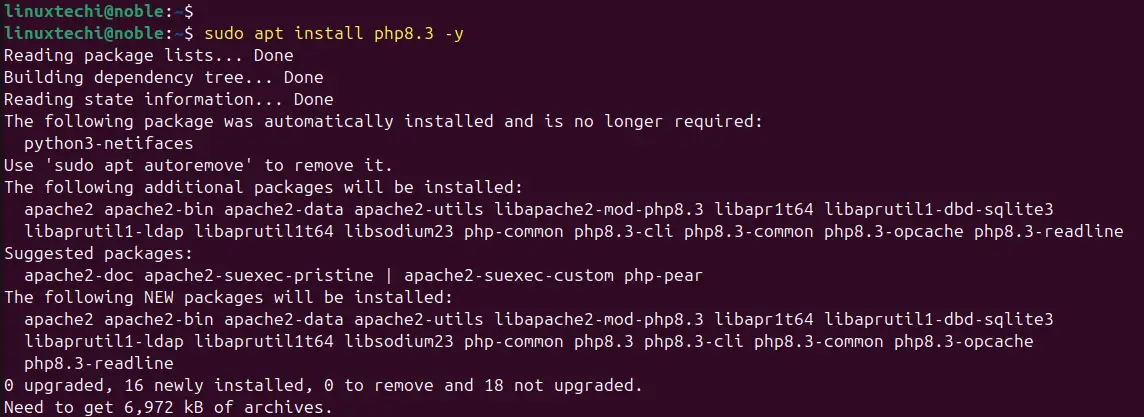
2) Install PHP 8.3 Using Default APT Repository
PHP 8.3 and its dependencies are available in Ubuntu 24.04’s default APT repositories. To install it, simply run the following APT command.
$ sudo apt install php8.3 -y
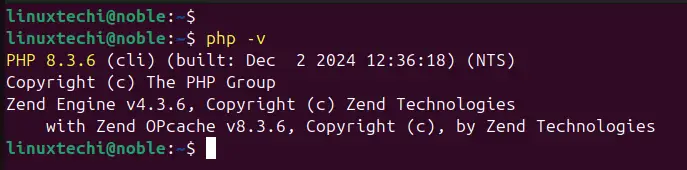
Once the php is installed, verify its version by running the command.
$ php -v
Install PHP 8.4 On Ubuntu 24.04
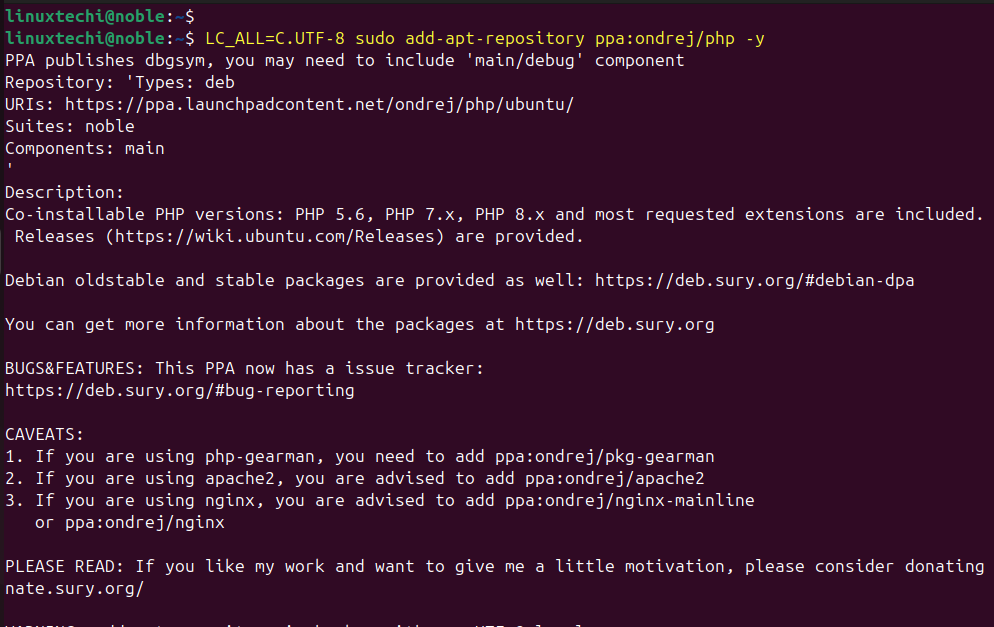
As of the time of writing, the latest version of PHP is 8.4. However, it’s not yet available in the default Ubuntu 24.04 repositories. To install it, you’ll need to add the Ondřej Surý PPA, a widely trusted source in the Ubuntu community.
Run following command:
$ LC_ALL=C.UTF-8 sudo add-apt-repository ppa:ondrej/php -y
Next, install php 8.4 using following apt commands.
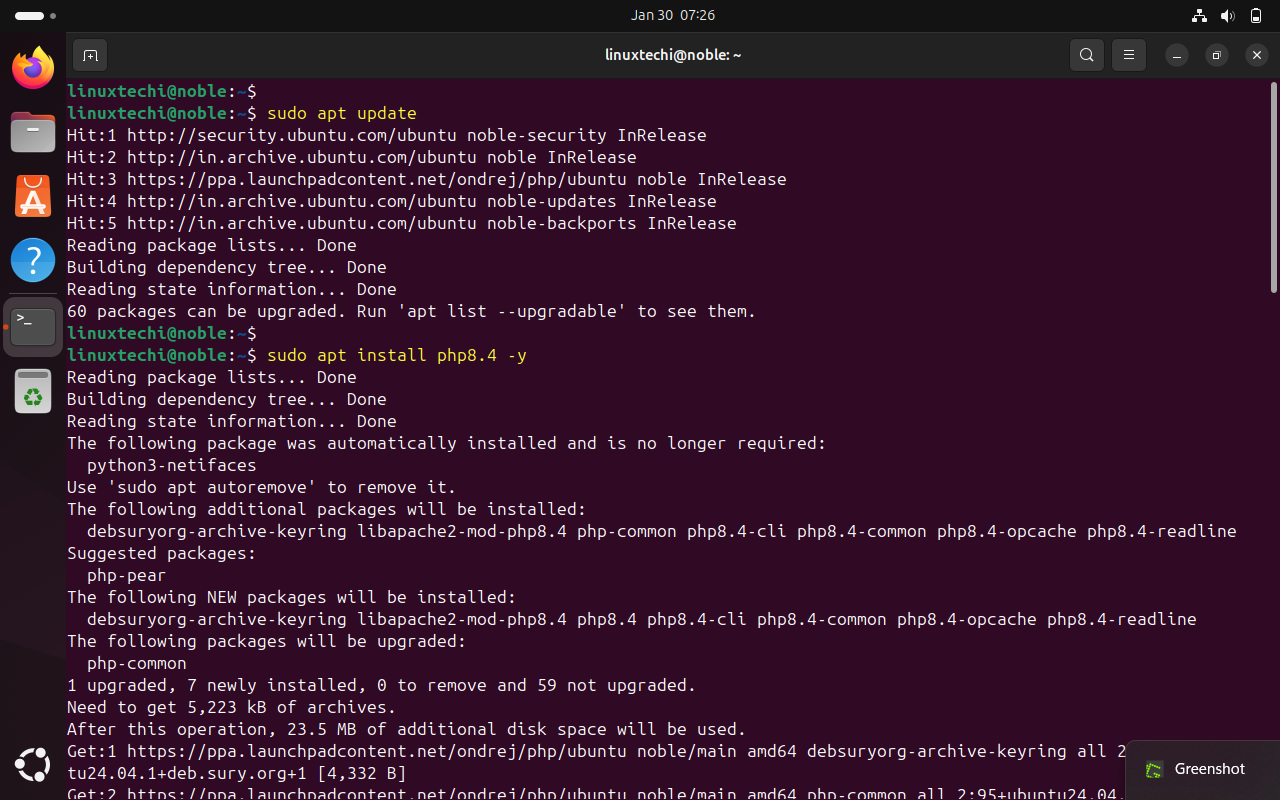
$ sudo apt update
$ sudo apt install php8.4 -y
Once installed, execute php -v command to verify php version.
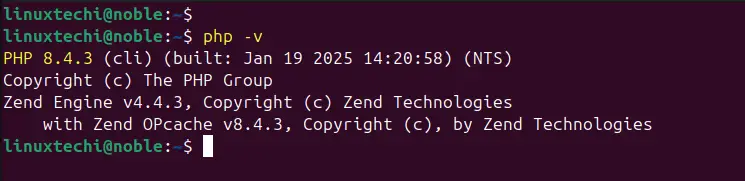
Great, output shows that you installed PHP 8.4.3.
3) Install PHP 8.3/8.4 Extensions
To enhance your PHP’s functionality, you should install additional PHP extensions. Here are some commonly used extensions:
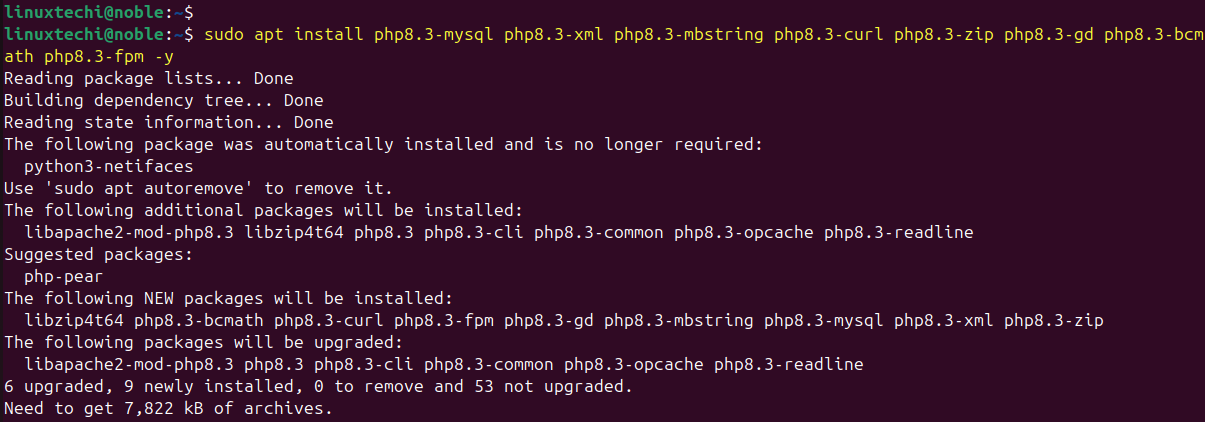
// For PHP 8.3, run following command
$ sudo apt install php8.3-mysql php8.3-xml php8.3-mbstring php8.3-curl php8.3-zip php8.3-gd php8.3-bcmath php8.3-fpm -y
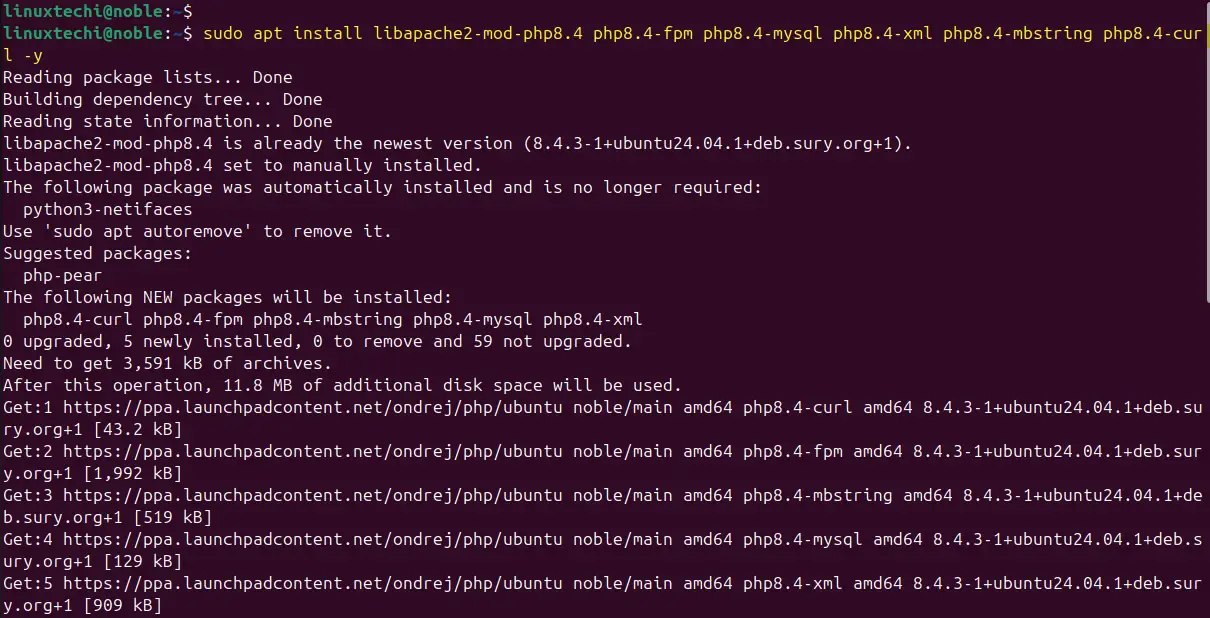
// For PHP 8.4, execute beneath command.
$ sudo apt install libapache2-mod-php8.4 php8.4-fpm php8.4-mysql php8.4-xml php8.4-mbstring php8.4-curl -y
Once above extensions are installed, verify by running the command:
$ php -m
4) Configure PHP 8.4 or 8.3 (Optional)
We can modify PHP settings by editing the `php.ini` file. The file’s location depends on whether PHP is being used for the command line or a web server:
Command Line:
PHP 8.4: ‘/etc/php/8.4/cli/php.ini’
PHP 8.3: ‘/etc/php/8.3/cli/php.ini’
Web Server (Apache/Nginx):
PHP 8.4:
Apache: ‘/etc/php/8.4/apache2/php.ini’
Nginx (PHP-FPM): ‘/etc/php/8.4/fpm/php.ini’
PHP 8.3:
Apache: /etc/php/8.3/apache2/php.ini
Nginx (PHP-FPM): /etc/php/8.3/fpm/php.ini
To edit the ‘php.ini‘ file, use a text editor like `vi` or `vim`:
For PHP 8.4 (Command Line):
$ sudo vi /etc/php/8.4/cli/php.ini
For PHP 8.3 (Command Line):
$ sudo vi /etc/php/8.3/cli/php.ini
Make the changes as per your requirements, save and close the file. Restart the web server if required.
5) Test PHP 8 with Web Server
If you are using PHP with a web server like Apache or Nginx, you can test your installation by creating a sample PHP file.
Note: If you have installed PHP 8.3 and PHP 8.4 and wants to make PHP 8.4 as the default php for your web server then run following commands.
$ sudo a2dismod php8.3       // This will disable PHP 8.3
$ sudo a2enmod php8.4       // This will enable PHP 8.4
To make above changes into the affect, restart Apache web service using
$ sudo systemctl restart apache2
For Apache Web server
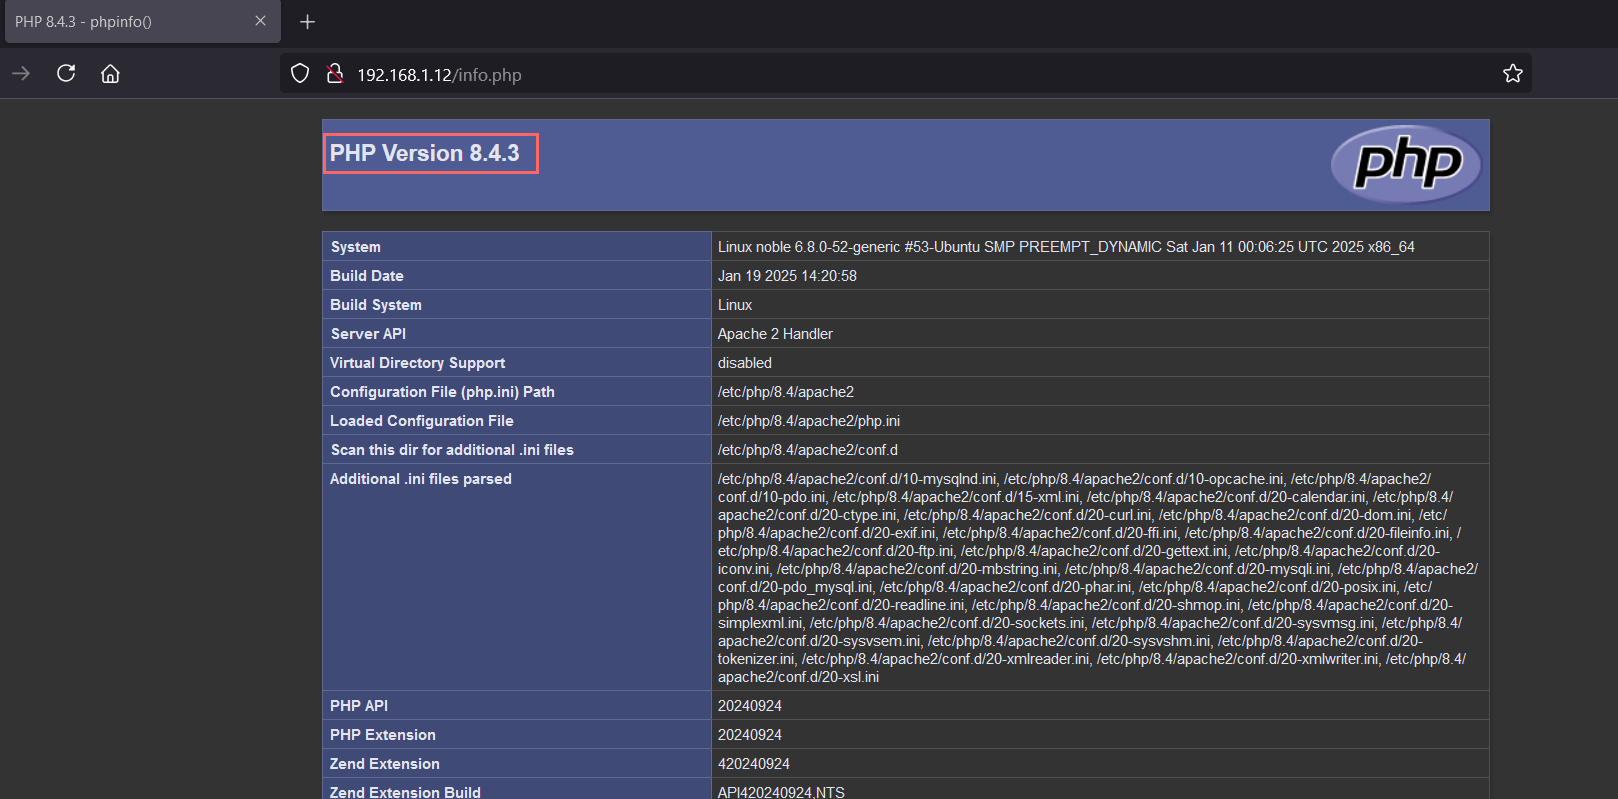
Create a PHP file (info.php) in the document root (/var/www/html/) using text editor.
$ sudo vi /var/www/html/info.php
<?php
phpinfo();
?>
Save and close the file.
Now, open the web browser, type following URL:
http://<Your-Ubuntu-System-IP-Address>/info.php
For Nginx web server
Create info.php file under the folder /usr/share/nginx/html with following content.
$ sudo vi /usr/share/nginx/html/info.php
<?php
phpinfo();
?>
Save and close the file.
That concludes our guide! We hope these instructions were helpful and easy to follow. If you have any questions or feedback, feel free to share them in the comments below.