In this post, you will learn how to dual boot Windows 11 and Ubuntu 24.04 step-by-step.
There are two ways of running Linux alongside Windows. You can choose to install a hypervisor such as Oracle VirtualBox or VMware on Windows and install a Linux distribution such as Ubuntu. However, virtualization comes with its limitations, and you are not able to reap the full benefits of running a guest OS. The second option is to implement a dual boot configuration which will let you run both systems on your PC hardware without having to install either OS on a separate machine.
With a dual boot setup, you are prompted to select the operating system to boot into from the boot options. You can choose to boot into either Linux or Windows. This lets you have the best of both worlds since you’ll be running each system directly on the hardware. Keep in mind that you can only run one operating system at a time.
Prerequisites
To configure the dual-boot setup, ensure you have the following set of requirements:
- A bootable USB pen drive of Ubuntu 24.04. Download the Ubuntu 24.04 ISO image from the Ubuntu desktop downloads page. Next, make the USB drive bootable using Rufus or UNetbootin, utilities for creating bootable media.
- Windows 11 system already installed with adequate disk space to create a free partition ( at least 30GB or more) for installing Ubuntu.
- You need to disable Bitlocker. If turned on, the hard drive will be left encrypted and Ubuntu will not be able to detect a pre-existing operating system.
- For best results, it’s recommended to implement the dual-boot setup on a UEFI. Therefore ensure that Windows 11 is configured to boot using UEFI.
- A fast and stable internet connection for installing third-party software and multimedia codes and updates.
Dual Boot Windows 11 and Ubuntu 24.04 Steps
Refer the following steps in order to setup dual boot Windows 11 and Ubuntu 24.04.
1) Create a free partition for installing Ubuntu
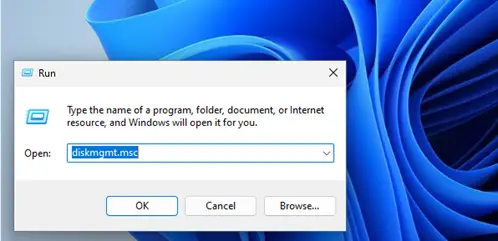
The first order of business is to create a separate partition for installing Ubuntu. To do so, launch the disk management by pressing Windows Key + R and diskmgmt.msc and hit ENTER.
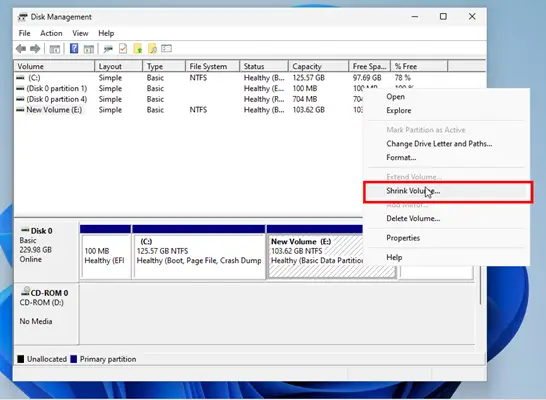
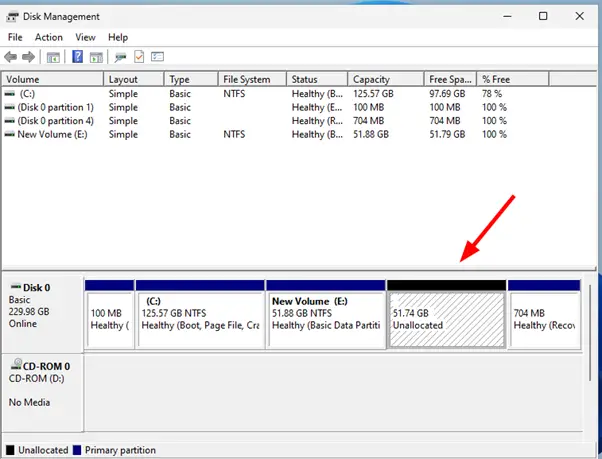
This opens the disk management utility that displays all the partitions. In our setup, we have two partitions: C and E. This might be different in your case. We will create a new partition in Volume E.
To create a free reserved space Right-click and select the `Shrink Volume` option.
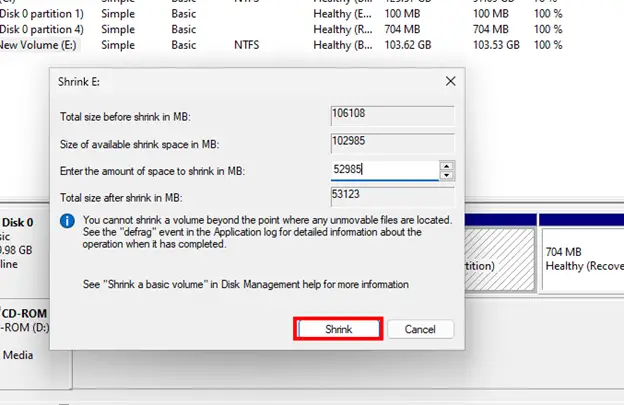
In the dialogue that appears, specify the amount of space to shrink the volume in MB and click ‘Shrink’. In our case, we will shrink by 52985 MB (approximately 51GB ). This is the free space reserved for installing Ubuntu.
Then click `Shrink`.
The free space will be labeled as ‘Unallocated’ as shown.
Now plug the USB bootable drive into your machine and reboot it. Ensure you have configured the boot order in the BIOS to boot from the USB drive.
2) Boot the system With Installation Media
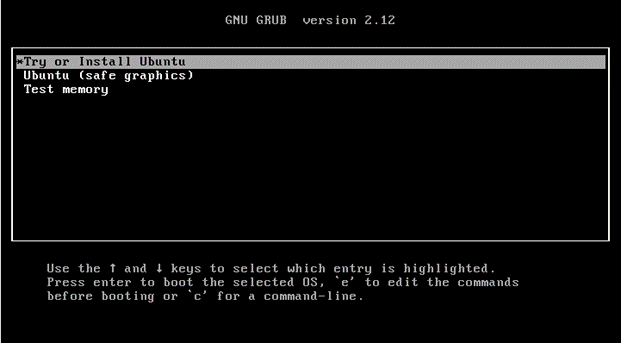
Once you have rebooted the system, the GRUB boot menu will be displayed. The first option (Try or Install Ubuntu) is pre-selected by default. Press ENTER to proceed.
The Ubuntu logo will be displayed as the system powers on.
3) Start the installation of Ubuntu 24.04
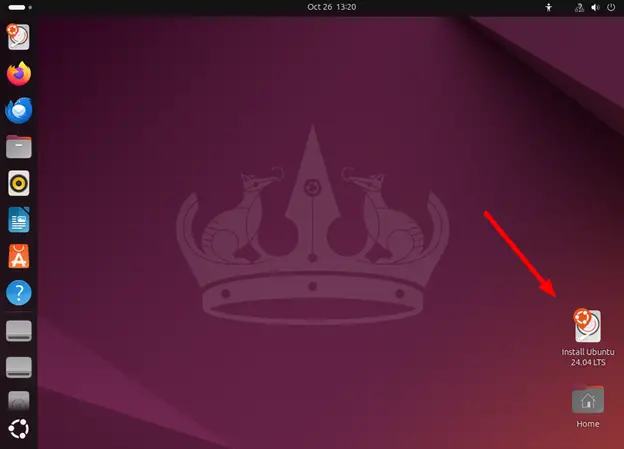
Once you have successfully booted your system, the Ubuntu 24.04 desktop will appear. On the bottom right corner, click the installer icon labeled ‘Install Ubuntu 24.04 LTS‘.
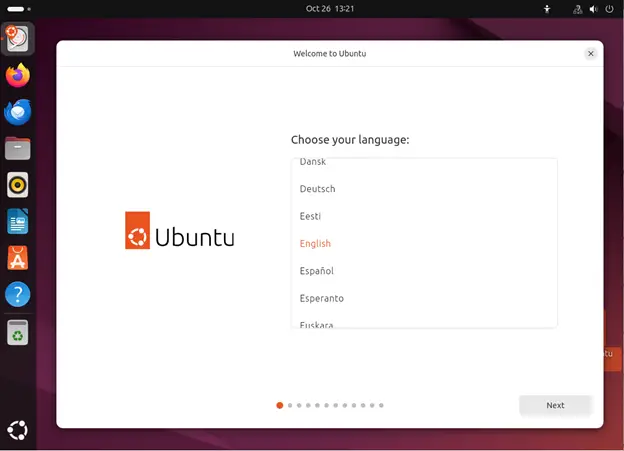
The installer window will appear, and the first step is to select the installation language. So, choose your preferred language and press ENTER or click NEXT.
4) Customize Accessibility options
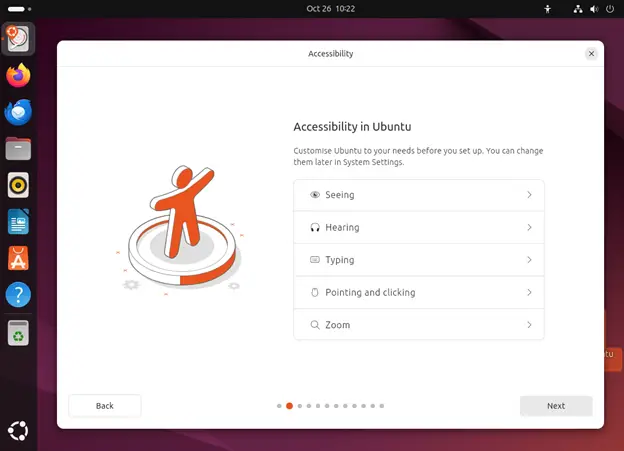
Ubuntu 24.04 provides an additional step to customize your system to your needs. This step lets you tweak visual, listening, typing, pointing, clicking, and zoom settings.
The default settings work just fine. However, if need be, take your time and tweak the settings to your preference. Then press ENTER or click ‘NEXT’ to proceed to the next step.
5) Configure Keyboard layout
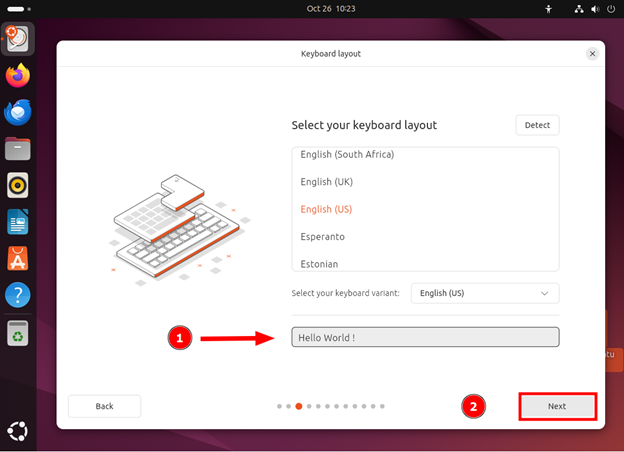
In this step, select your keyboard layout. You can type a few words in the text field to verify the layout type. Once you are satisfied, press ENTER or click ‘NEXT’ to proceed to the next step.
6) Select Internet Connection
During installation, an Internet connection is preferred to install additional packages, and third-party software and for compatibility checks. The `Wired Connection` selection is checked by default. If your system or PC has a wireless connection, you will have the option of connecting wirelessly.
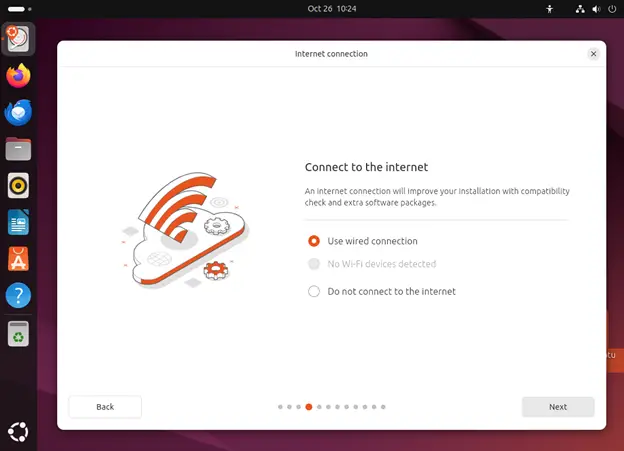
Once you have connected to the internet, press ENTER or click ‘NEXT’ to proceed to the next step.
7) Select to Install Ubuntu
Next, you might be prompted to update the installer. You can click `Update now` to update it or simply skip by clicking `Skip`.

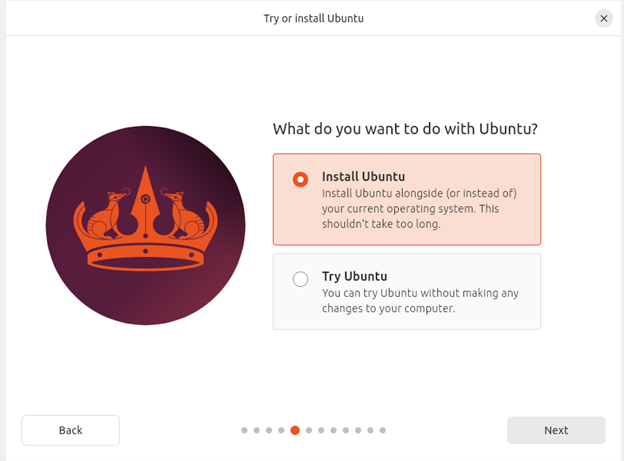
Since we are installing Ubuntu on the hard drive, select the first option ‘Install Ubuntu’ and hit ENTER.
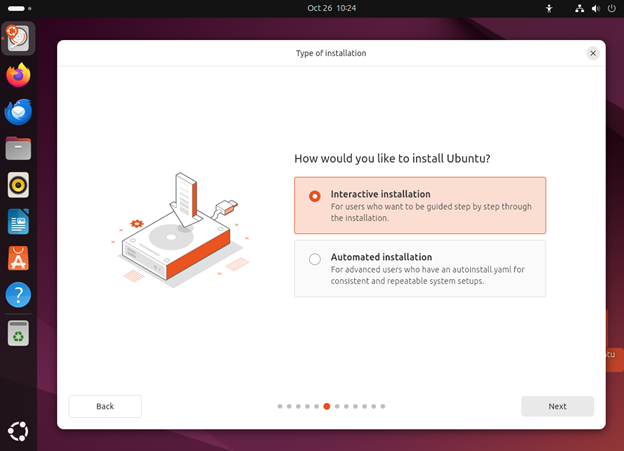
In this step, you will be asked your preferred mode of installing Ubuntu. Two options are presented: “interactive installation” and “Automated installation“. For simplicity, choose “interactive installation.” Then press ENTER or click ‘NEXT’ to proceed to the next step.
8) Select apps to install
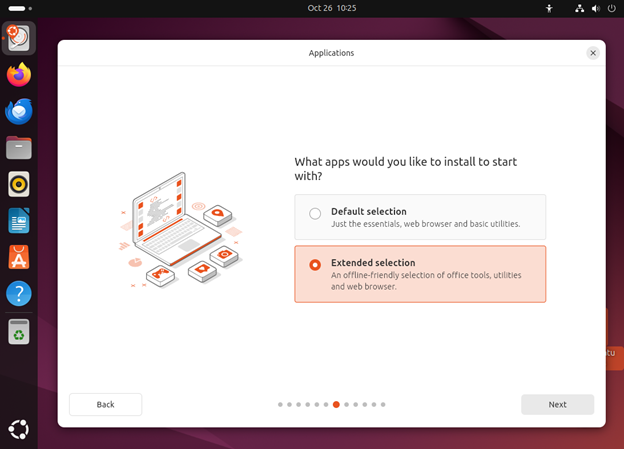
This step prompts you to select the applications you’d like to start with. The “Default selection” installs the essentials, such as basic utilities and a web browser. Choose this option if you prefer a lean or minimal system.
The “Extended selection” option offers extra utilities and programs. Choose this option if you have enough disk space and don’t mind having multiple applications you might not need from the get-go.
In our case, we will go with the second selection. Click ‘Next’ to proceed to the next step.
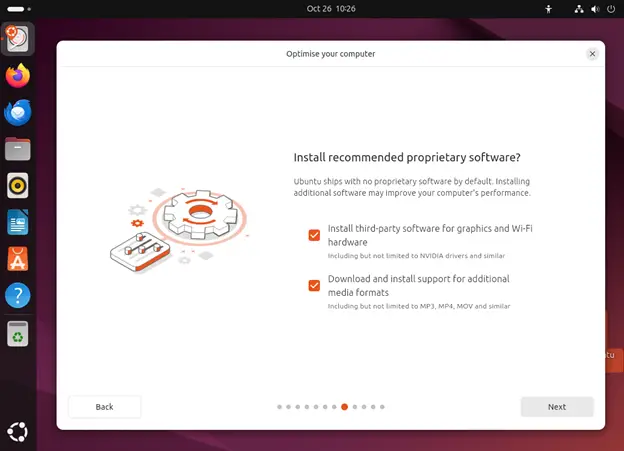
Next, you will be required to install proprietary software for improved performance. In our case, we have chosen to install software to enhance multimedia, graphics, and Wi-Fi hardware support.
9) Configure Disk Partitions
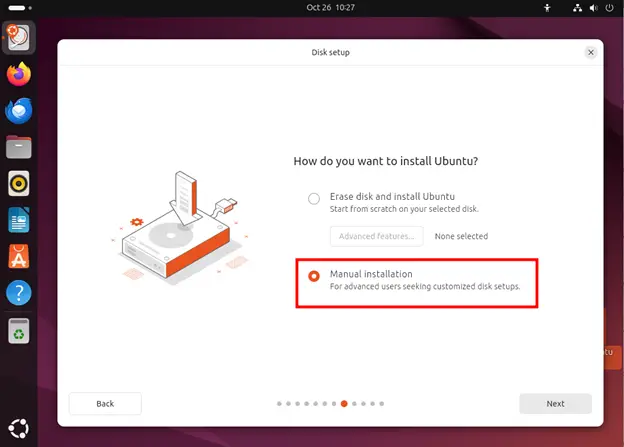
In this step, you will create the partitions your Linux system will go into. There are two options: ‘Erase disk and install Ubuntu‘ and ‘Manual Installation‘. The former erases all the partitions including the Windows partitions, and lets you start from scratch. The latter – ‘Manual Installation‘ – lets you manually create Linux partitions and by so doing, allows you to install Linux alongside Windows.
Since we are installing Ubuntu alongside Windows, select the ‘Manual Installation‘ option and click NEXT.
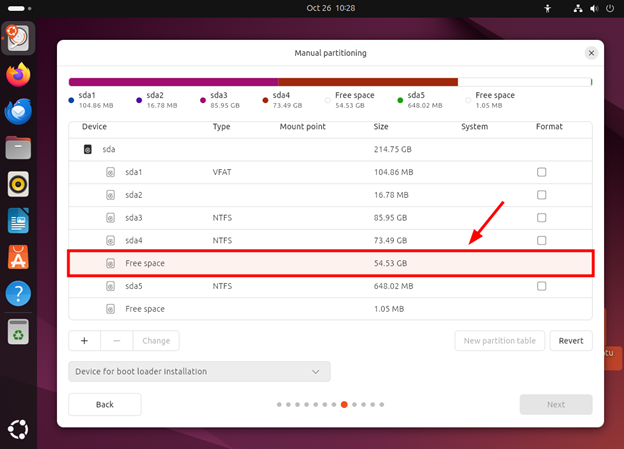
You will see the partition table displayed. Be sure you can locate the free space that you created in Windows to install Linux.
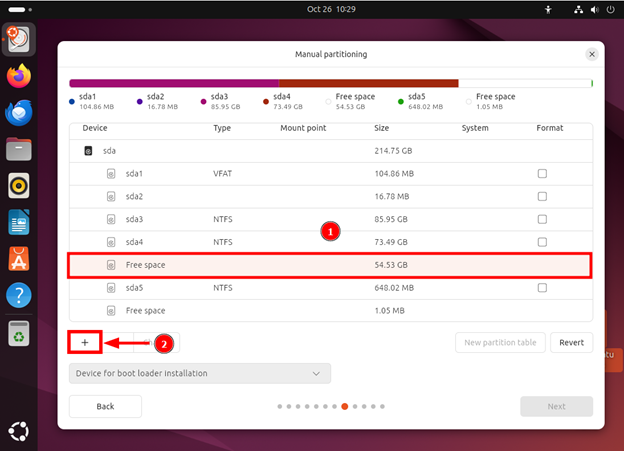
To start creating partitions, click the [+] button.
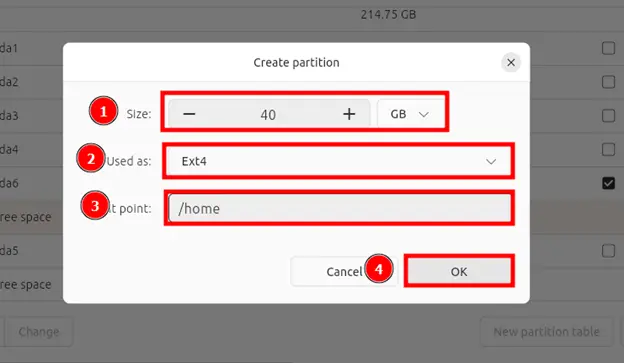
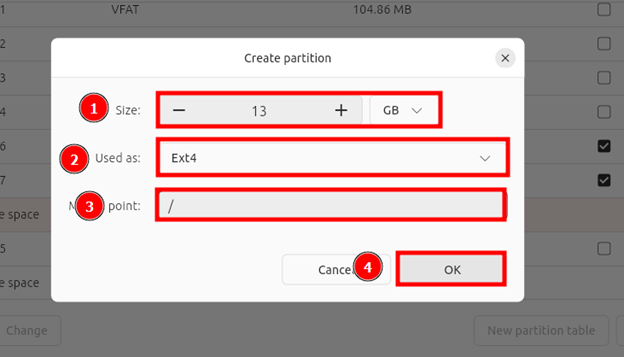
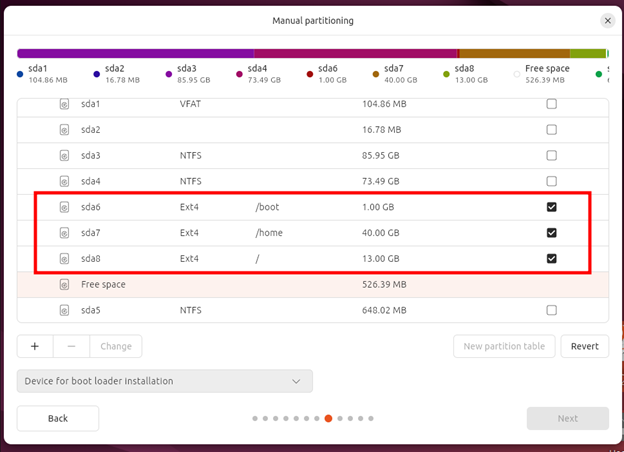
From here specify the mount points and their sizes. Here is a list of our partitions:
- /boot 1G
- /home 40G
- / 13G
So first, create the /boot mount point.
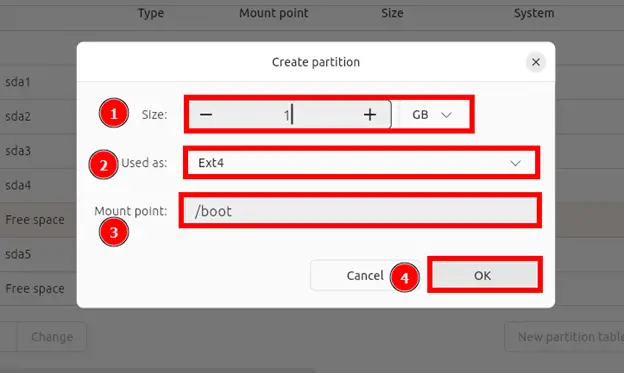
Next, create the /home partition. This is where all your personal files and folders will go to.
Lastly, create the / root partition. This will contain the Linux filesystem.
Once you are done, the partition table will be displayed.
Be sure to select the hard drive on which the bootloader will be installed, then Click `Next` to proceed.

10) Create a user account
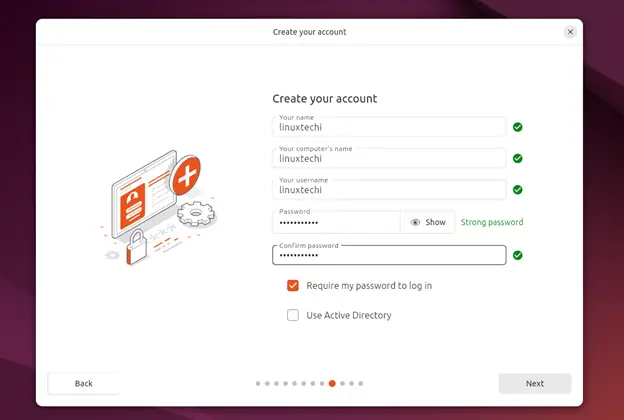
In this step, create a user account by specifying the name, computer name, and user password. Then hit `NEXT`.
11) Configure Timezone
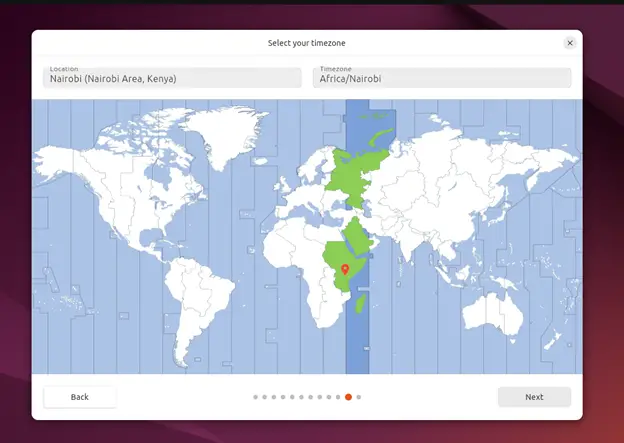
Next, specify your location and timezone on the global map.
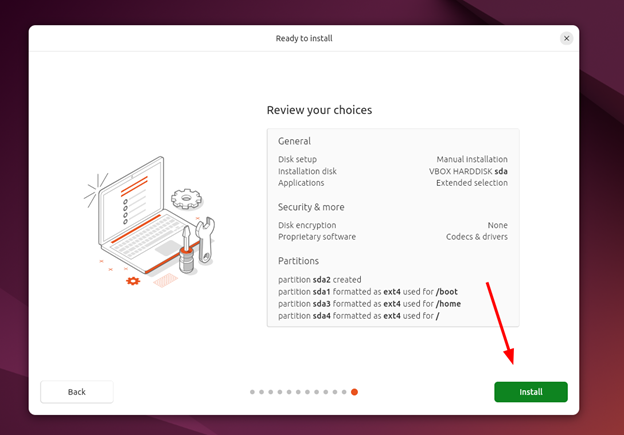
Review your choices and ensure your partitions are correct. If all looks good, click `Install`.
The installer will copy all the files from the ISO image to the hard drive. This typically takes between 10 to 20 minutes. You can take a break at this point as the installation takes place.
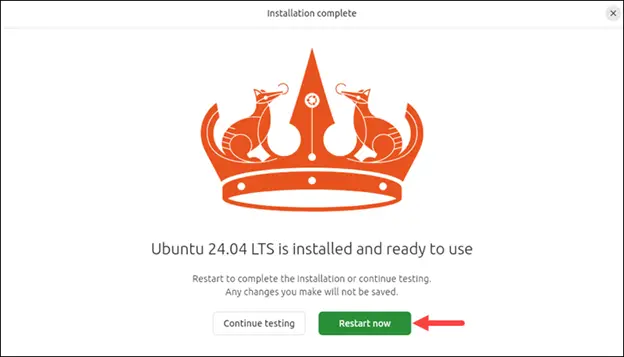
Once the installation is complete, you will get the notification: “Ubuntu 24.04 LTS is installed and ready to use”. At this point click `Restart Now` to restart.
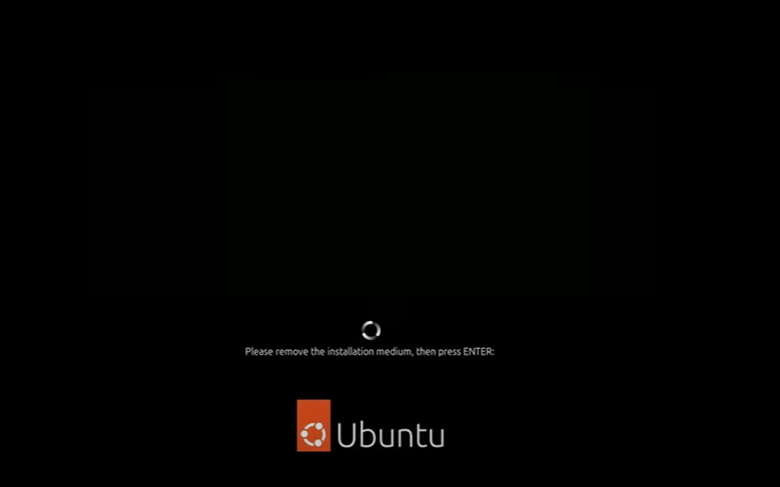
You will be prompted to eject the installation media. So remove the installation medium and hit ENTER.
12) Boot into either Ubuntu 24.04 or Windows 11
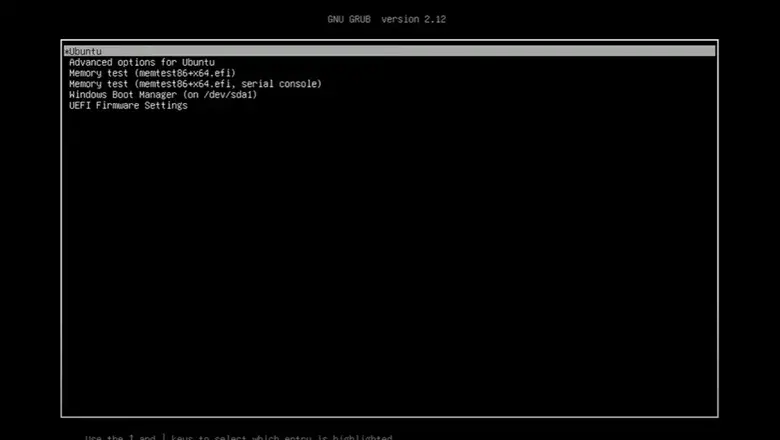
Upon booting, you will see a GRUB bootloader with multiple entries, including an entry for the Windows boot manager. The first option lets you boot into Ubuntu 24.04. The `Windows boot manager` entry lets you boot into your Windows system.
From here you can boot into either Ubuntu 24.04, by selecting the first option, or Windows by selecting the `Windows boot manager` entry.
Conclusion
And that’s it. You have learned how to configure a dual-boot setup of Windows 11 and Ubuntu 24.04. We started by creating a bootable medium for Ubuntu then proceeded to configure a free partition in which we installed Ubuntu. Your feedback is much welcome.

