Hello readers, in this post, we will show you how to deploy Kubernetes Cluster on RHEL 9 with kubeadm utility.
Kubernetes (k8s) is an open-source container orchestration platform. It allows automating deployment, scaling, and management of container-based applications. In Kubernetes cluster, we have control plane node (or master node) and the worker nodes.
Prerequisites
- Pre-Install RHEL Instances
- SSH Access to each instance
- Regular user with sudo rights
- Minimum of 2GB RAM, 2 CPUs and 20 GB free disk space on each instance
- Stable Internet Connectivity
Lab Setup
In this demonstration, we will be using three RHEL 9 systems with following details.
- Instance 1 : Master Node (master01.linuxtechi.org 192.168.1.80)
- Instance 2 : Worker Node (worker01.linuxtechi.org 192.168.1.81)
- Instance 3 : Worker Node (worker02.linuxtechi.org 192.168.1.82)
Deploy Kubernetes Cluster on RHEL 9 with Kubeadm
Without any further delay, let’s jump into Kubernetes cluster deployment steps on RHEL 9.
1) Define Host Name and Update hosts file
SSH to each instance and set their respective hostname using hostnamectl command.
$ sudo hostnamectl set-hostname "master01.linuxtechi.org"   // Master Node
$ sudo hostnamectl set-hostname "worker01.linuxtechi.org"   // Worker Node 1
$ sudo hostnamectl set-hostname "worker02.linuxtechi.org"   // Worker Node 2
Next, add the following lines to /etc/hosts file on each instance.
192.168.1.80  master01.linuxtechi.org  master01
192.168.1.81  worker01.linuxtechi.org  worker01
192.168.1.82  worker02.linuxtechi.org  worker02
2) Disable Swap and SELinux
Disable swap on each instance so that Kubernetes cluster works smoothly. Run beneath command on each instance to disable swap space.
$ sudo swapoff -a
$ sudo sed -i '/ swap / s/^\(.*\)$/#\1/g' /etc/fstab
Disable SELinux on each system using following set of commands,
$ sudo setenforce 0
$ sudo sed -i 's/^SELINUX=enforcing$/SELINUX=permissive/' /etc/selinux/config
3) Add Kernel Modules and Parameters
Add the following kernel modules using modprobe command.
$ sudo modprobe overlay
$ sudo modprobe br_netfilter
For the permanent loading, create a file (k8s.conf) with following content.
$ sudo tee /etc/modules-load.d/k8s.conf <<EOF
overlay
br_netfilter
EOF
Now, add the kernel parameters like IP forwarding. Create a file and load the parameters using sysctl command,
$ sudo tee /etc/sysctl.d/k8s.conf <<EOT
net.bridge.bridge-nf-call-iptables  = 1
net.ipv4.ip_forward                 = 1
net.bridge.bridge-nf-call-ip6tables = 1
EOT
To load the above kernel parameters, run
$ sudo sysctl --system
4) Add Firewall Rules on Master and Worker Nodes
On the master node, allow the following ports in the firewall.
$ sudo firewall-cmd --permanent --add-port={6443,2379,2380,10250,10251,10252,10257,10259,179}/tcp
$ sudo firewall-cmd --permanent --add-port=4789/udp
$ sudo firewall-cmd --reload
On the worker nodes, allow following ports.
$ sudo firewall-cmd --permanent --add-port={179,10250,30000-32767}/tcp
$ sudo firewall-cmd --permanent --add-port=4789/udp
$ sudo firewall-cmd --reload
5) Install Containerd
We will use Containerd as container run time environment for our Kubernetes cluster. Containerd package is not available in the default repositories of RHEL 9, so for its installation, add its repository on each system using ‘dnf config-manager’ command.
$ sudo dnf config-manager --add-repo https://download.docker.com/linux/rhel/docker-ce.repo
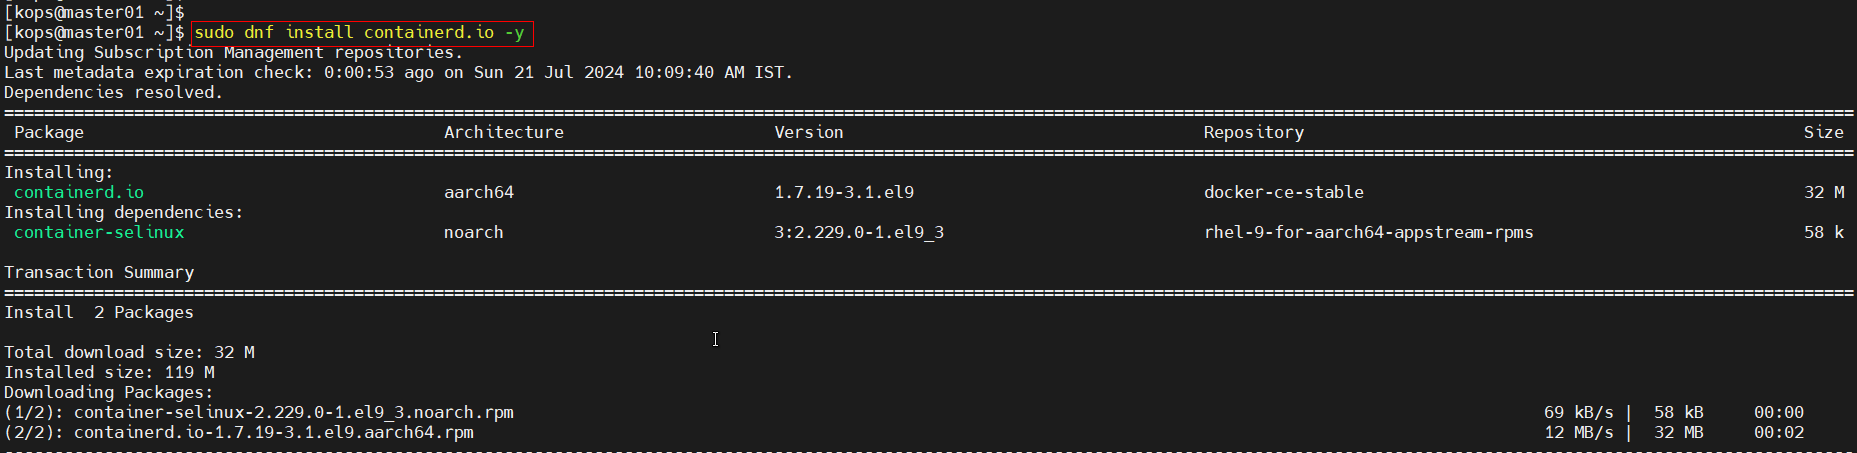
Next, install and configure containerd on each node.
$ sudo dnf install containerd.io -y
Post installation start & enable containerd service.
$ sudo systemctl start containerd
$ sudo systemctl enable containerd
Configure containerd so that it starts using SystemdCgroup. Run following commands.
$ containerd config default | sudo tee /etc/containerd/config.toml >/dev/null 2>&1
$ sudo sed -i 's/SystemdCgroup \= false/SystemdCgroup \= true/g' /etc/containerd/config.toml
Restart containerd service
$ sudo systemctl restart containerd
6) Add Kubernetes Yum Repository
Kubernetes packages are not available in the default package repositories of RHEL 9, so for its installation first add its official repositories. Run the following command on each instance.
Note: At the time of writing this post latest version of Kubernetes was 1.30. So, you can this version according to your requirement.
$ cat <<EOF | sudo tee /etc/yum.repos.d/kubernetes.repo
[kubernetes]
name=Kubernetes
baseurl=https://pkgs.k8s.io/core:/stable:/v1.30/rpm/
enabled=1
gpgcheck=1
gpgkey=https://pkgs.k8s.io/core:/stable:/v1.30/rpm/repodata/repomd.xml.key
exclude=kubelet kubeadm kubectl cri-tools kubernetes-cni
EOF
$
7) Install Kubeadm, kubelet & kubectl
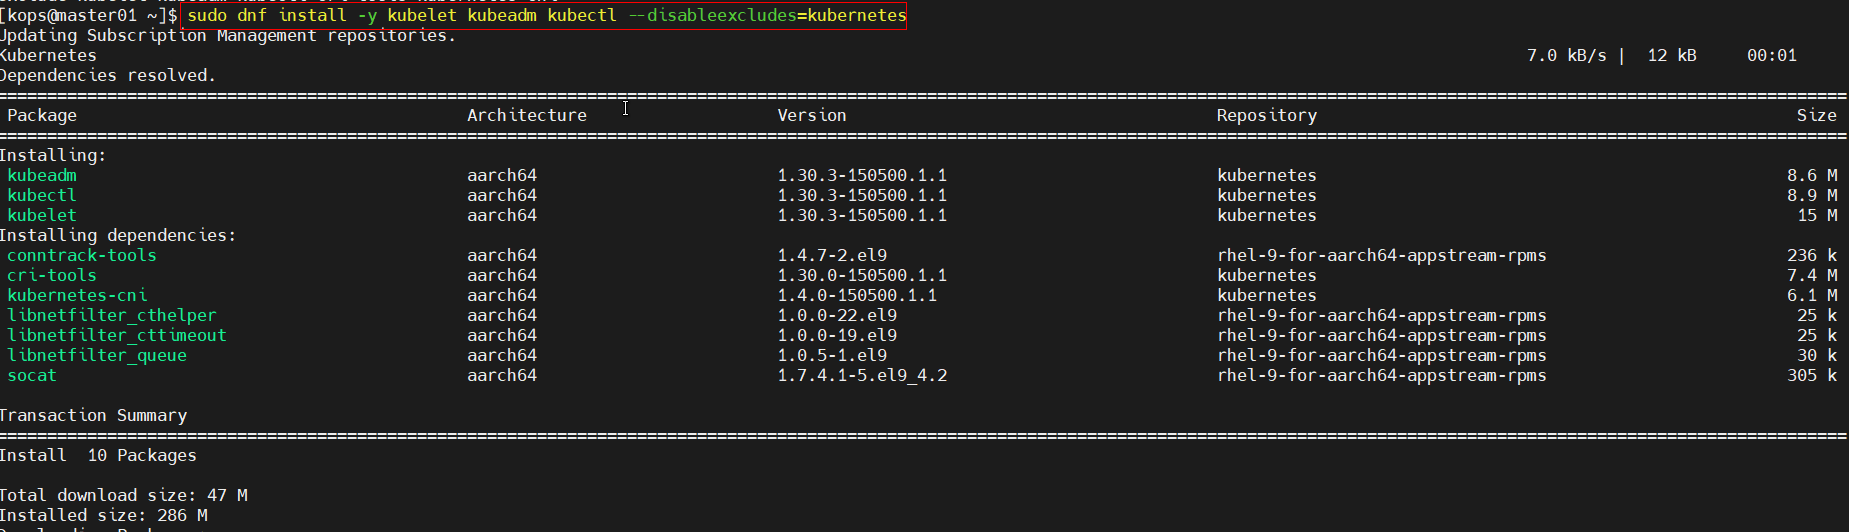
Install the Kubernetes components like Kubeadm, kubectl and kubelet on each system using following dnf command.
$ sudo dnf install -y kubelet kubeadm kubectl --disableexcludes=kubernetes
8) Initialize Kubernetes Cluster (master node only)
As all the requirements are fulfilled, so we are good to start the Kubernetes deployment. Initialize your Kubernetes cluster from the master node using Kubeadm command.
$ sudo kubeadm init --control-plane-endpoint=master01.linuxtechi.org
Above command will pull the required images for your Kubernetes cluster. Once this command is executed successfully, we will get the output something like below:
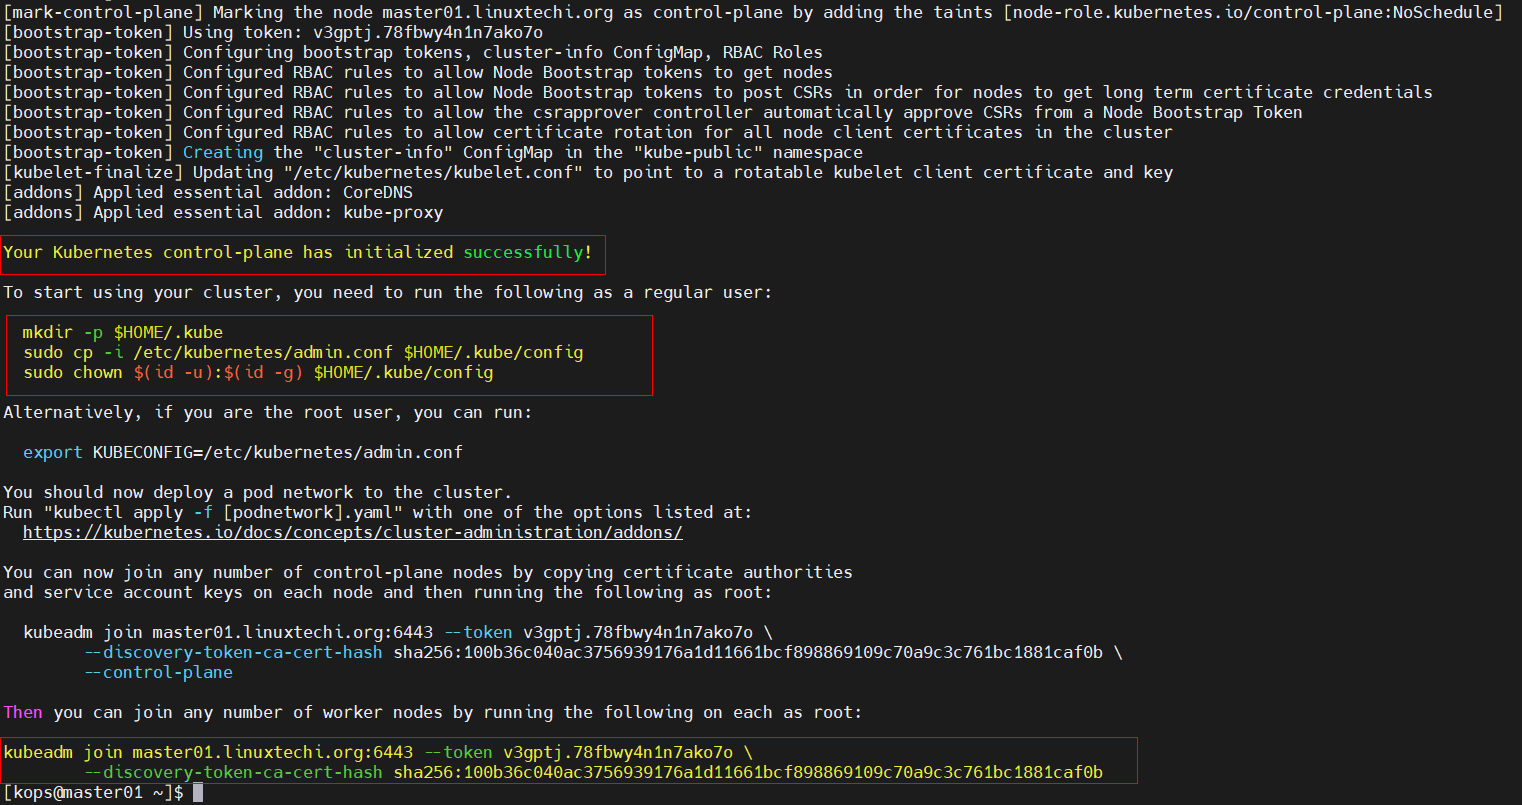
In the output above, we will get commands like how to interact Kubernetes cluster and how to join worker nodes to the cluster.
On the master node, run following set of commands to interact with Kubernetes cluster.
$ mkdir -p $HOME/.kube
$ sudo cp -i /etc/kubernetes/admin.conf $HOME/.kube/config
$ sudo chown $(id -u):$(id -g) $HOME/.kube/config
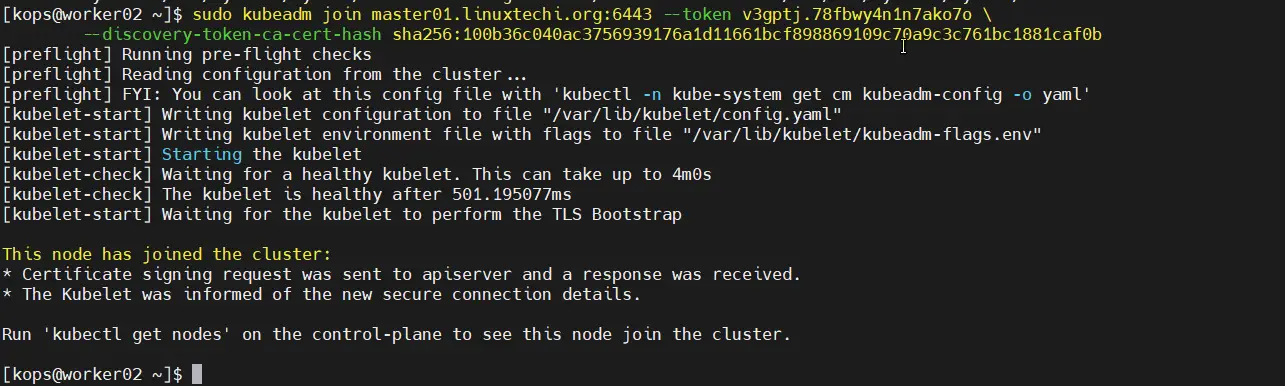
Next copy the command to join any worker node from the output above, execute it on both the worker nodes. In my case, command would be:
$ kubeadm join master01.linuxtechi.org:6443 --token v3gptj.78fbwy4n1n7ako7o \
        --discovery-token-ca-cert-hash sha256:100b36c040ac3756939176a1d11661bcf898869109c70a9c3c761bc1881caf0b
Output from first worker node,

Output from second worker node,
Head back to master node and run “kubectl get nodes” command to verify the nodes status.
$ kubectl get nodes
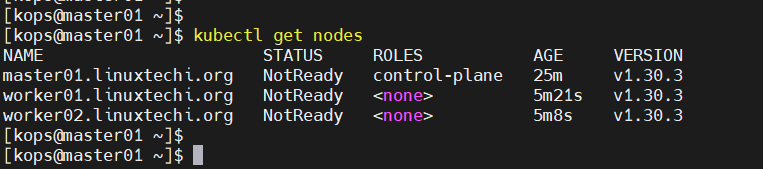
Above output shows that worker nodes have joined the Kubernetes cluster, but their status is NotReady.
So, in order to make node’s status Ready, we must install network add-ons plugin like calico on this cluster.
9) Install a Pod Network Add-on (Calico)
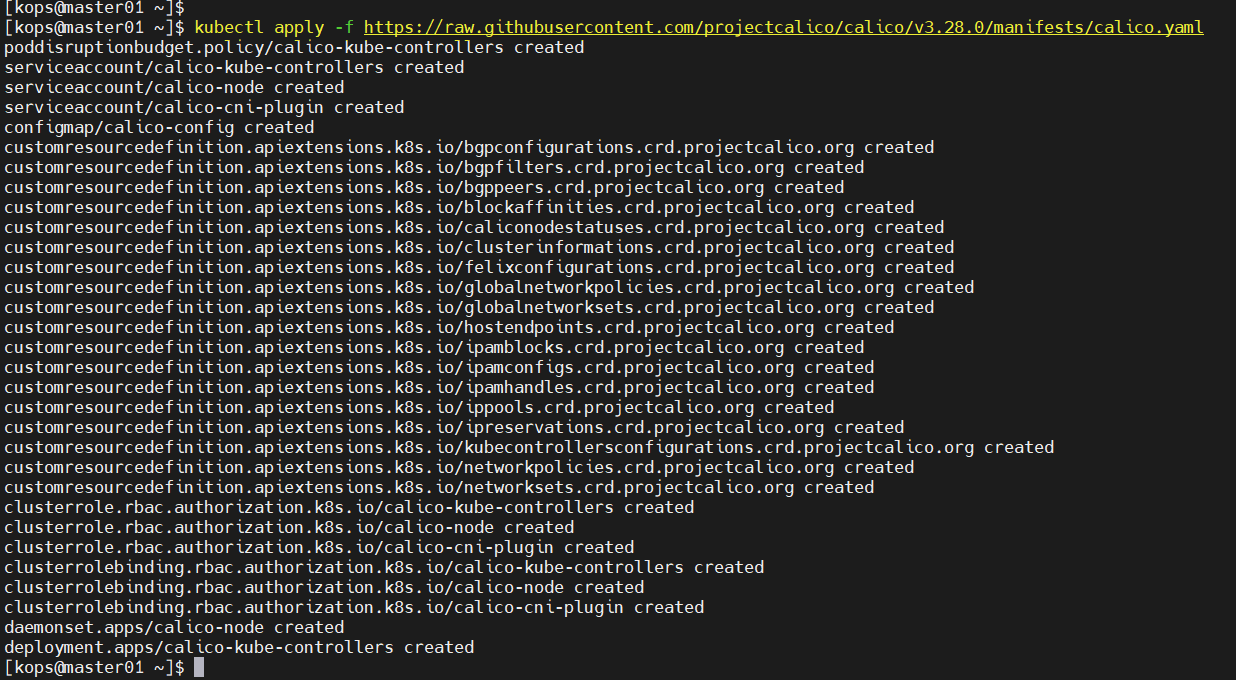
To install calico pod network add-on, run the following command from master node only.
$ kubectl apply -f https://raw.githubusercontent.com/projectcalico/calico/v3.28.0/manifests/calico.yaml
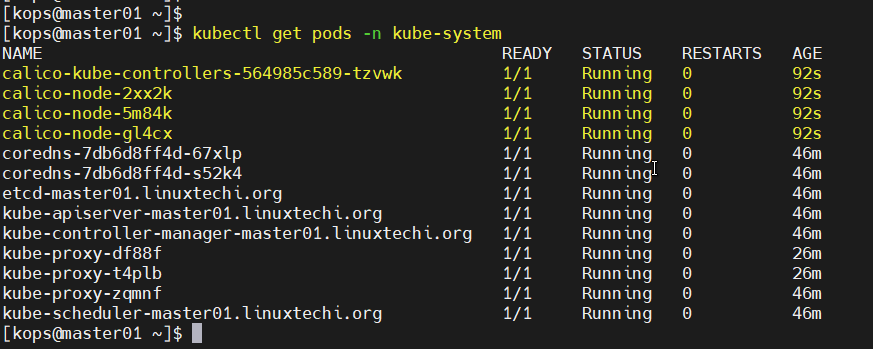
Verify the calico installation, check the pods status from kube-system namespace.
$ kubectl get pods -n kube-system
Now, verify the nodes status,
$ kubectl get nodes
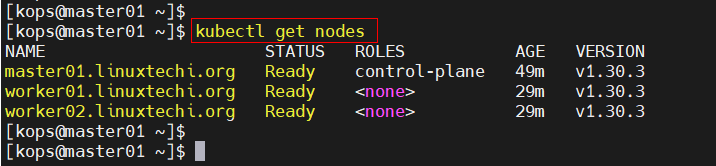
Great, Output shows that nodes are in Ready state.
10) Validate Kubernetes Cluster Installation
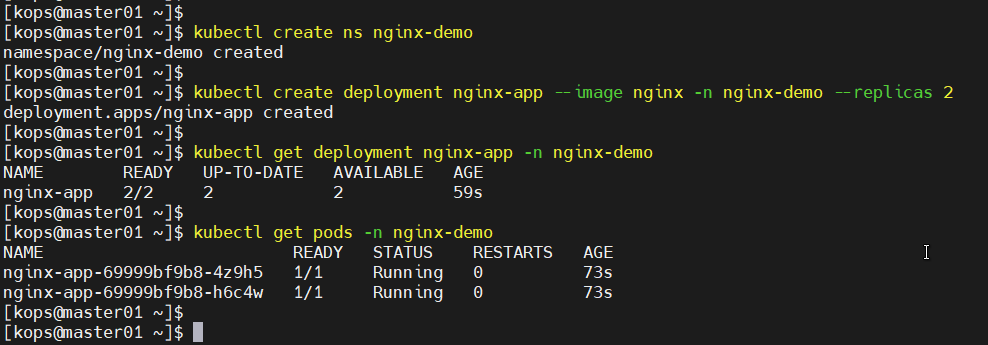
In order to validate our Kubernetes installation, let’s deploy an nginx based application using deployment and then expose it via nodeport. Execute the following kubectl commands from master node.
$ kubectl create ns nginx-demo
$ kubectl create deployment nginx-app --image nginx -n nginx-demo --replicas 2
$ kubectl get deployment nginx-app -n nginx-demo
$ kubectl get pods -n nginx-demo
Next expose this deployment using NodePort type, run
$ kubectl expose deployment nginx-app -n nginx-demo --type NodePort --port 80
$ kubectl get svc -n nginx-demo

Now, try to access your nginx application using nodeport as shown below
$ curl http://<worker-IP>:30301
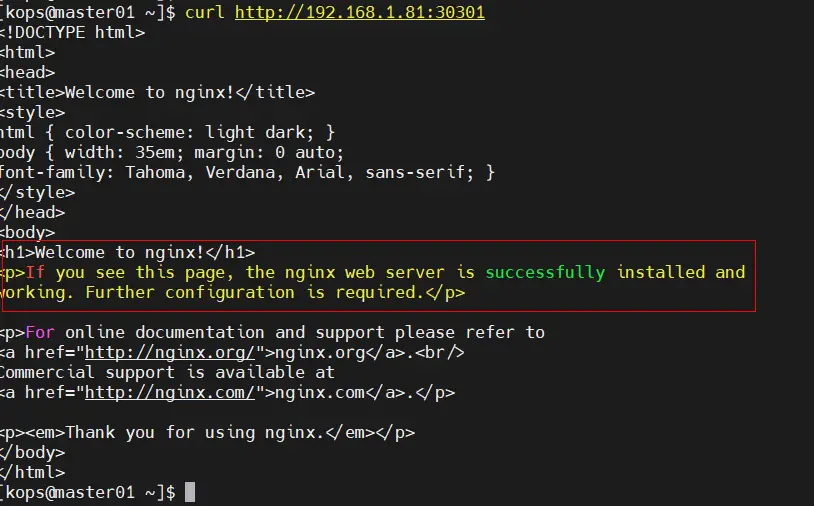
Perfect, output shows that we can access our nginx application, this also confirms that Kubernetes installation is successful.
That’s it, we hope you have found these instructions helpful and informative. Feel free to post your queries and feedback in below comments section.
Also Read: How to Install Kubernetes Dashboard (Simple Guide)