A step-by-step guide on this page will show you how to install Xubuntu 22.04 LTS.
In the ever-evolving landscape of Linux distributions, Xubuntu stands out as a lightweight and efficient choice, combining the power of Ubuntu with the XFCE desktop environment. The latest long-term support release, Xubuntu 22.04 LTS, brings a plethora of improvements and updates.
It is a perfect DE (Desktop environment) for people looking to get the most out of their system combined with a surreal look and equipped with a lot of features to handle all kinds of stress of a daily usage of a normal user.
Prerequisites
- 2 GHz dual-core processor
- 2 GB of RAM or more
- At least 25 GB of free disk space
- Bootable Media (USB or DVD)
- Internet Connectivity (Optinal)
Without any delay, let’s deep dive into Xubuntu 22.04 Installation steps.
1) Download Xubuntu 22.04 ISO File
Head over to the official Xubuntu website or download the ISO file directly from the Ubuntu release page. Choose the 64-bit version unless you have specific hardware constraints requiring the 32-bit version.
Once the ISO file file is downloaded on your system then create a bootable USB drive. Use a tool like Rufus (for Windows) or Etcher (for Linux and macOS) to create a bootable USB from the downloaded ISO file. Insert the USB drive into your computer.
2) Boot the System from Bootable USB Drive
Restart your computer and enter the BIOS or UEFI settings to set the USB drive as the primary boot device. Save the changes and exit, allowing your system to boot from the USB drive.
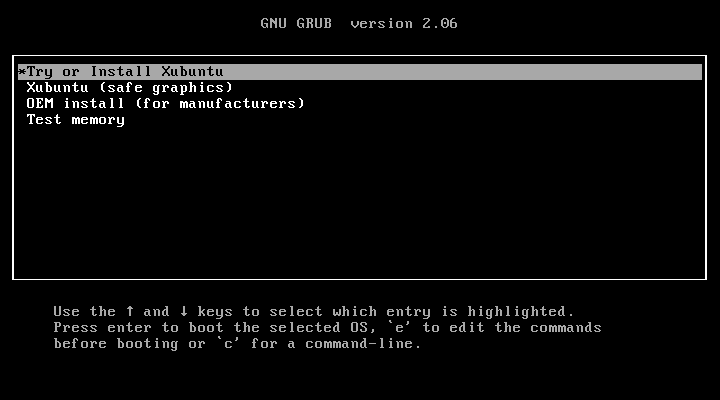
Choose the first option “Try or Install Xubuntu” and hit enter.
3) Initiating the Installation Process
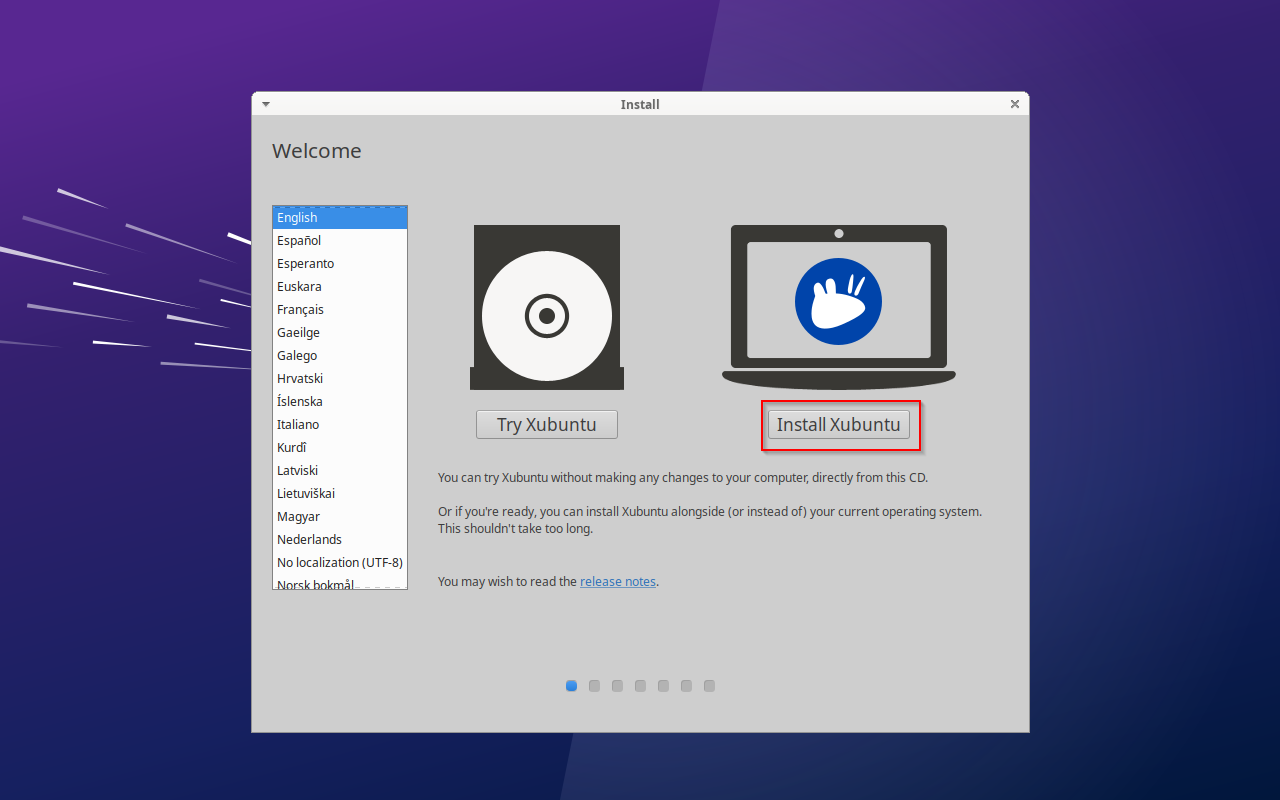
You will be presented with the Xubuntu installation screen. Select “Install Xubuntu” to begin the installation process.
4) Configuring Keyboard Layout
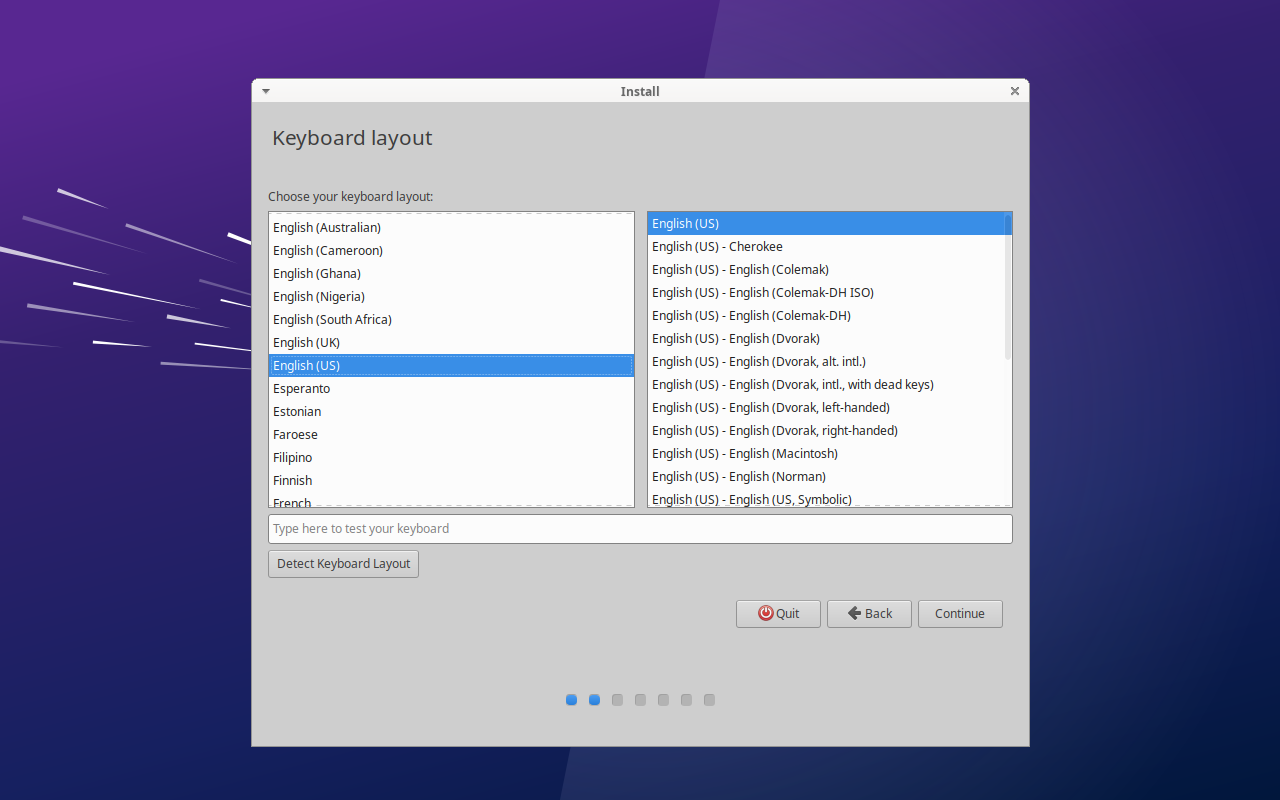
In this step, you will be asked to choose keyboard that suits to your installation.
Click on “Continue”
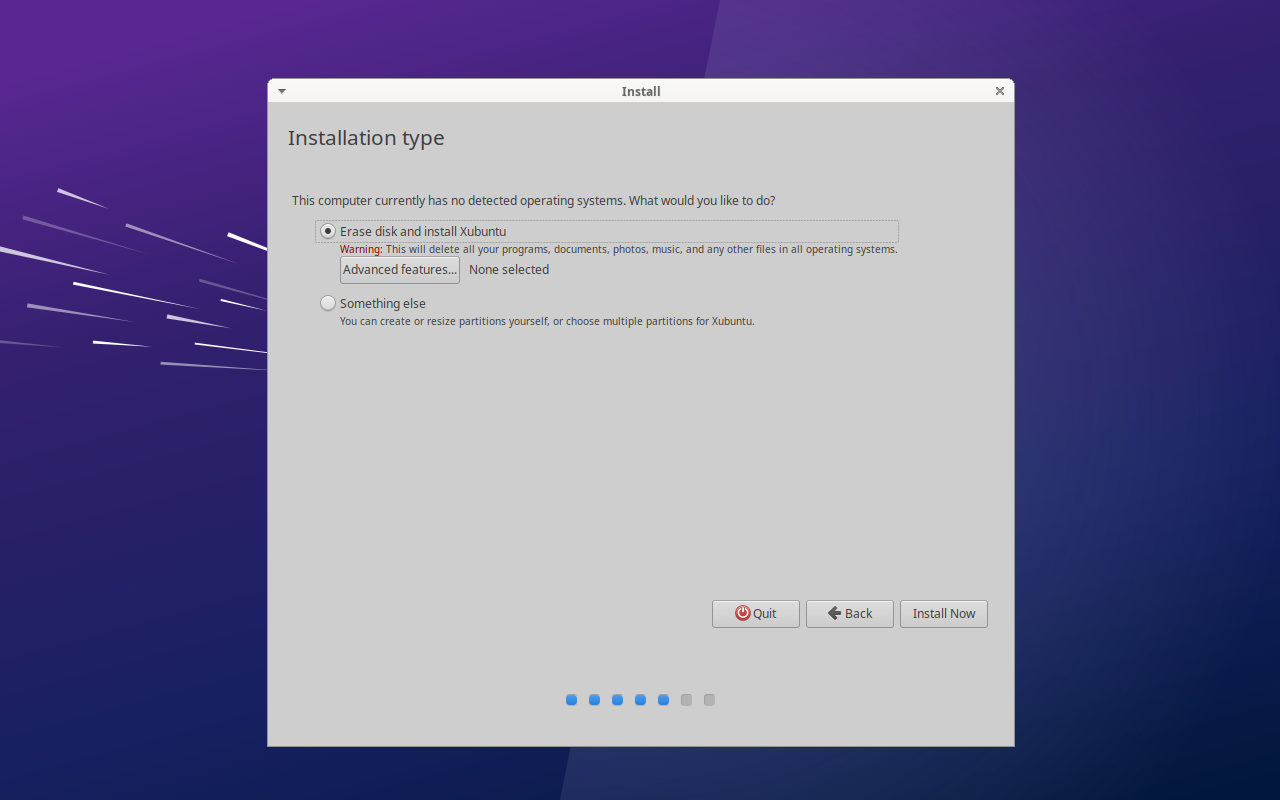
5) Choose Installation Type
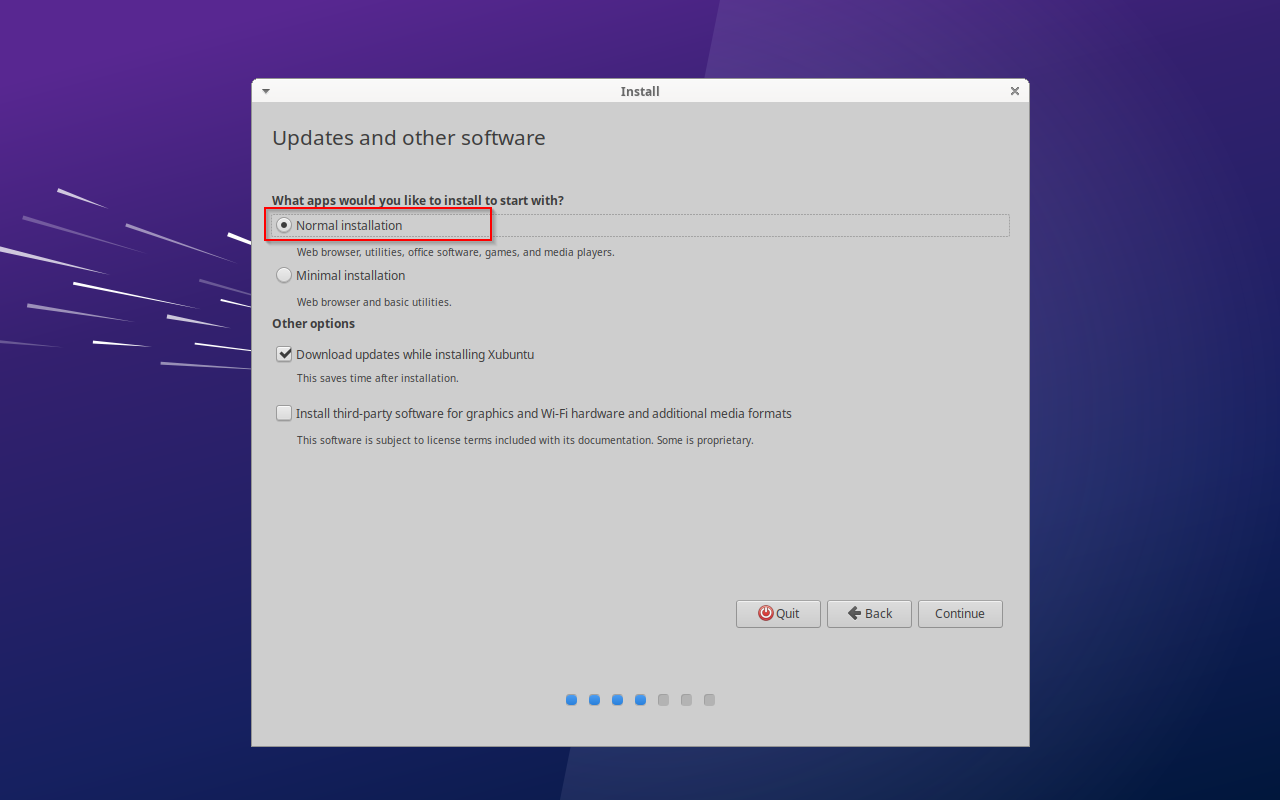
At this step, you will be asked to choose the installation type:
- Normal Installation
- Minimal Installation
And if you have internet connectivity and want to install updates during the installation then choose “Download Updates while installing Xubuntu” else uncheck this option.
Click Continue to proceed further,
In the next screen, Select the installation type that suits your needs. If you’re new to Linux or want a hassle-free installation, choose the option to “Erase the disk and install Xubuntu”. For advanced users, manual partitioning is also available via “Something else” option.
In our case, we are going with the first option.
Click “Install Now”
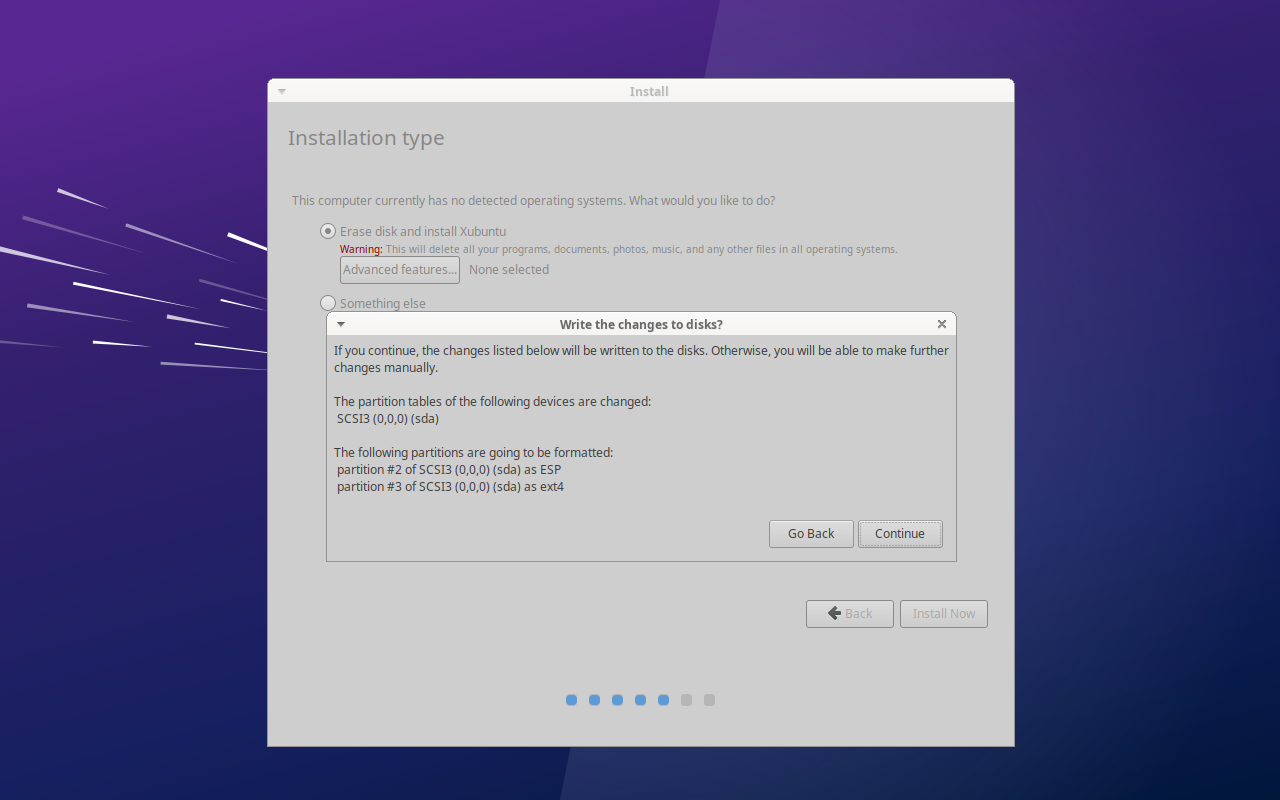
Next, Choose Continue to write changes to the disk.
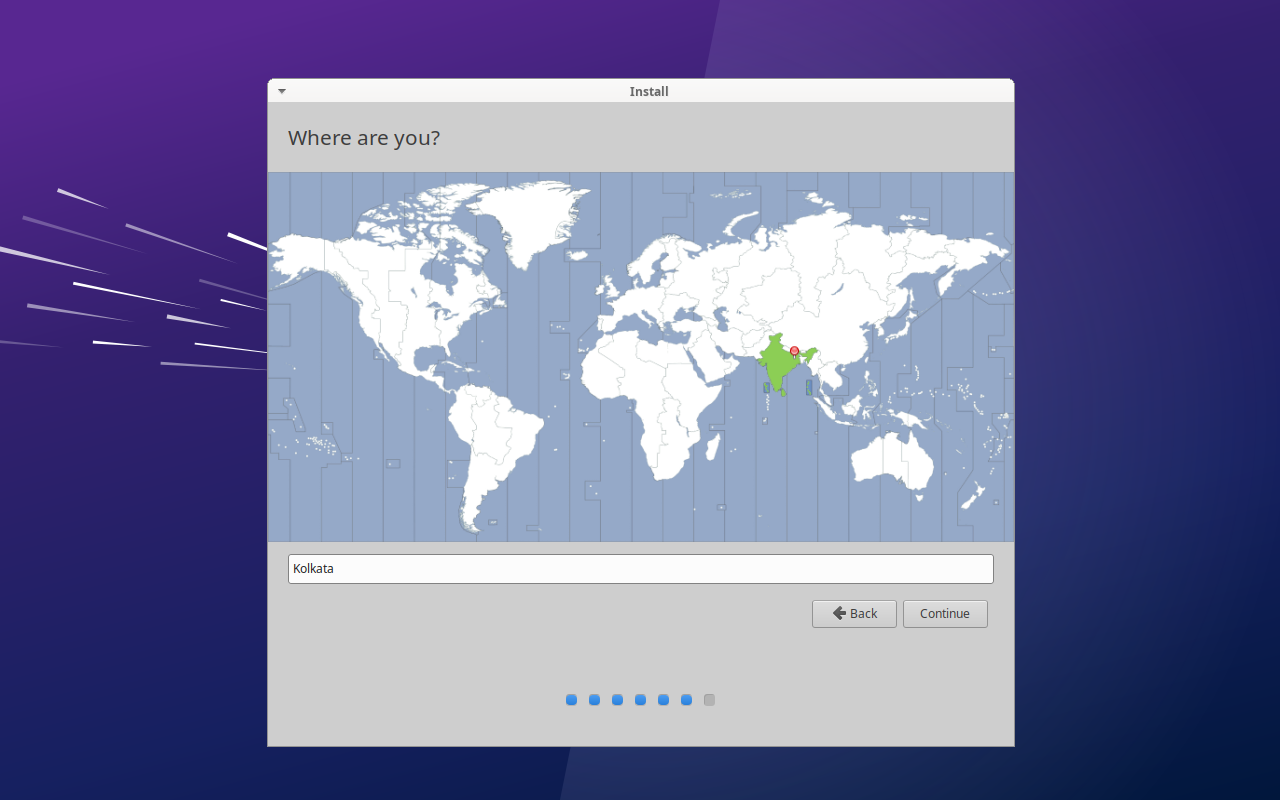
6) Choose Your Preferred location
Choose your preferred location for your Xubuntu installation. Based on the location time zone will be configured automatically.
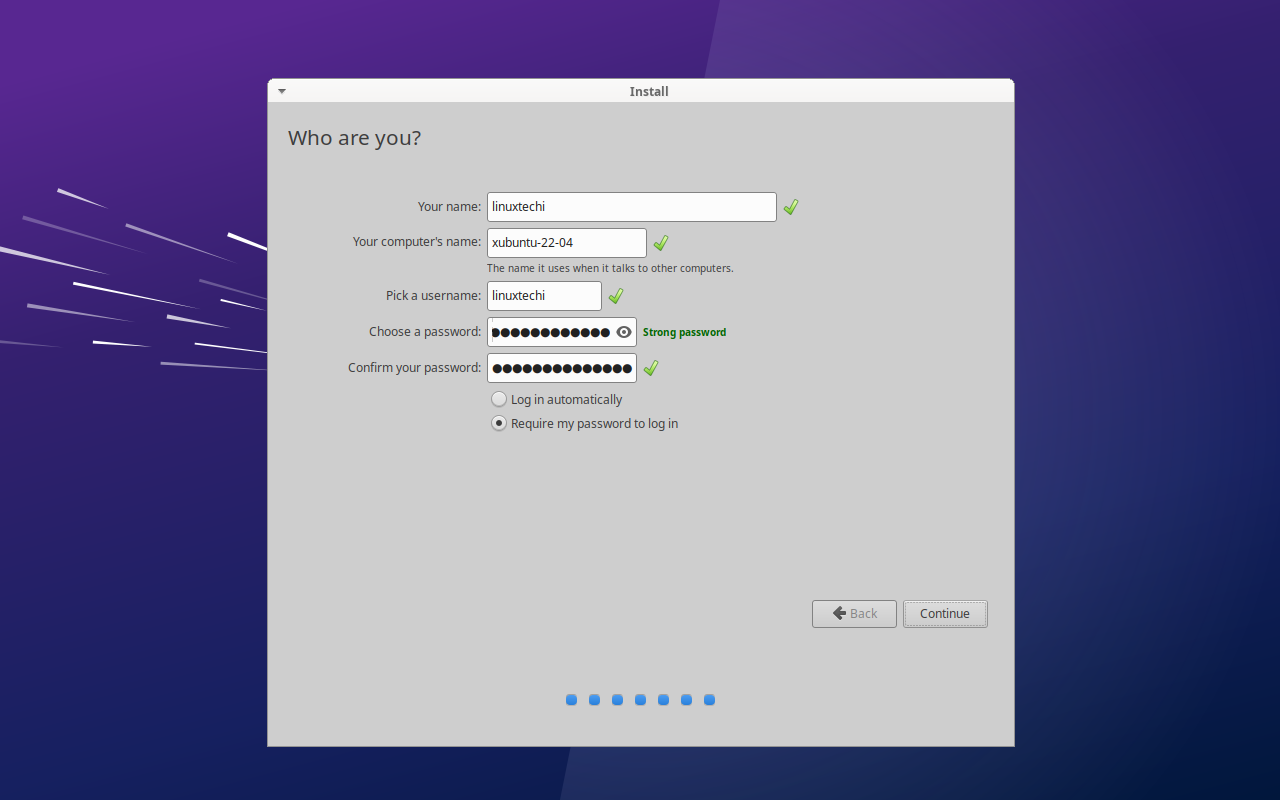
7) Create User Account and Password
Provide your name, the desired computer name, username, and password. This information will be used to create your user account.
Click Continue to proceed further.
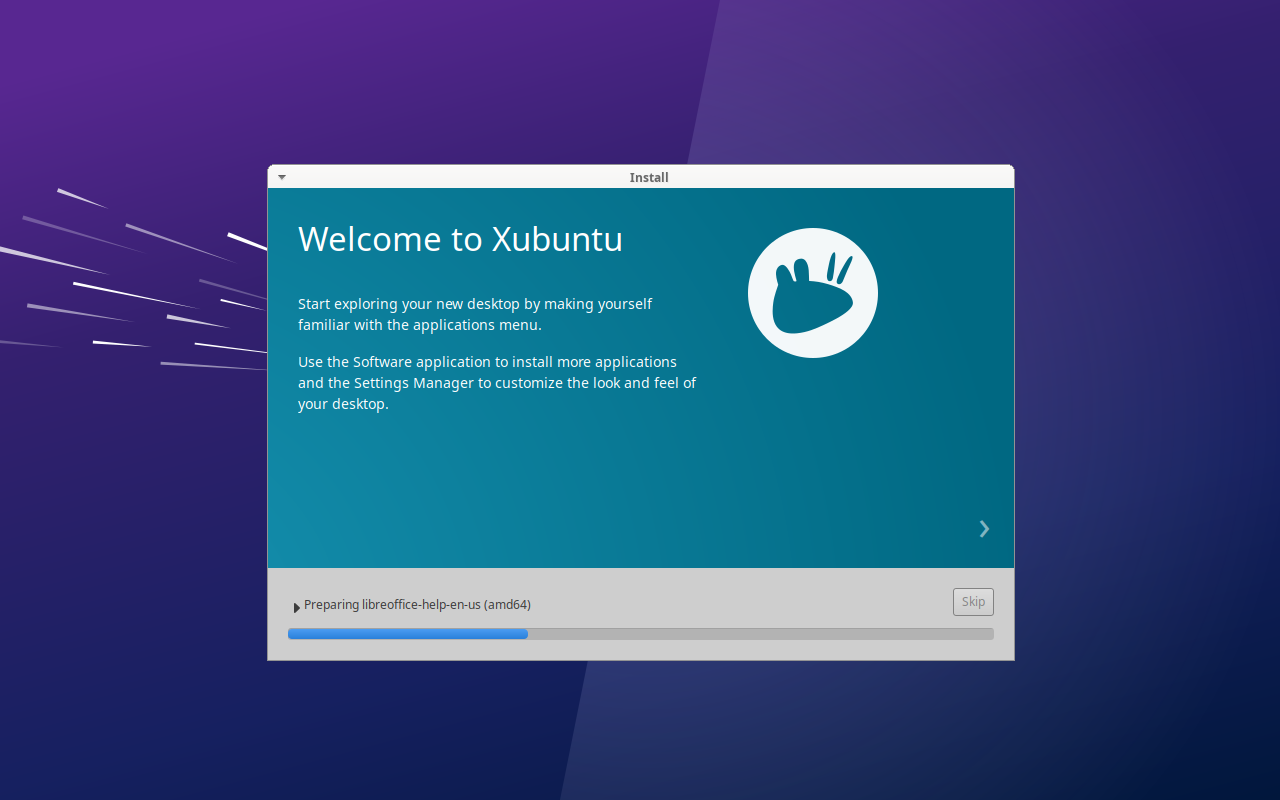
8) Xubuntu Installation Progress
On this step, Xubuntu 22.04 installation get started and is in progress. Sit back and relax as the installer copies files and configures your system. This may take some time, so grab a cup of coffee.
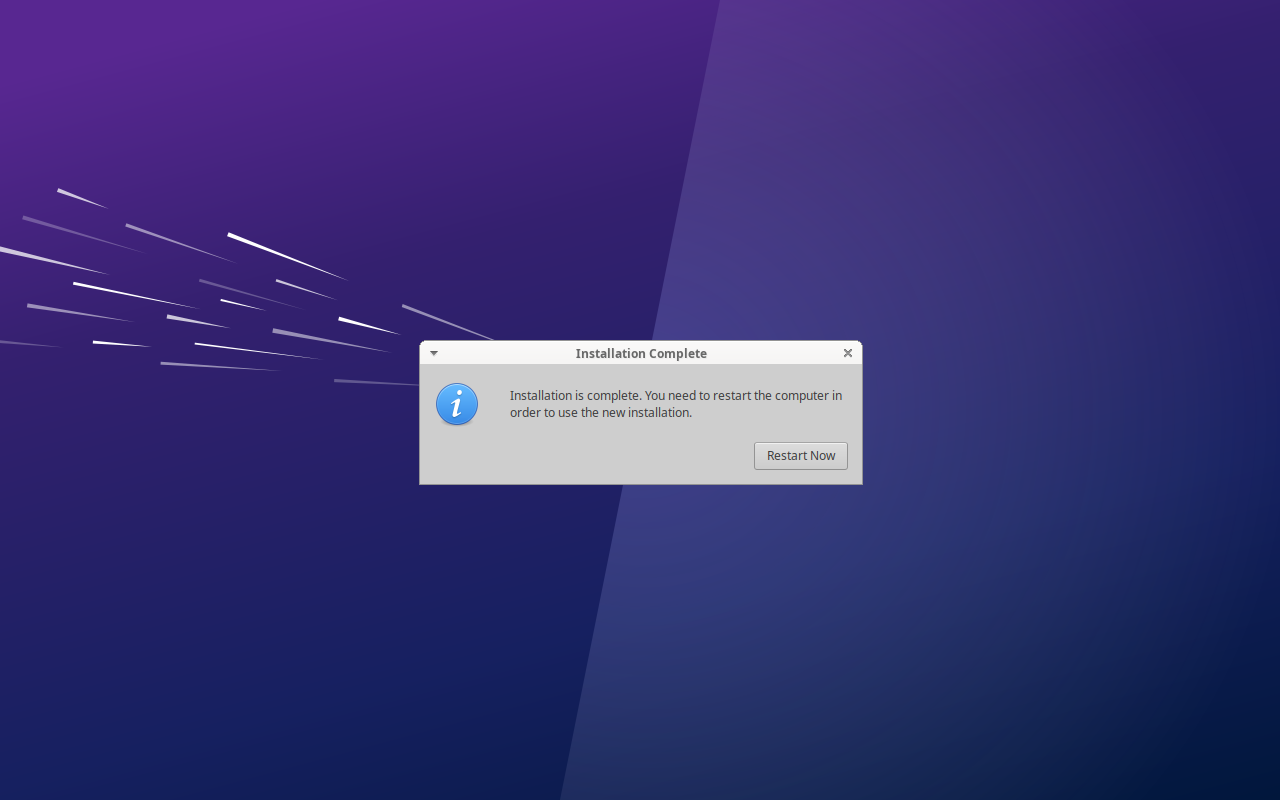
Once the installation is completed, you will be prompted to reboot the system.
Click on “Restart Now” to reboot the system. Also don’t forget to remove the installation media and change the boot medium from the bios settings so that system boots up with disk.
9) Xubuntu Login Screen and Desktop Environment
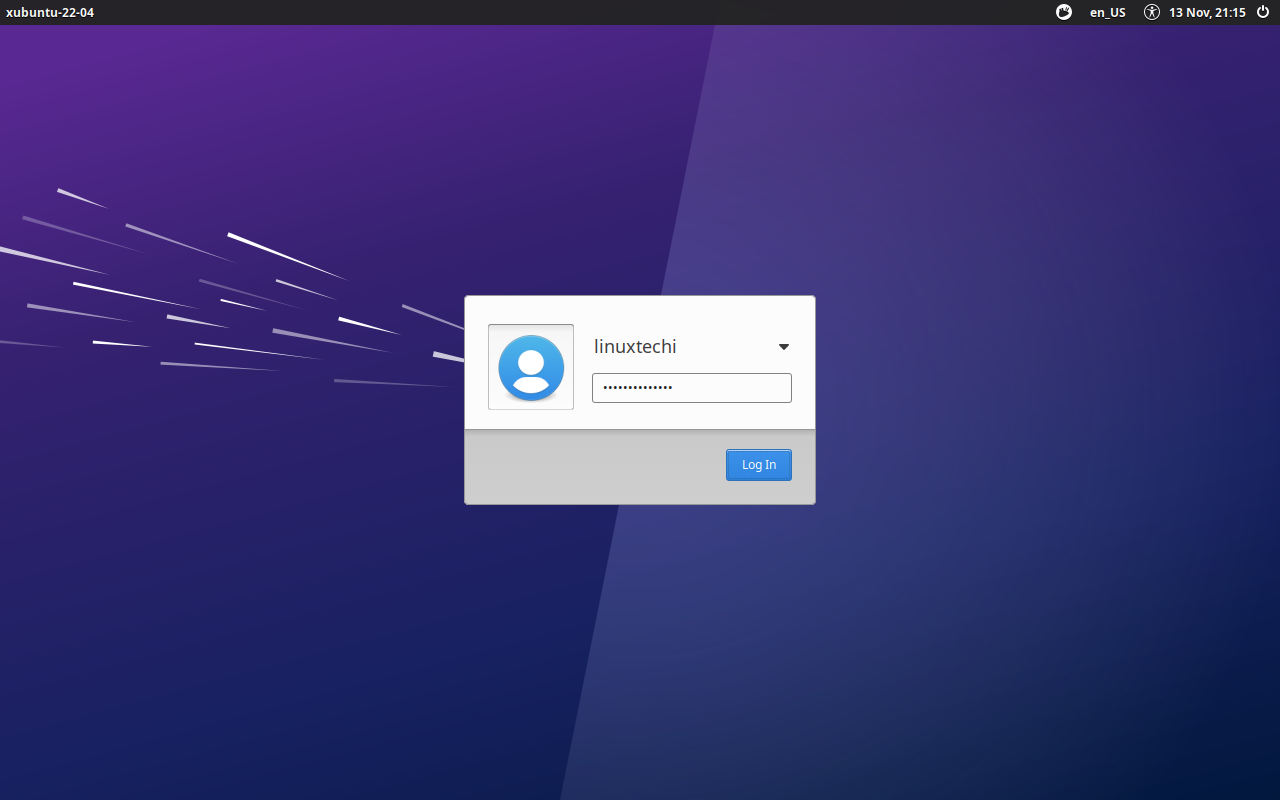
When the system boots up post installation, you will be presented following login screen, use the same username and password that you have created during the installation.
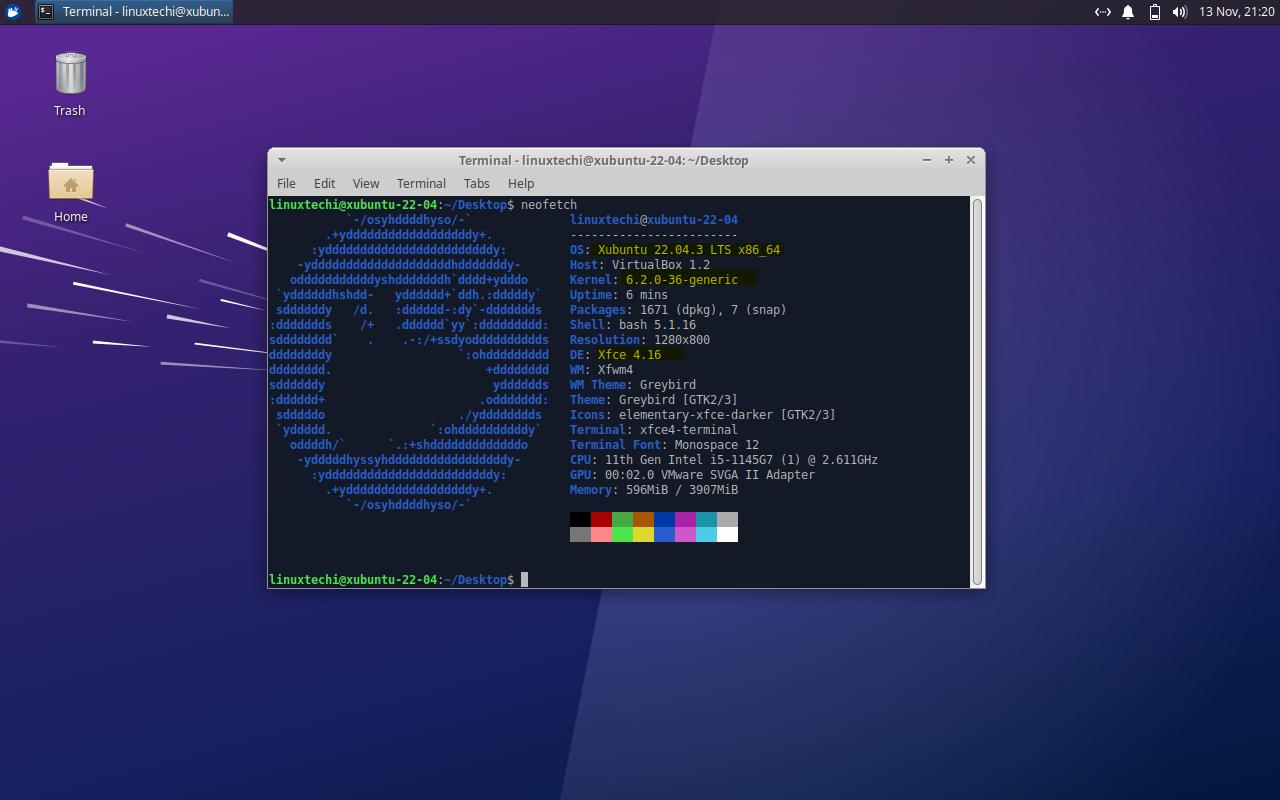
After entering the credentials, click on “Log In”, this will take us to the desktop environment.
Conclusion
Congratulations! You have successfully installed Xubuntu 22.04 LTS on your system. This lightweight and user-friendly Linux distribution is now ready for you to explore. Feel free to post your queries and feedback in below comments section.
VMWare Workstation?? You lost me right at the beginning. What/where is that to be found?
I’ve got the Xubuntu *.iso file, and managed to make it into a virtual CD (V drive). Cannot detect how to move forward from here.