Joomla is one of the most popular open source content management system (CMS) that helps you to build websites and online applications in an easy manner. Its ease of use and user-friendliness makes Joomla as one of the top CMS among developers and people with little coding knowledge looking to build websites. It is completely written in PHP and uses OOP (Object Oriented Programming) techniques and uses MySQL / MariaDB as its backend for storing data. It also has more than 10,000 add-ons to enhance the functionality of your website. One of the major advantages with Joomla is that you don’t need to have very high technical skill or coding knowledge to create and manage your website using Joomla.
Some of the important features of Joomla is listed below:
- Joomla supports various operating systems including Linux, MacOSX server, FreeBSD, Solaris, AIX etc.
- You can easily customize the appearance and functionality of your website with wide range of extensions available
- Track all the changes made to your website easily
- Add new content using the default editor to create new pages in your website without any knowledge of code
- Integrate easily with Gmail and OpenID
- Manage your site easily using the Admin control panel
- Create blogs, polls, news tickers, news flashes, RSS feeds, search easily
- Has been downloaded over 50 million times
This tutorial will explain how to install latest version Joomla 3.7.2 on CentOS 7 / RHEL 7, now let’s jump in directly to the tutorial:
Technical Requirements
- A server running on CentOS 7 / RHEL 7
- LAMP stack which includes Apache (2.x+), PHP (5.3.10+) and MySQL / MariaDB (5.1+)
Install LAMP Stack
If you have LAMP installed in your system, you can skip this, but if you don’t you’ll need to follow these steps to have LAMP installed in order to have Joomla in your system:
Update your CentOS / RHEL system using the command below:
[root@joomla-server ~]# yum update -y
Now Install Apache Web server and MariaDB database and PHP with the command below:
[root@joomla-server ~]# yum install httpd mariadb-server php php-mysql php-curl php-gd php-pear php-memcache php-pspell php-snmp php-xmlrpc -y
Once the LAMP stack packages are installed then start and enanle httpd and mariadb services
[root@joomla-server ~]# systemctl start httpd ; systemctl enable httpd
[root@joomla-server ~]# systemctl start mariadb ; systemctl enable mariadb
Configure MariaDB Database for Joomla
Run the command “mysql_secure_installation” to configure password for root user, to remove anonymous-user accounts and to remove test database which is accessed by anonymous users
[root@joomla-server ~]# mysql_secure_installation
Set a strong and secure password and answer the questions below as provided:
Set root password? [Y/n] New password:  <New_Strong_Password>
Re-enter new password: <New_Strong_Password>
Remove anonymous users? [Y/n] Y
Disallow root login remotely? [Y/n] Y
Remove test database and access to it? [Y/n] Y
Reload privilege tables now? [Y/n] Y
Now login to the database using root user credentials that we set in above command.
Create a database, user and grant privileges to the user, Let’s call the database as “joomldb” and username as “dbuser” and set password as “Joomla@123#“, you can provide your own names and password
[root@joomla-server ~]# mysql -u root -p
Enter password:
Welcome to the MariaDB monitor.  Commands end with ; or \g.
Your MariaDB connection id is 11
Server version: 5.5.52-MariaDB MariaDB Server

Copyright (c) 2000, 2016, Oracle, MariaDB Corporation Ab and others.

Type 'help;' or '\h' for help. Type '\c' to clear the current input statement.
MariaDB [(none)]> create database joomla_db;
Query OK, 1 row affected (0.00 sec)
MariaDB [(none)]> create user dbuser@localhost identified by 'Joomla@123#';
Query OK, 0 rows affected (0.00 sec)
MariaDB [(none)]> grant all privileges on joomla_db.* to dbuser@localhost;
Query OK, 0 rows affected (0.00 sec)
MariaDB [(none)]> flush privileges;
Query OK, 0 rows affected (0.00 sec)
MariaDB [(none)]> exit
Bye
[root@joomla-server ~]#
Download and Install Joomla
Once your done with Database creation for Joomla, Now lets download latest version of Joomla from its Official Web site.

In my case i am downloading the Joomla software from the command line using wget command.
[root@joomla-server ~]# wget https://downloads.joomla.org/cms/joomla3/3-7-2/Joomla_3-7.2-Stable-Full_Package.zip
Extract the file into the Apache root directory (/var/www/html)
[root@joomla-server ~]# unzip Joomla_3-7.2-Stable-Full_Package.zip -d /var/www/html/
Assign proper permissions to the apache root directory and sub-directories using the beneath commands
[root@joomla-server ~]# chown -R apache:apache /var/www/html/
[root@joomla-server ~]# chmod -R 775 /var/www/html/
Edit the Apache web sever configuration file (/etc/httpd/conf/httpd.conf) and change the following line as described below
Change the line from:
AllowOverride None to AllowOverride All
Now make sure to save the httpd.conf file and restart the Apache Service
[root@joomla-server ~]# systemctl restart httpd
Configure Firewall
In case OS firewall enabled on your server then provide access to port 80 and 443 to be accessed from outside the network with the command below:
[root@joomla-server ~]# firewall-cmd --permanent --add-service=http

root@joomla-server ~]# firewall-cmd --permanent --add-service=https
Reload the firewall services for the changes to take effect
[root@joomla-server ~]# firewall-cmd --reload
Configure Joomla
So, everything is setup, you’ve successfully installed LAMP, created a database, downloaded and installed Joomla, and also configured the firewall and now it’s time to open your browser and configure Joomla using the Joomla installation wizard:
Now open your browser and provide the following URL
http://[your-server-ip]
Make sure to provide the IP of your system IP in the [your-server-ip]
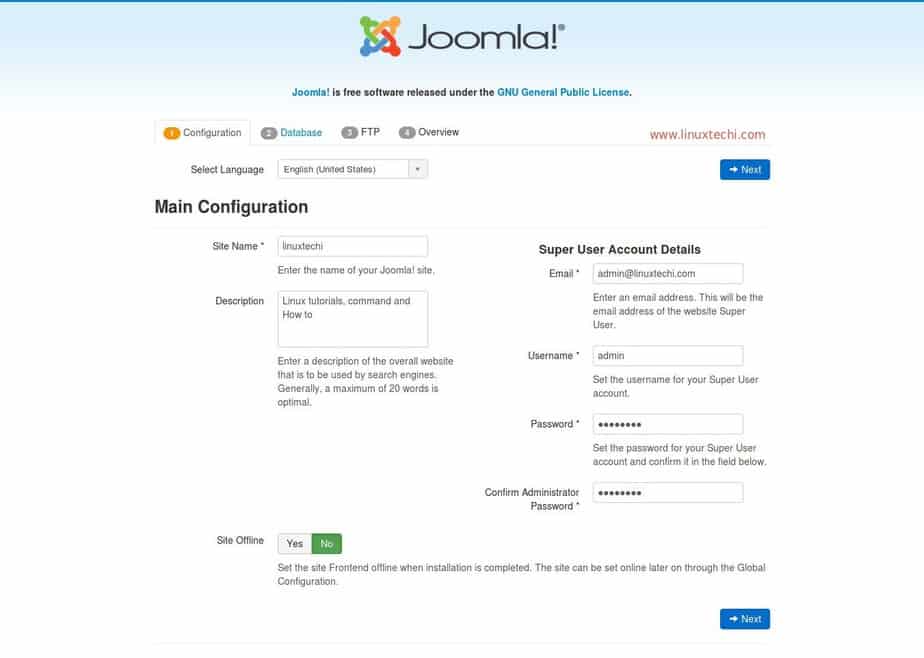
You can see the following webpage and provide all the information required in the screen including your website name, email, username and password. Also, select the preferred language accordingly. Once you’ve provided all the details, Click ‘Next’ to proceed.
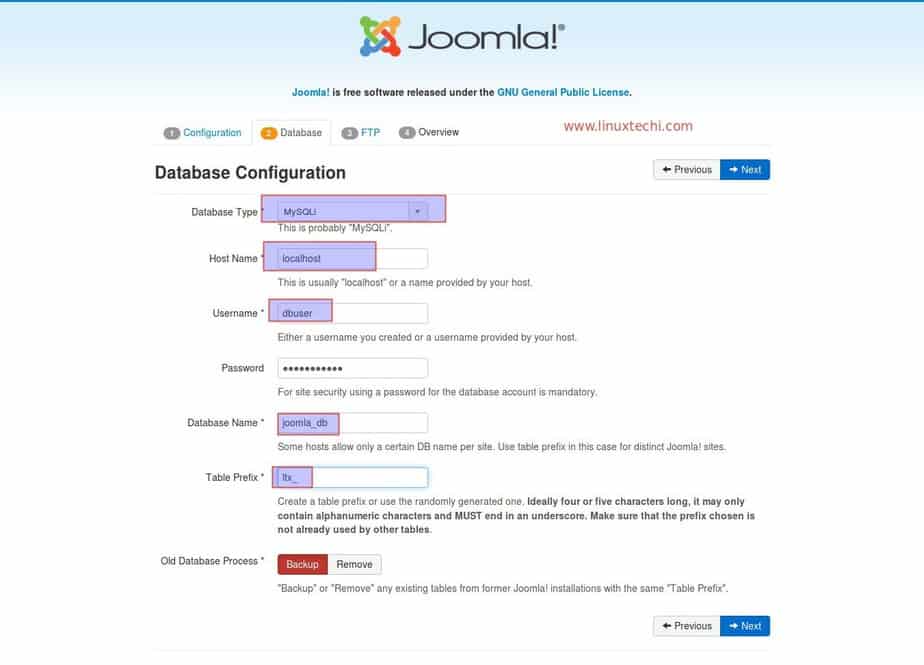
Now it’s time to provide all the needed information for your database including your database name, database user name, database password, table prefix (say for example, if you give a prefix as “ltx”, all your tables with start as “ltx_tablename”)
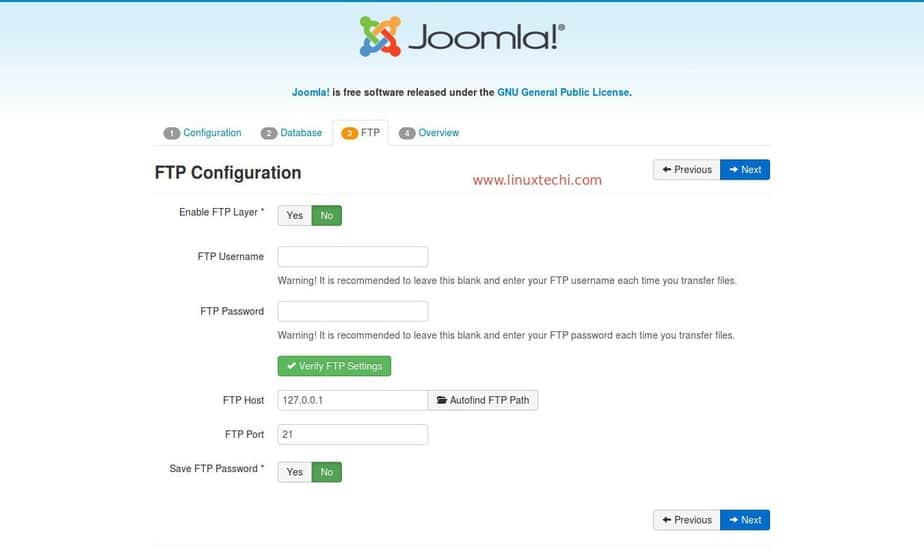
Leave the FTP details as it is and click on Next.
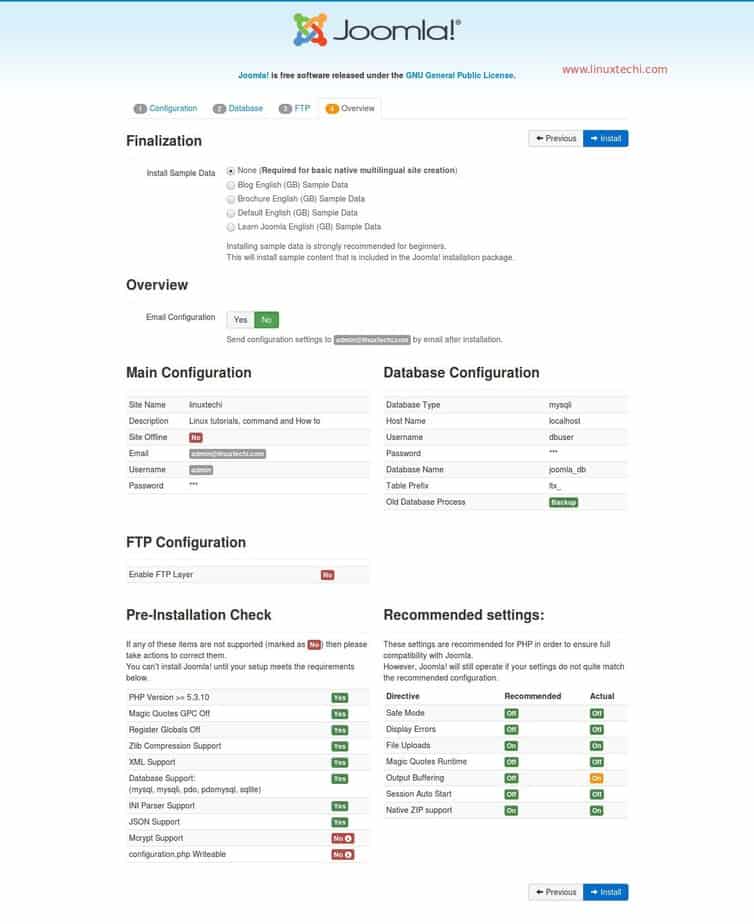
Last step is to overview all data provided and Click on “Install” button to start the installation process.
Once the installation is completed, we will get the next window something like below:
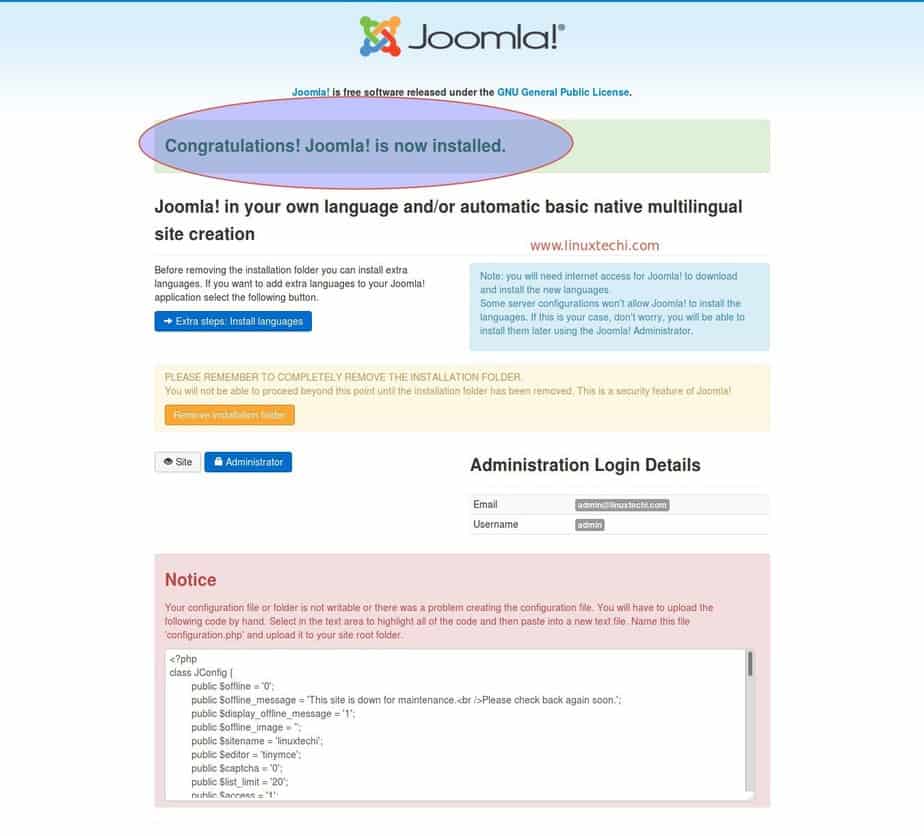
We will see a message to copy the content provided below and save the file as configuration.php in your Apache root directory, Copy this content and paste in configuration.php
[root@joomla-server ~]# vi /var/www/html/configuration.php
<?php
class JConfig {
    public $offline = '0';
    public $offline_message = 'This site is down for maintenance.<br />Please check back again soon.';
    public $display_offline_message = '1';
    public $offline_image = '';
    public $sitename = 'linuxtechi';
    public $editor = 'tinymce';
    public $captcha = '0';
    public $list_limit = '20';
    public $access = '1';
    public $debug = '0';
    public $debug_lang = '0';
    public $dbtype = 'mysqli';
    public $host = 'localhost';
    public $user = 'dbuser';
    public $password = 'Joomla@123#';
    public $db = 'joomla_db';
    public $dbprefix = 'ltx_';
    public $live_site = '';
    public $secret = 'JzX4fFyW1yez6gzv';
    public $gzip = '0';
    public $error_reporting = 'default';
    public $helpurl = 'https://help.joomla.org/proxy/index.php?keyref=Help{major}{minor}:{keyref}';
    public $ftp_host = '127.0.0.1';
    public $ftp_port = '21';
    public $ftp_user = '';
    public $ftp_pass = '';
    public $ftp_root = '';
    public $ftp_enable = '0';
    public $offset = 'UTC';
    public $mailonline = '1';
    public $mailer = 'mail';
    public $mailfrom = '[email protected]';
    public $fromname = 'linuxtechi';
    public $sendmail = '/usr/sbin/sendmail';
    public $smtpauth = '0';
    public $smtpuser = '';
    public $smtppass = '';
    public $smtphost = 'localhost';
    public $smtpsecure = 'none';
    public $smtpport = '25';
    public $caching = '0';
    public $cache_handler = 'file';
    public $cachetime = '15';
    public $cache_platformprefix = '0';
    public $MetaDesc = 'Linux tutorials, command and How to';
    public $MetaKeys = '';
    public $MetaTitle = '1';
    public $MetaAuthor = '1';
    public $MetaVersion = '0';
    public $robots = '';
    public $sef = '1';
    public $sef_rewrite = '0';
    public $sef_suffix = '0';
    public $unicodeslugs = '0';
    public $feed_limit = '10';
    public $feed_email = 'none';
    public $log_path = '/var/www/html/administrator/logs';
    public $tmp_path = '/var/www/html/tmp';
    public $lifetime = '15';
    public $session_handler = 'database';
    public $shared_session = '0';
}
Now save the file and remove the installation folder manually.
[root@joomla-server ~]# rm -rf /var/www/html/installation/
Note: In Case SELinux is enabled then set the following rule on you apache root directory.
[root@joomla-server ~]# chcon -R -t httpd_sys_rw_content_t /var/www/html/
Now go to your Joomla admin page by providing the following URL:
http://[your-server-ip]/administrator
Make sure to provide the IP of your system IP in the [your-server-ip]
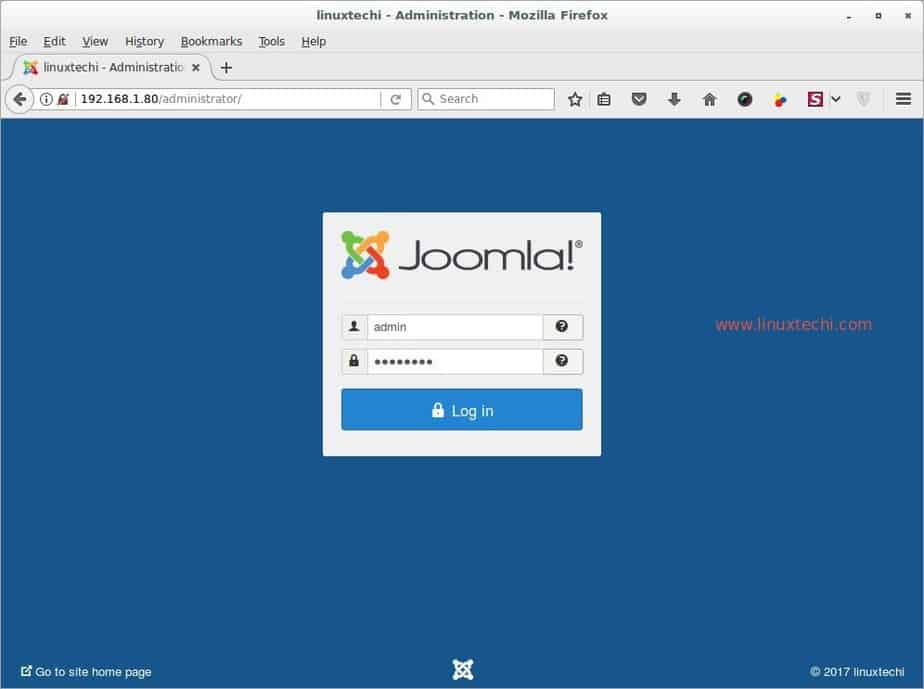
Enter your admin username and a password to login to the control panel
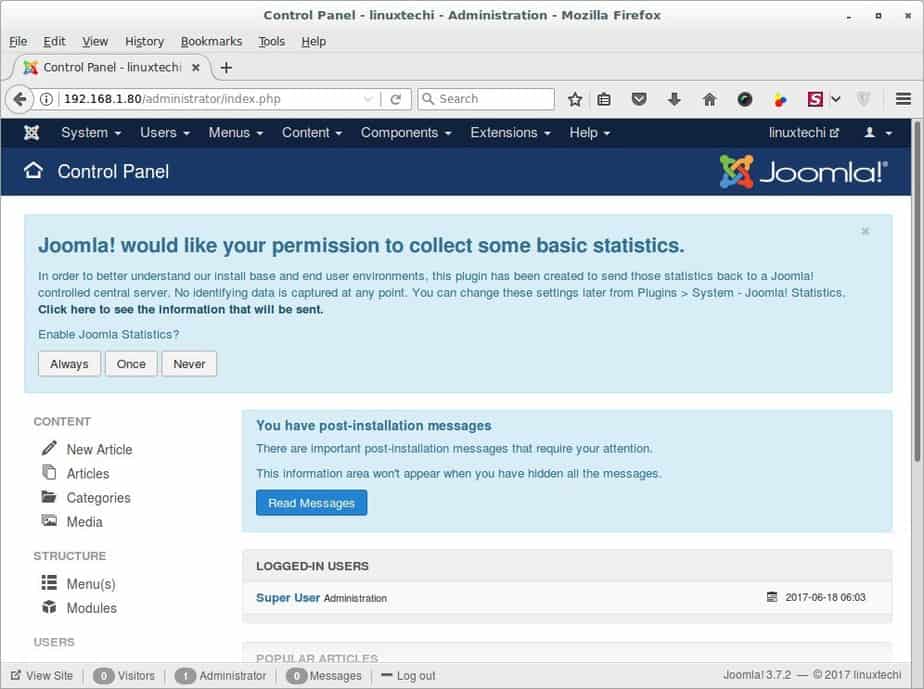
Conclusion:
So you’ve successfully installed the most popular CMS Joomla on your CentOS 7 server. Now you can easily build create websites, blogs using Joomla. Please provide your valuable suggestions and comments on this installation guide and we’ll be happy to assist you by all means. Thank you!!!
All you have to do is to update this with the steps to install php7 instead of php5x